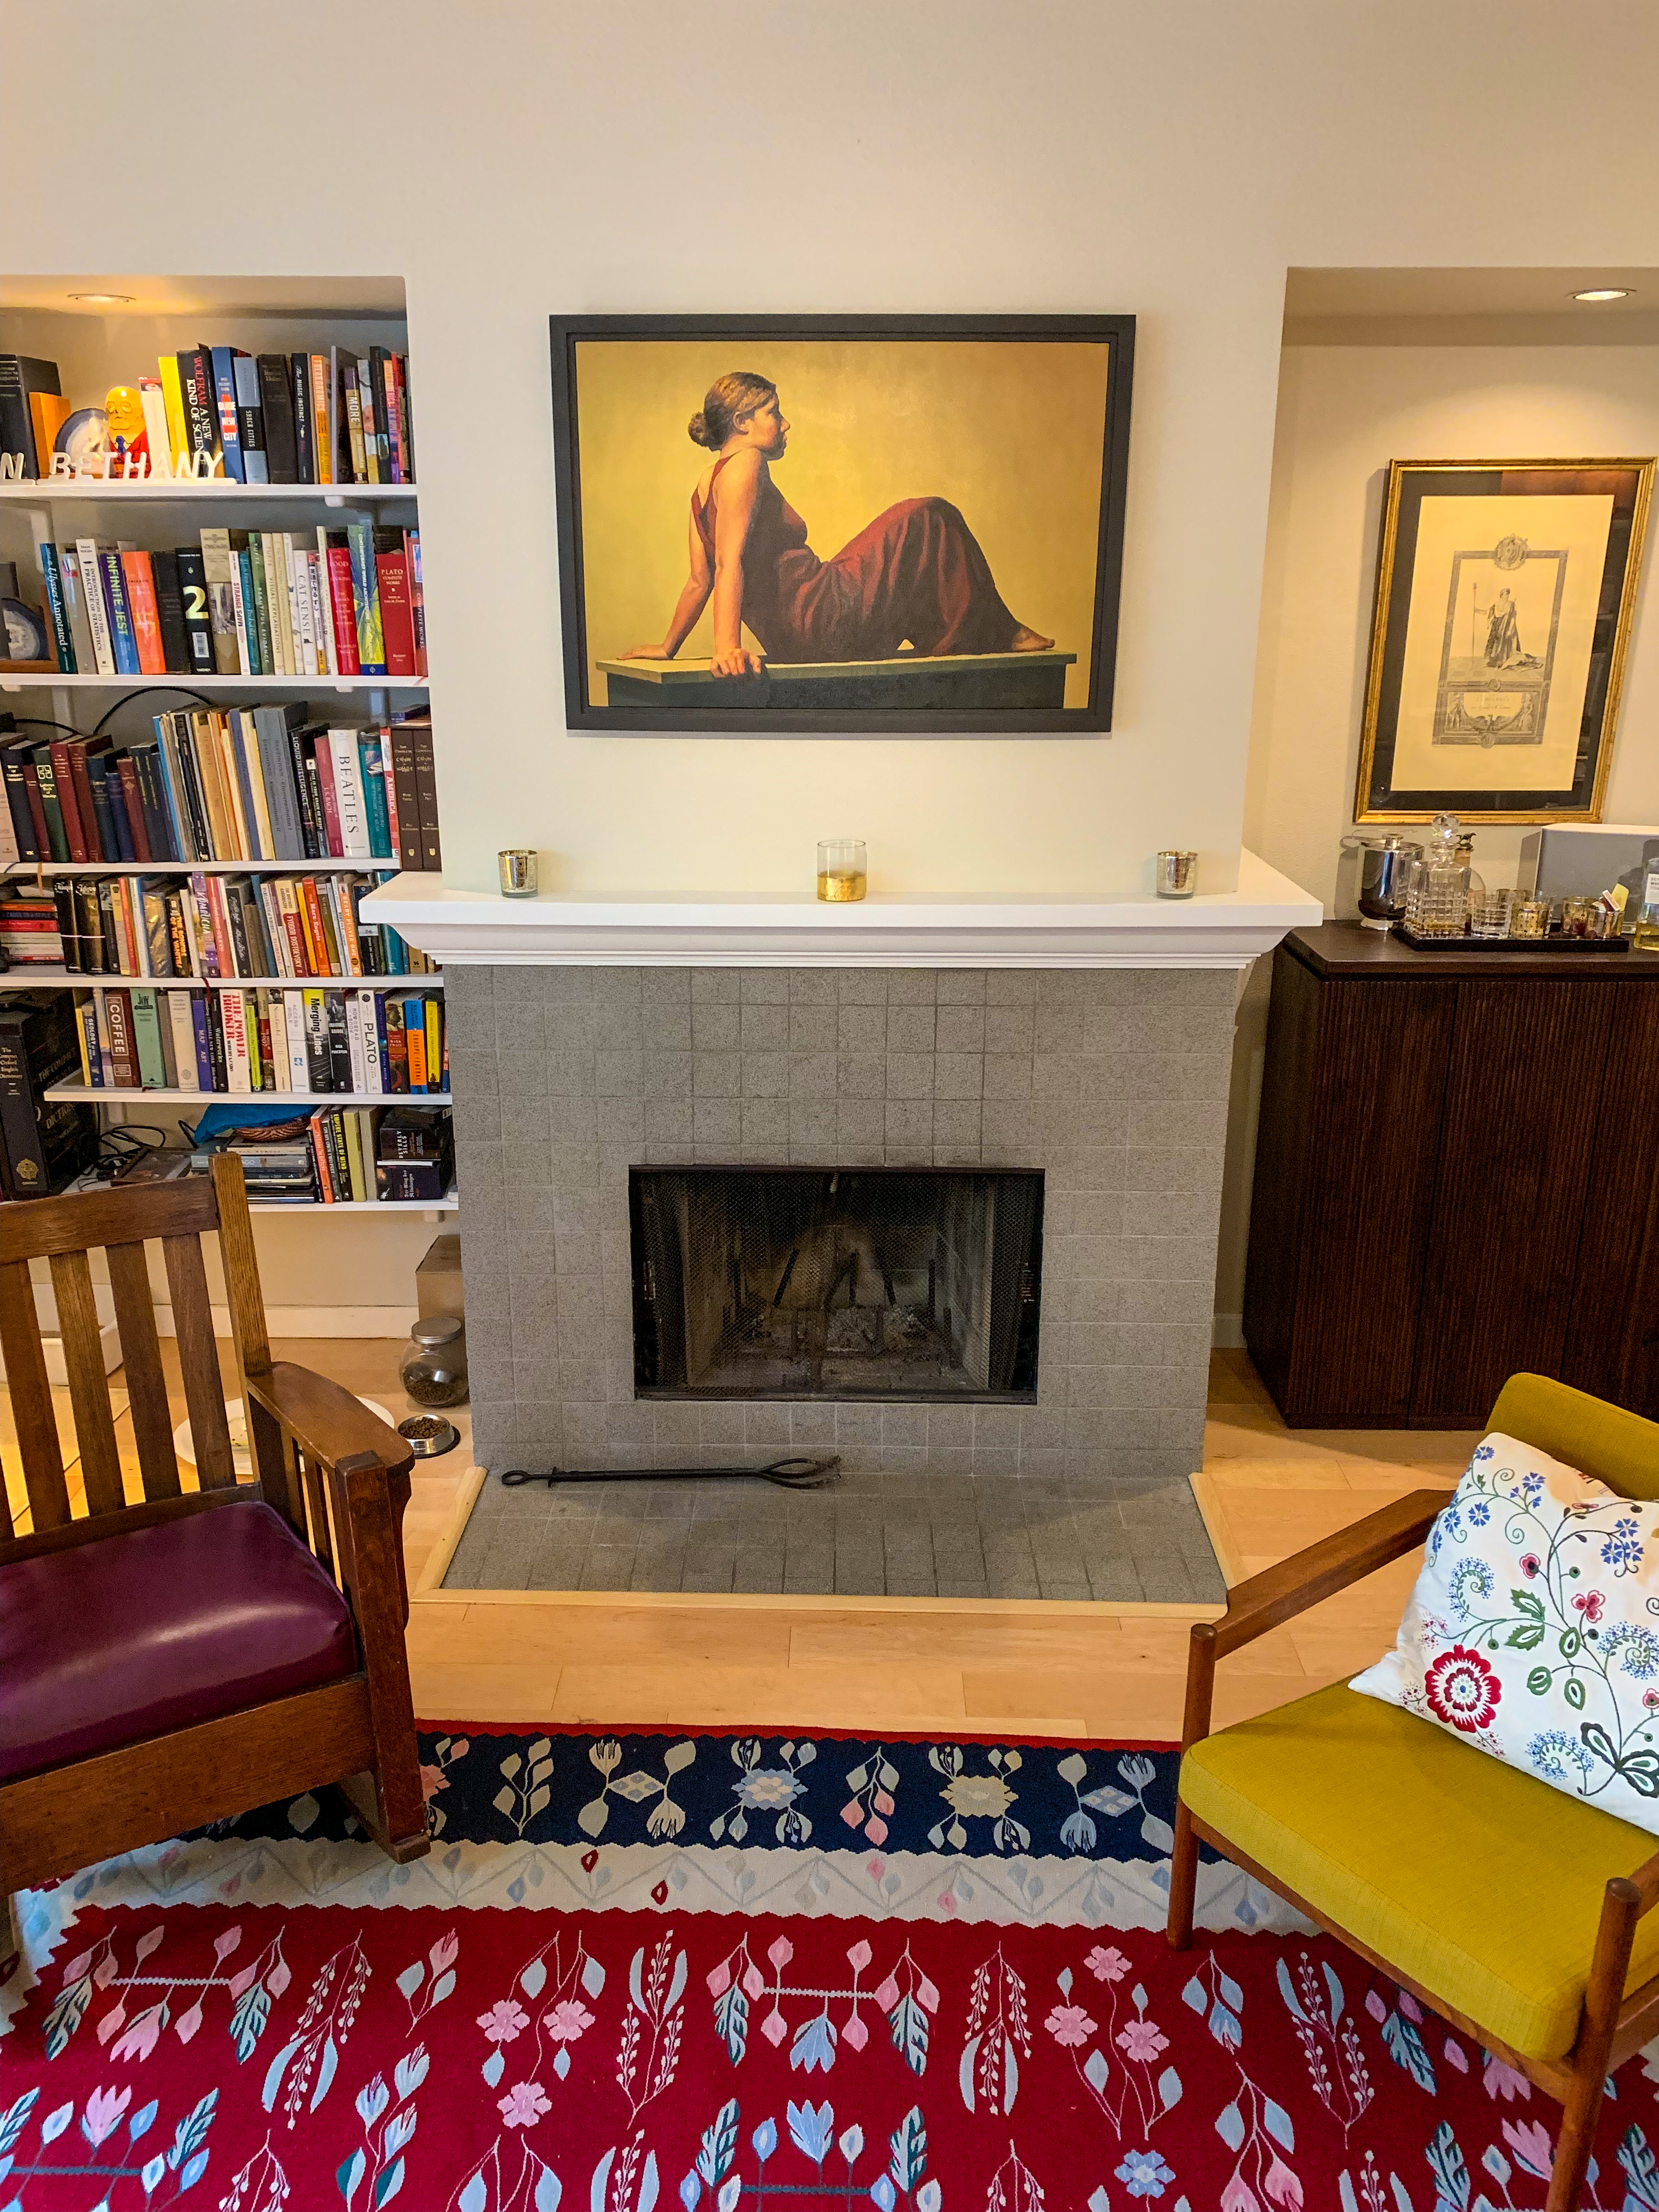
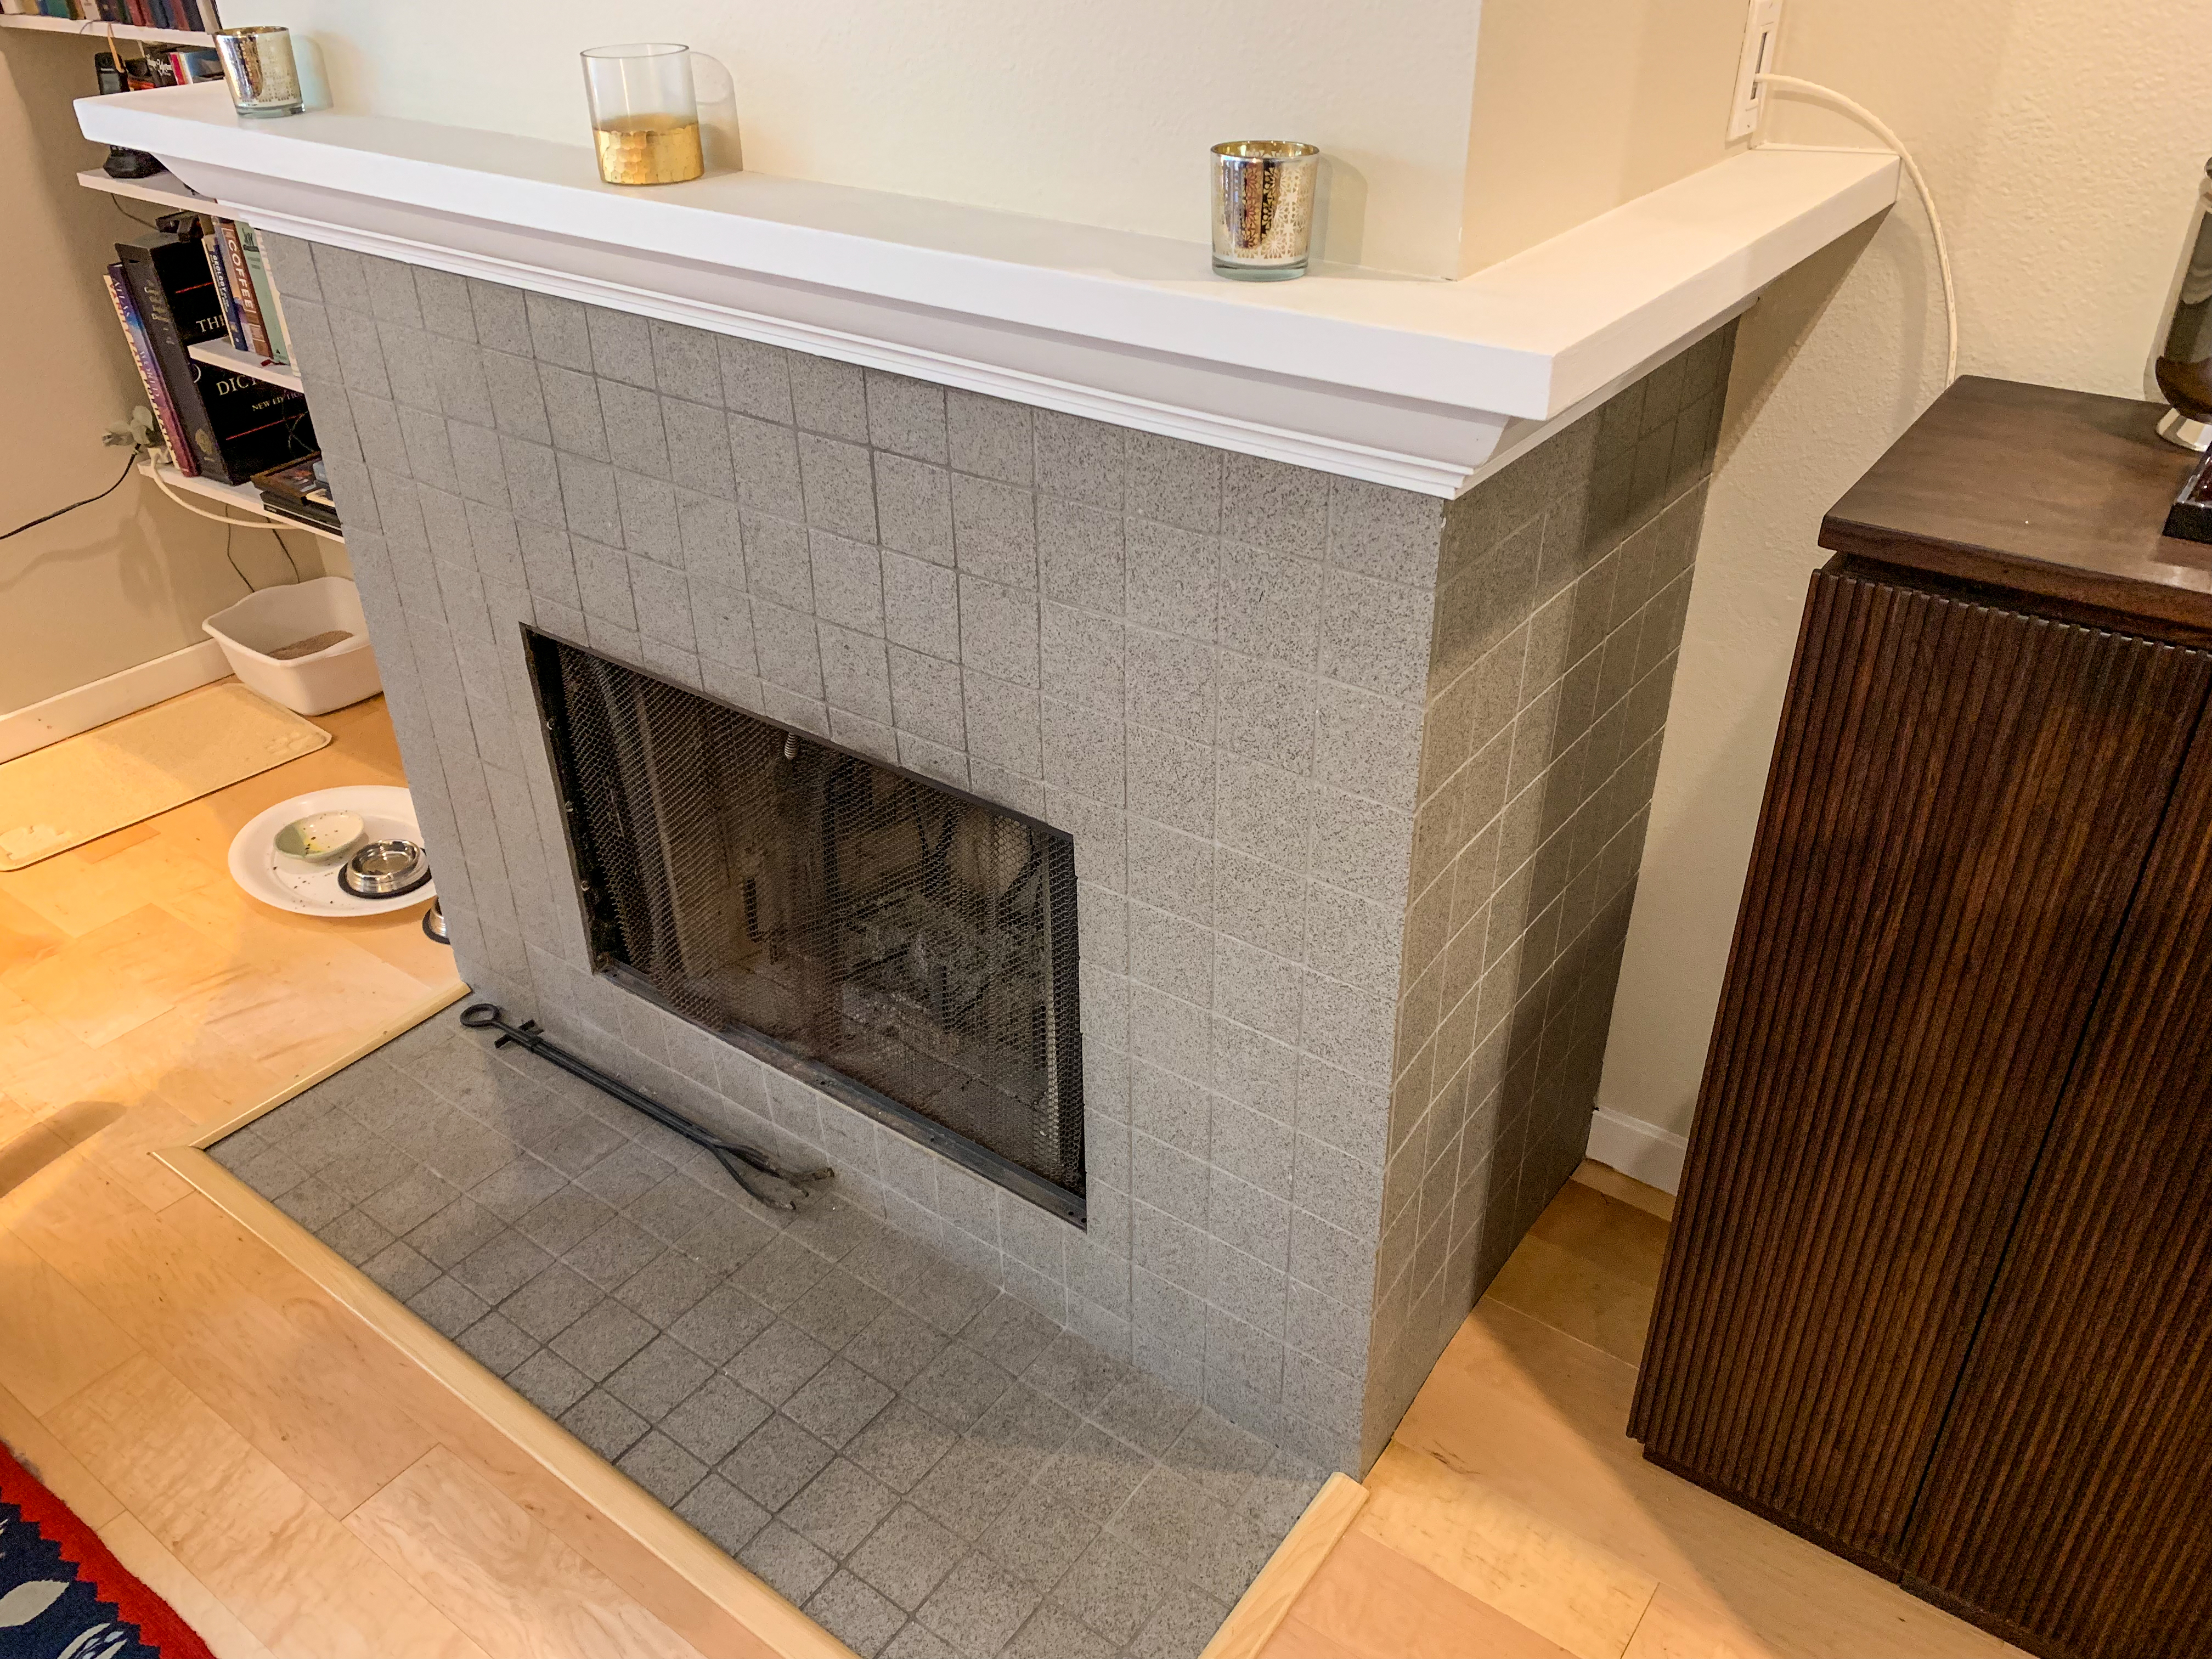
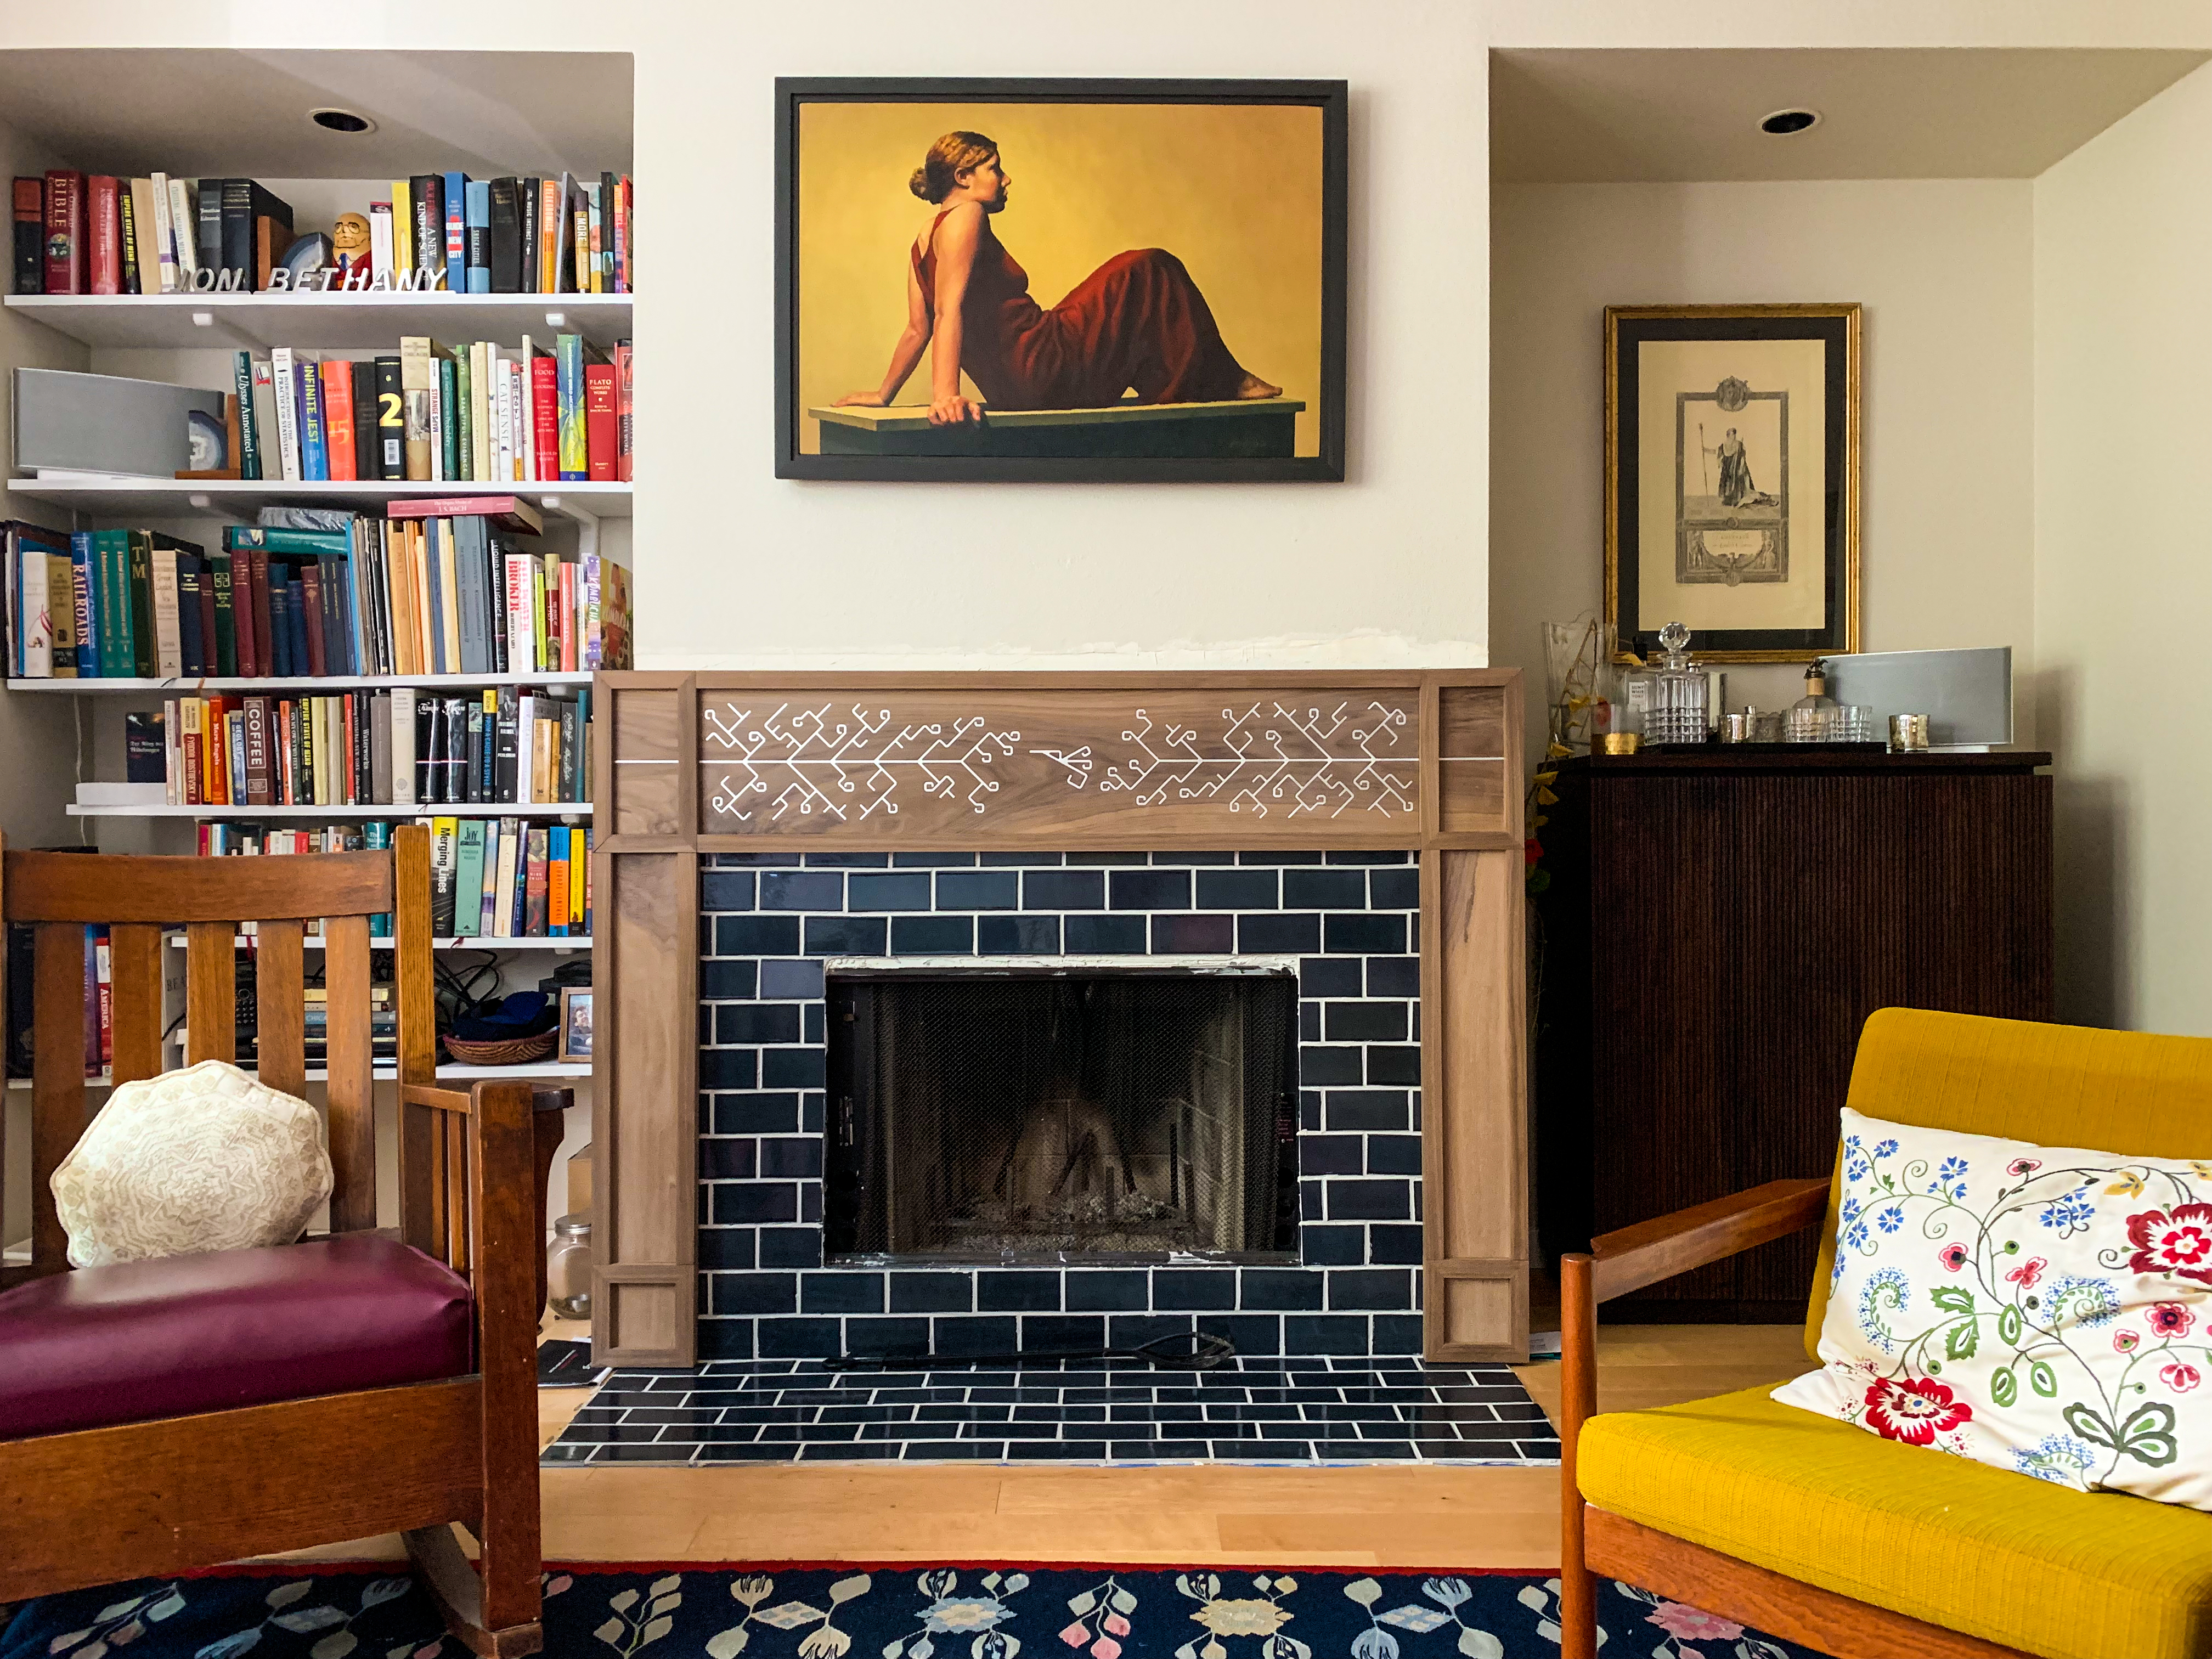
Five years ago my wife and I bought a condo. It was built in 1989, at a high point in construction practices, and we’ve consistently been impressed by the quality and good taste of the original detailing. Like this fireplace: surrounded by olive-grey, fully-aligned square tiles and crowned with a plywood mantel tacked into the sheetrock.
Haha, no, come on, this is terrible. We’d stare at it contemptuously whenever we sat in the living room. Eventually we realized we were spending too much time muttering incredulously about the fireplace, and so I decided to build a new mantel.
Two summers ago I built a large lamp that combined walnut, steel tube, and copper mesh; I loved the contrast that develops between the metal and wood components.
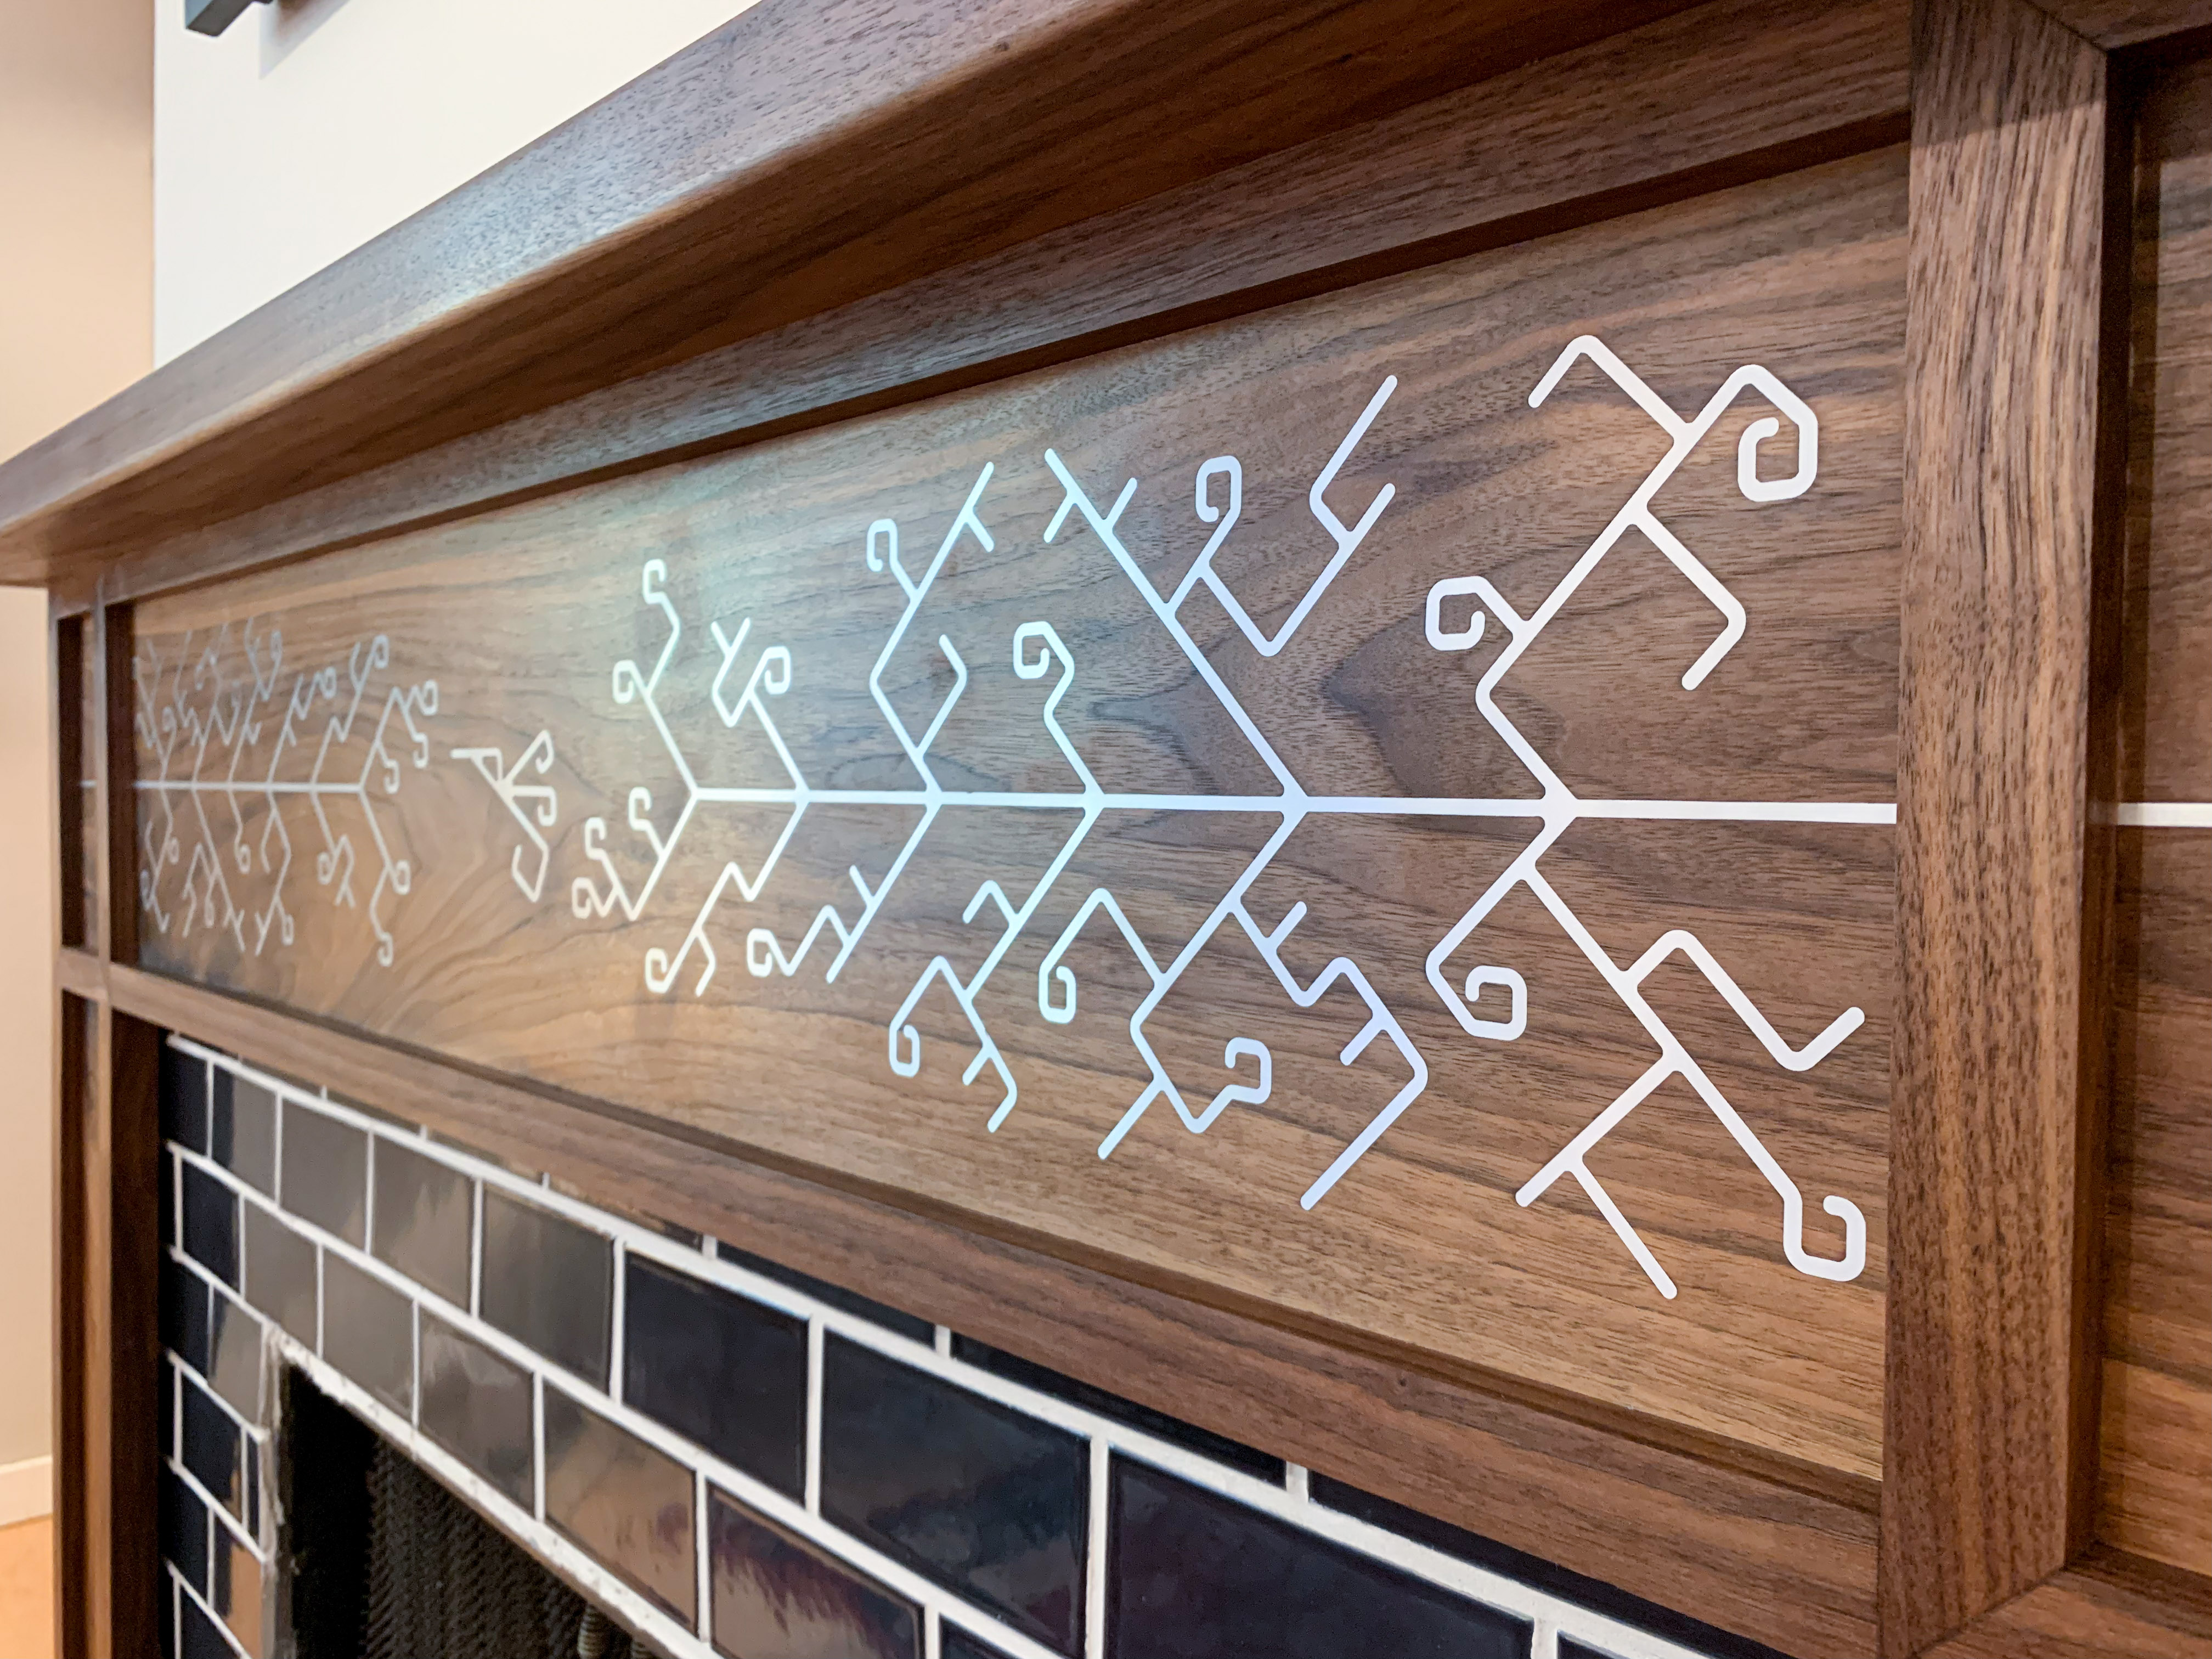
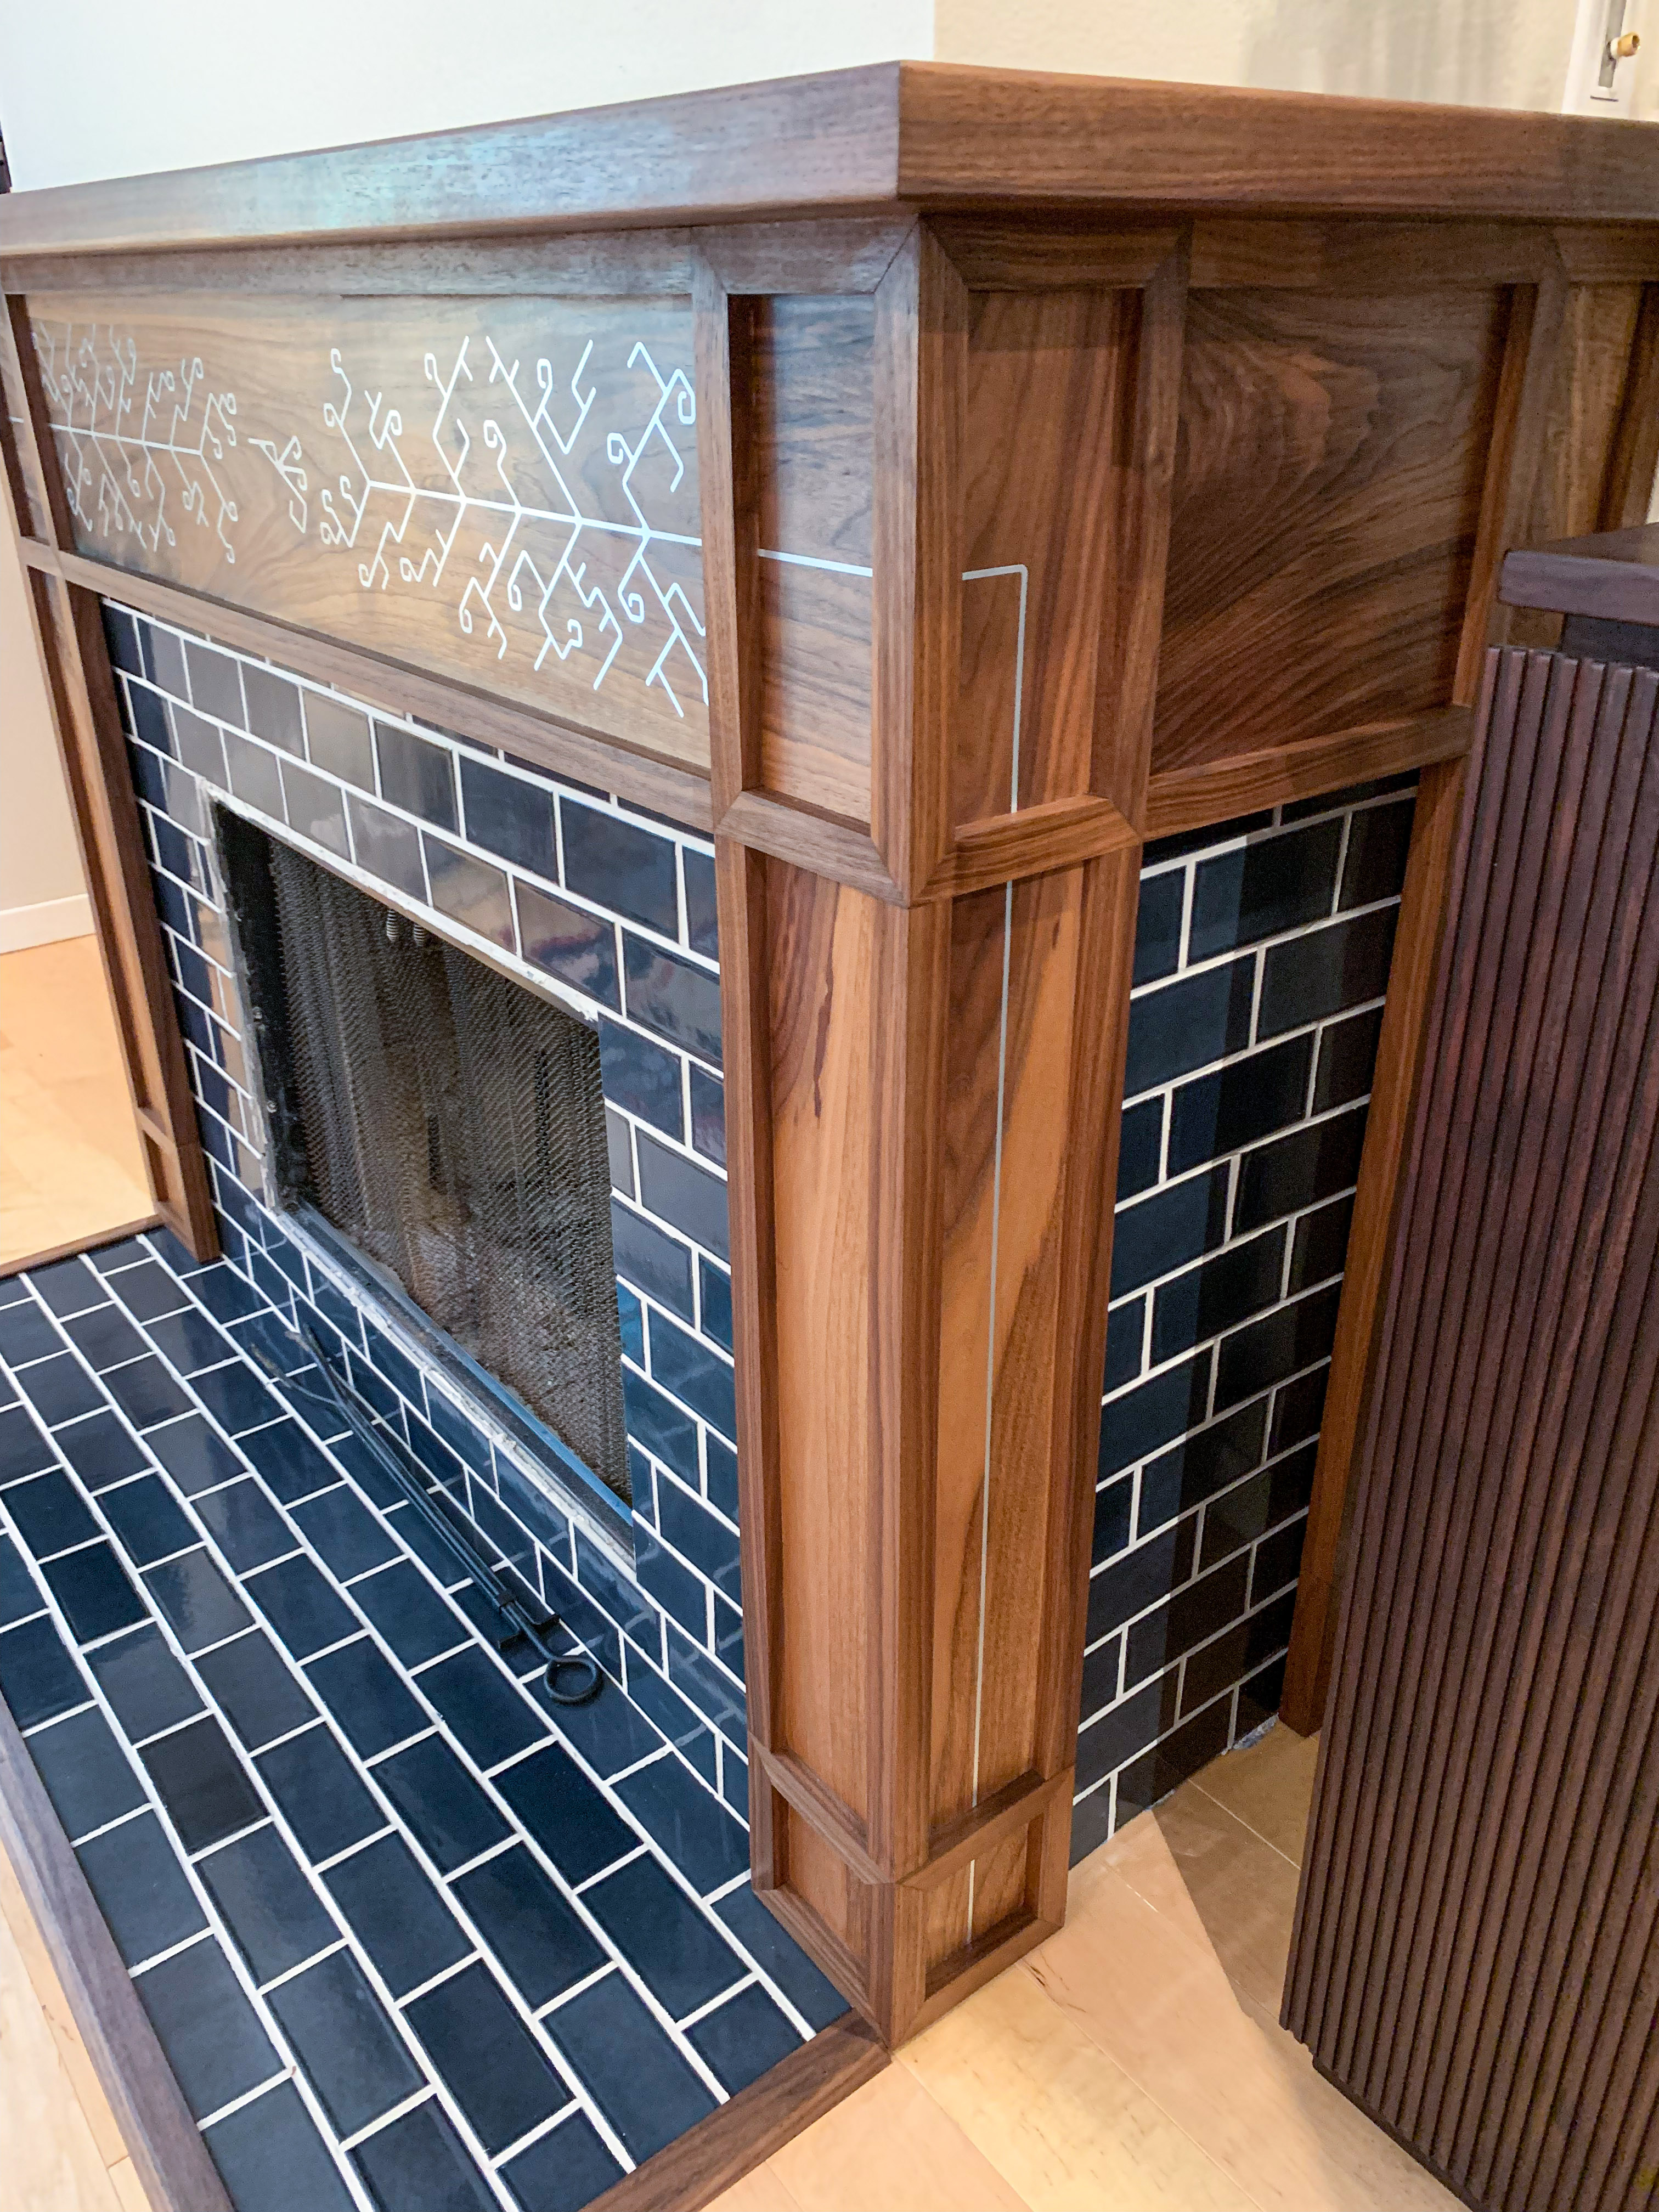
Since then I’ve wanted to try combining metal and wood through an abstract geometric design that sets up tension between the cold, regularized industrialism of metal and the warm organic swirl of wood. With aluminum inlaid in walnut, the metal forces its way across the background indifferently to the wood’s grain. The metal seems to win, but the wood perseveres behind it and ultimately swallows the metal.
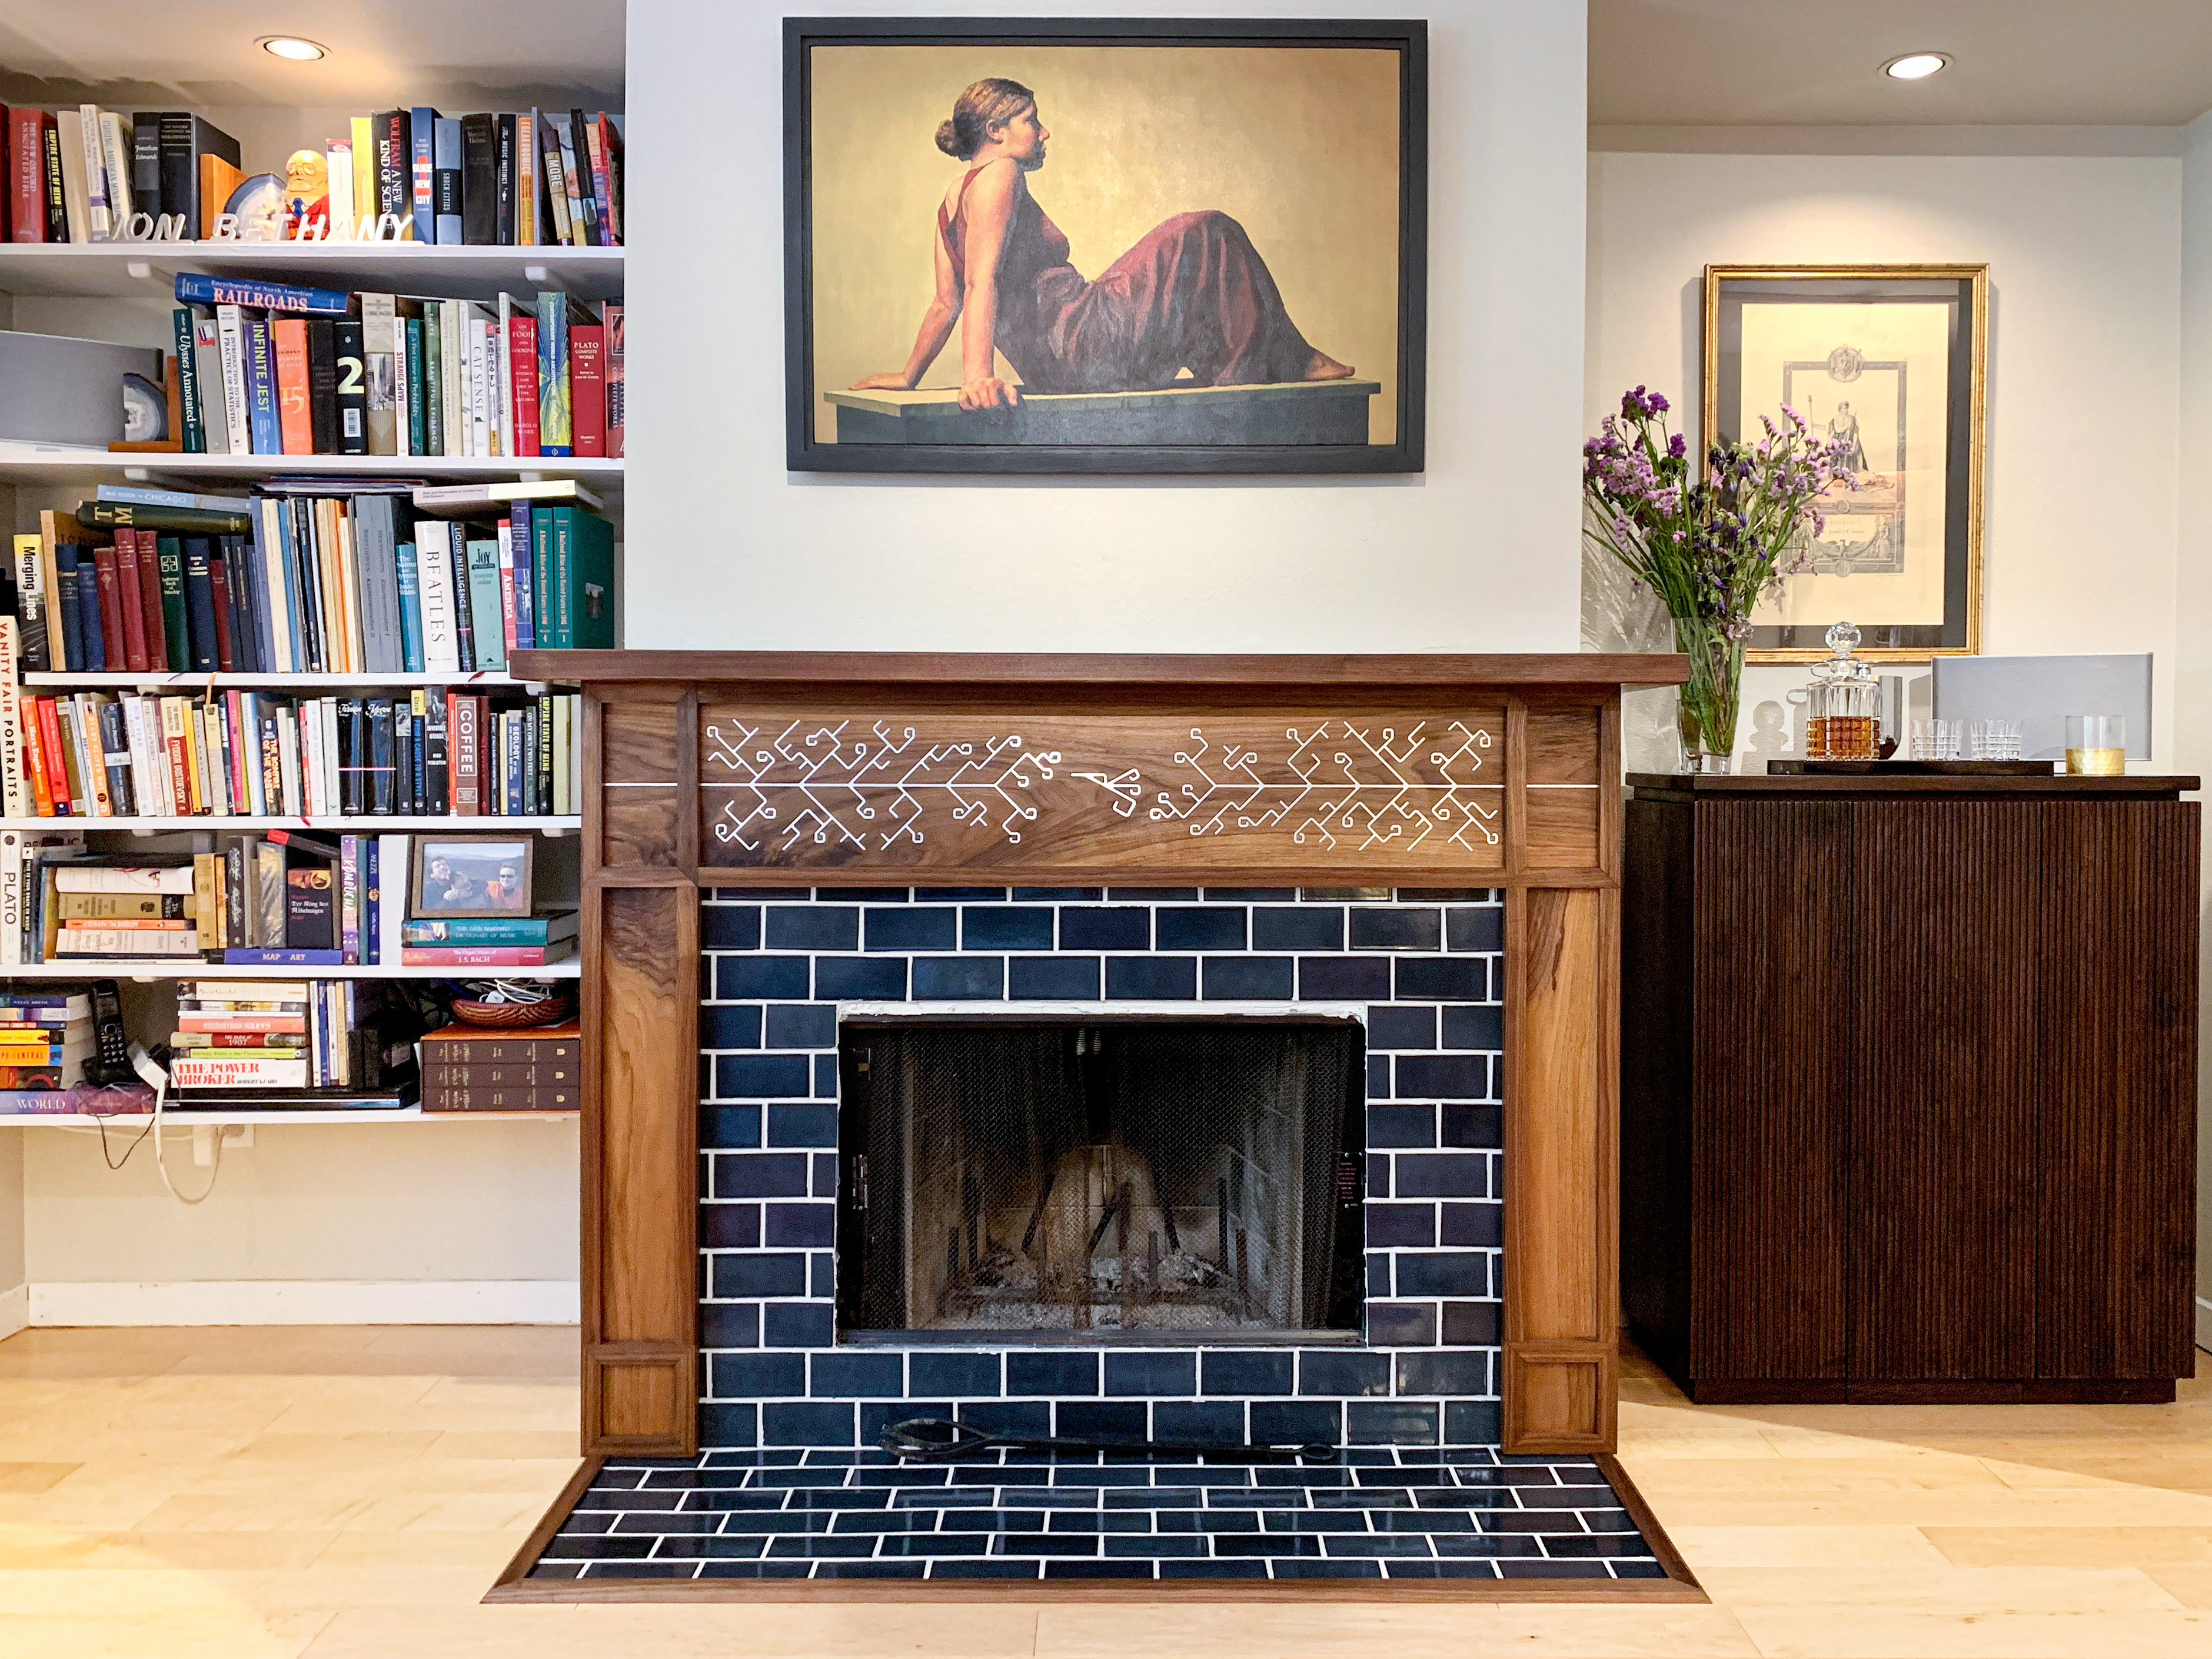
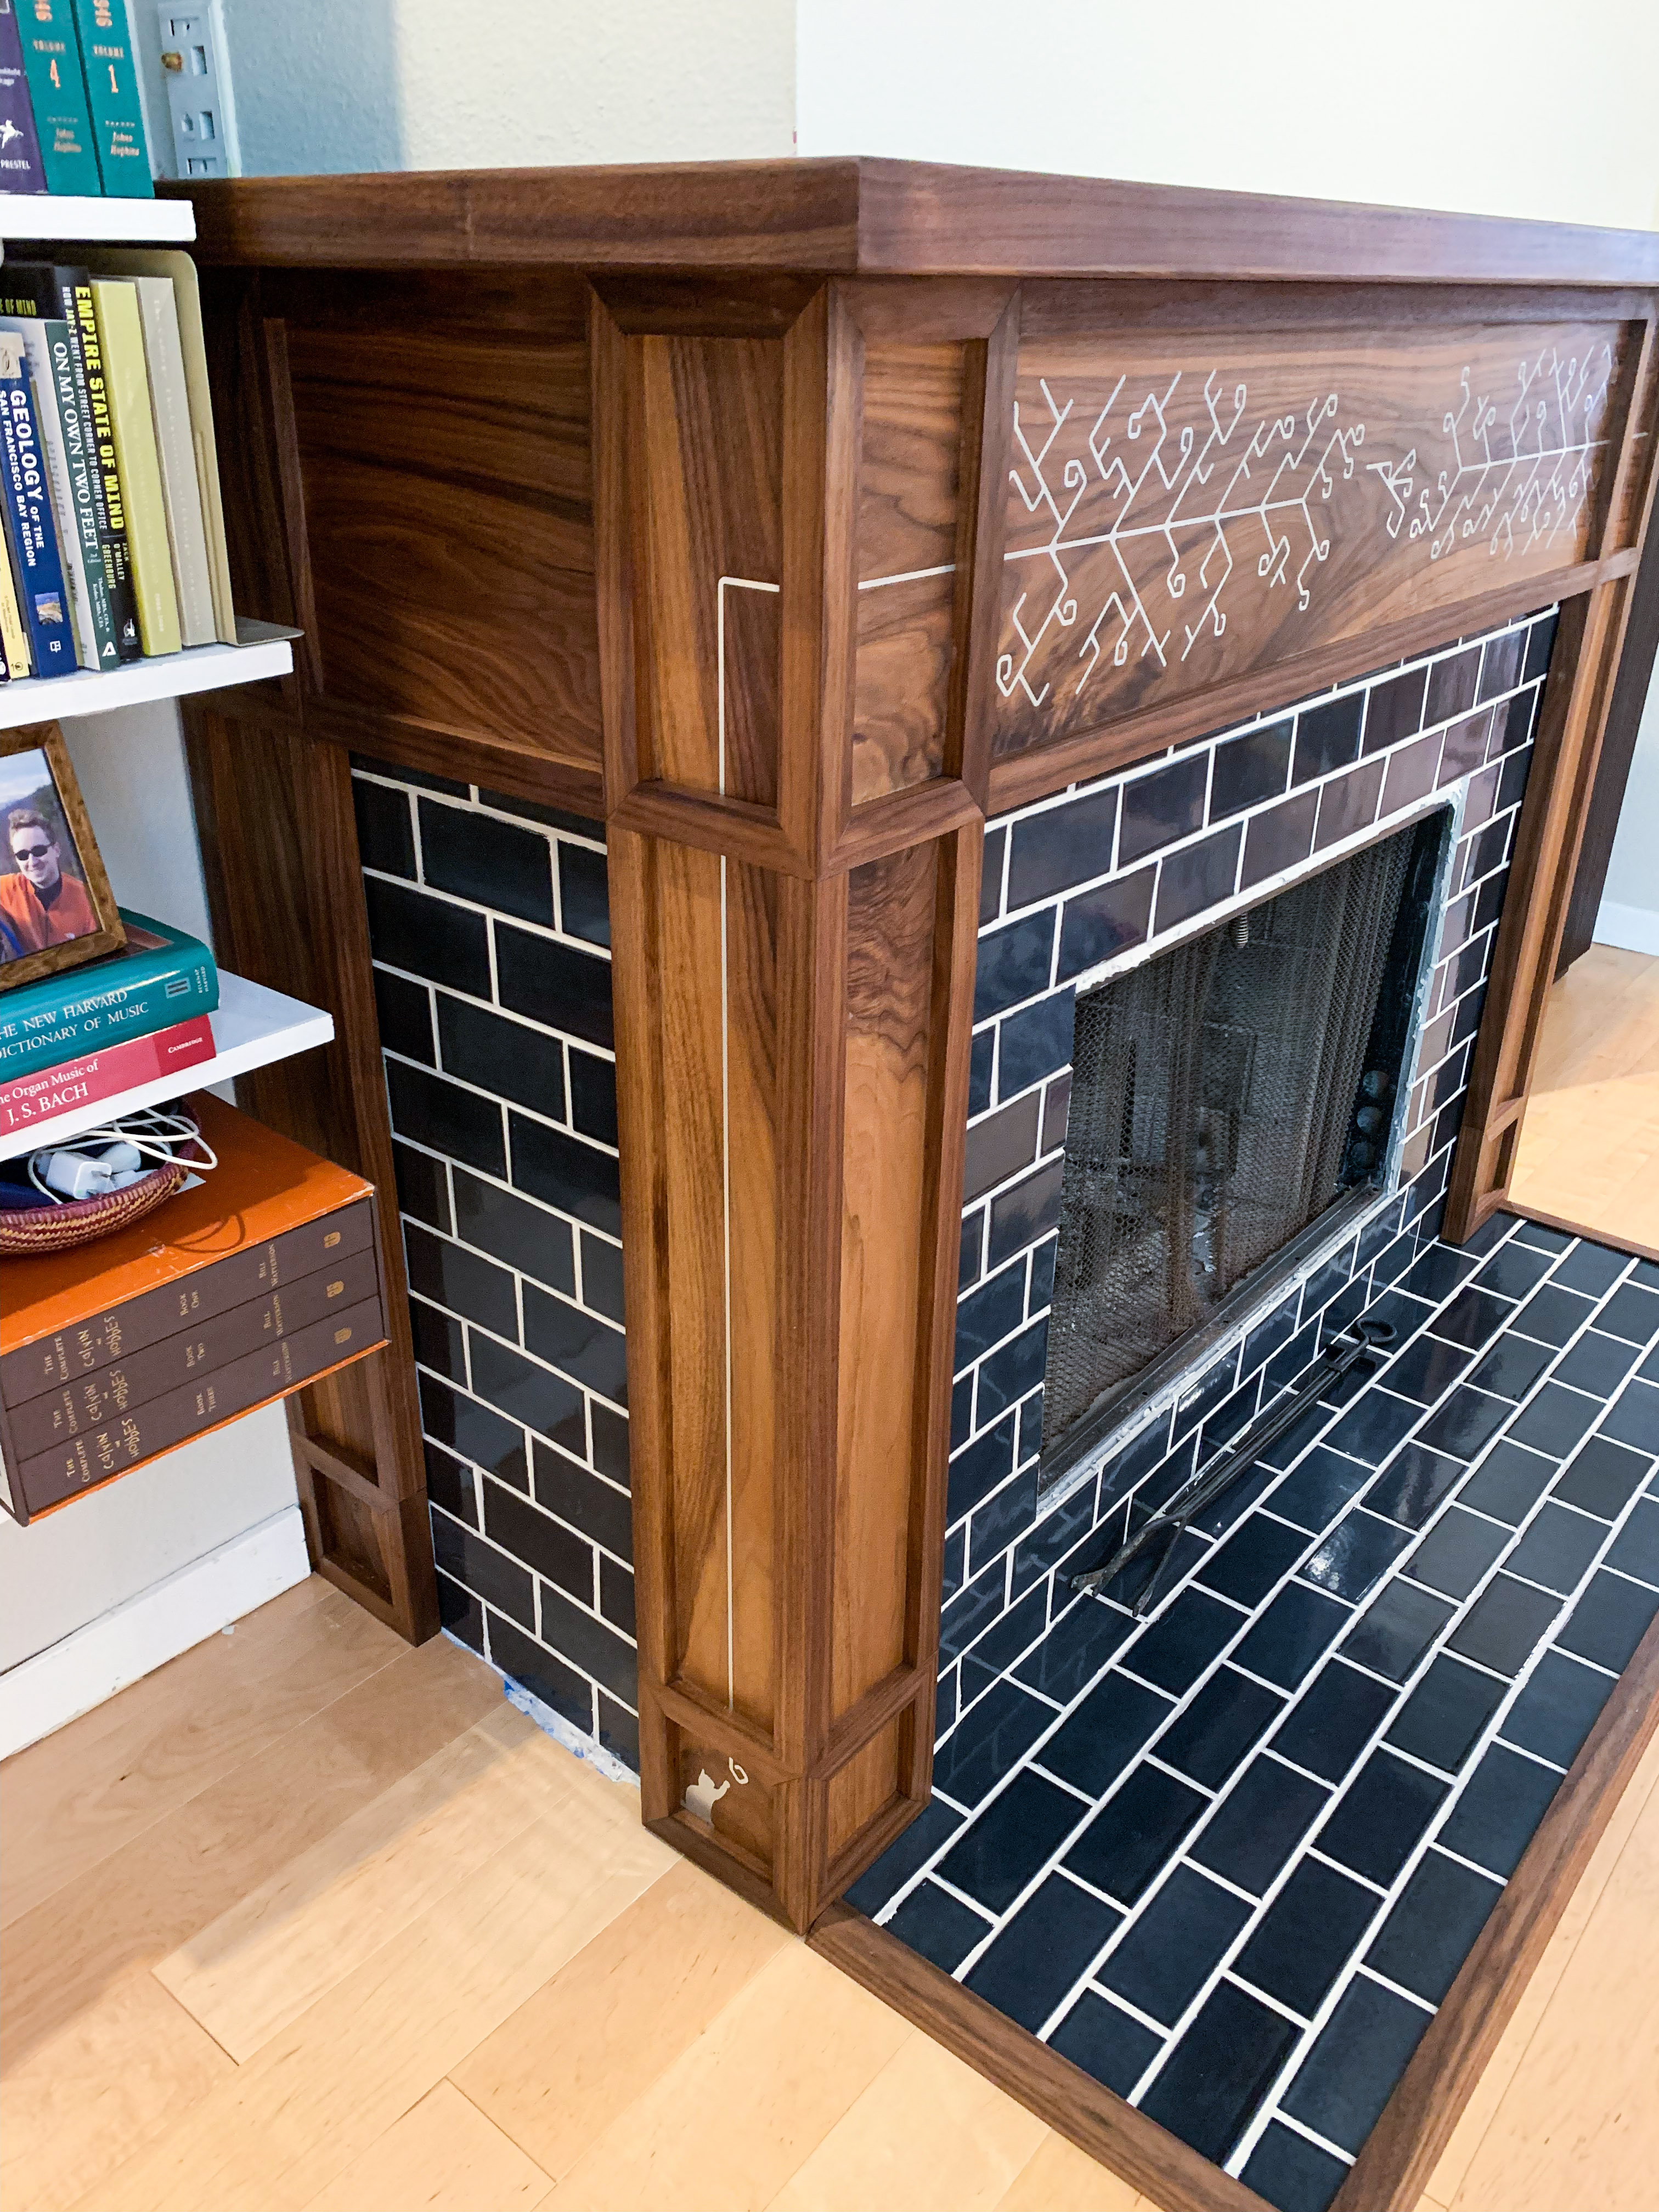
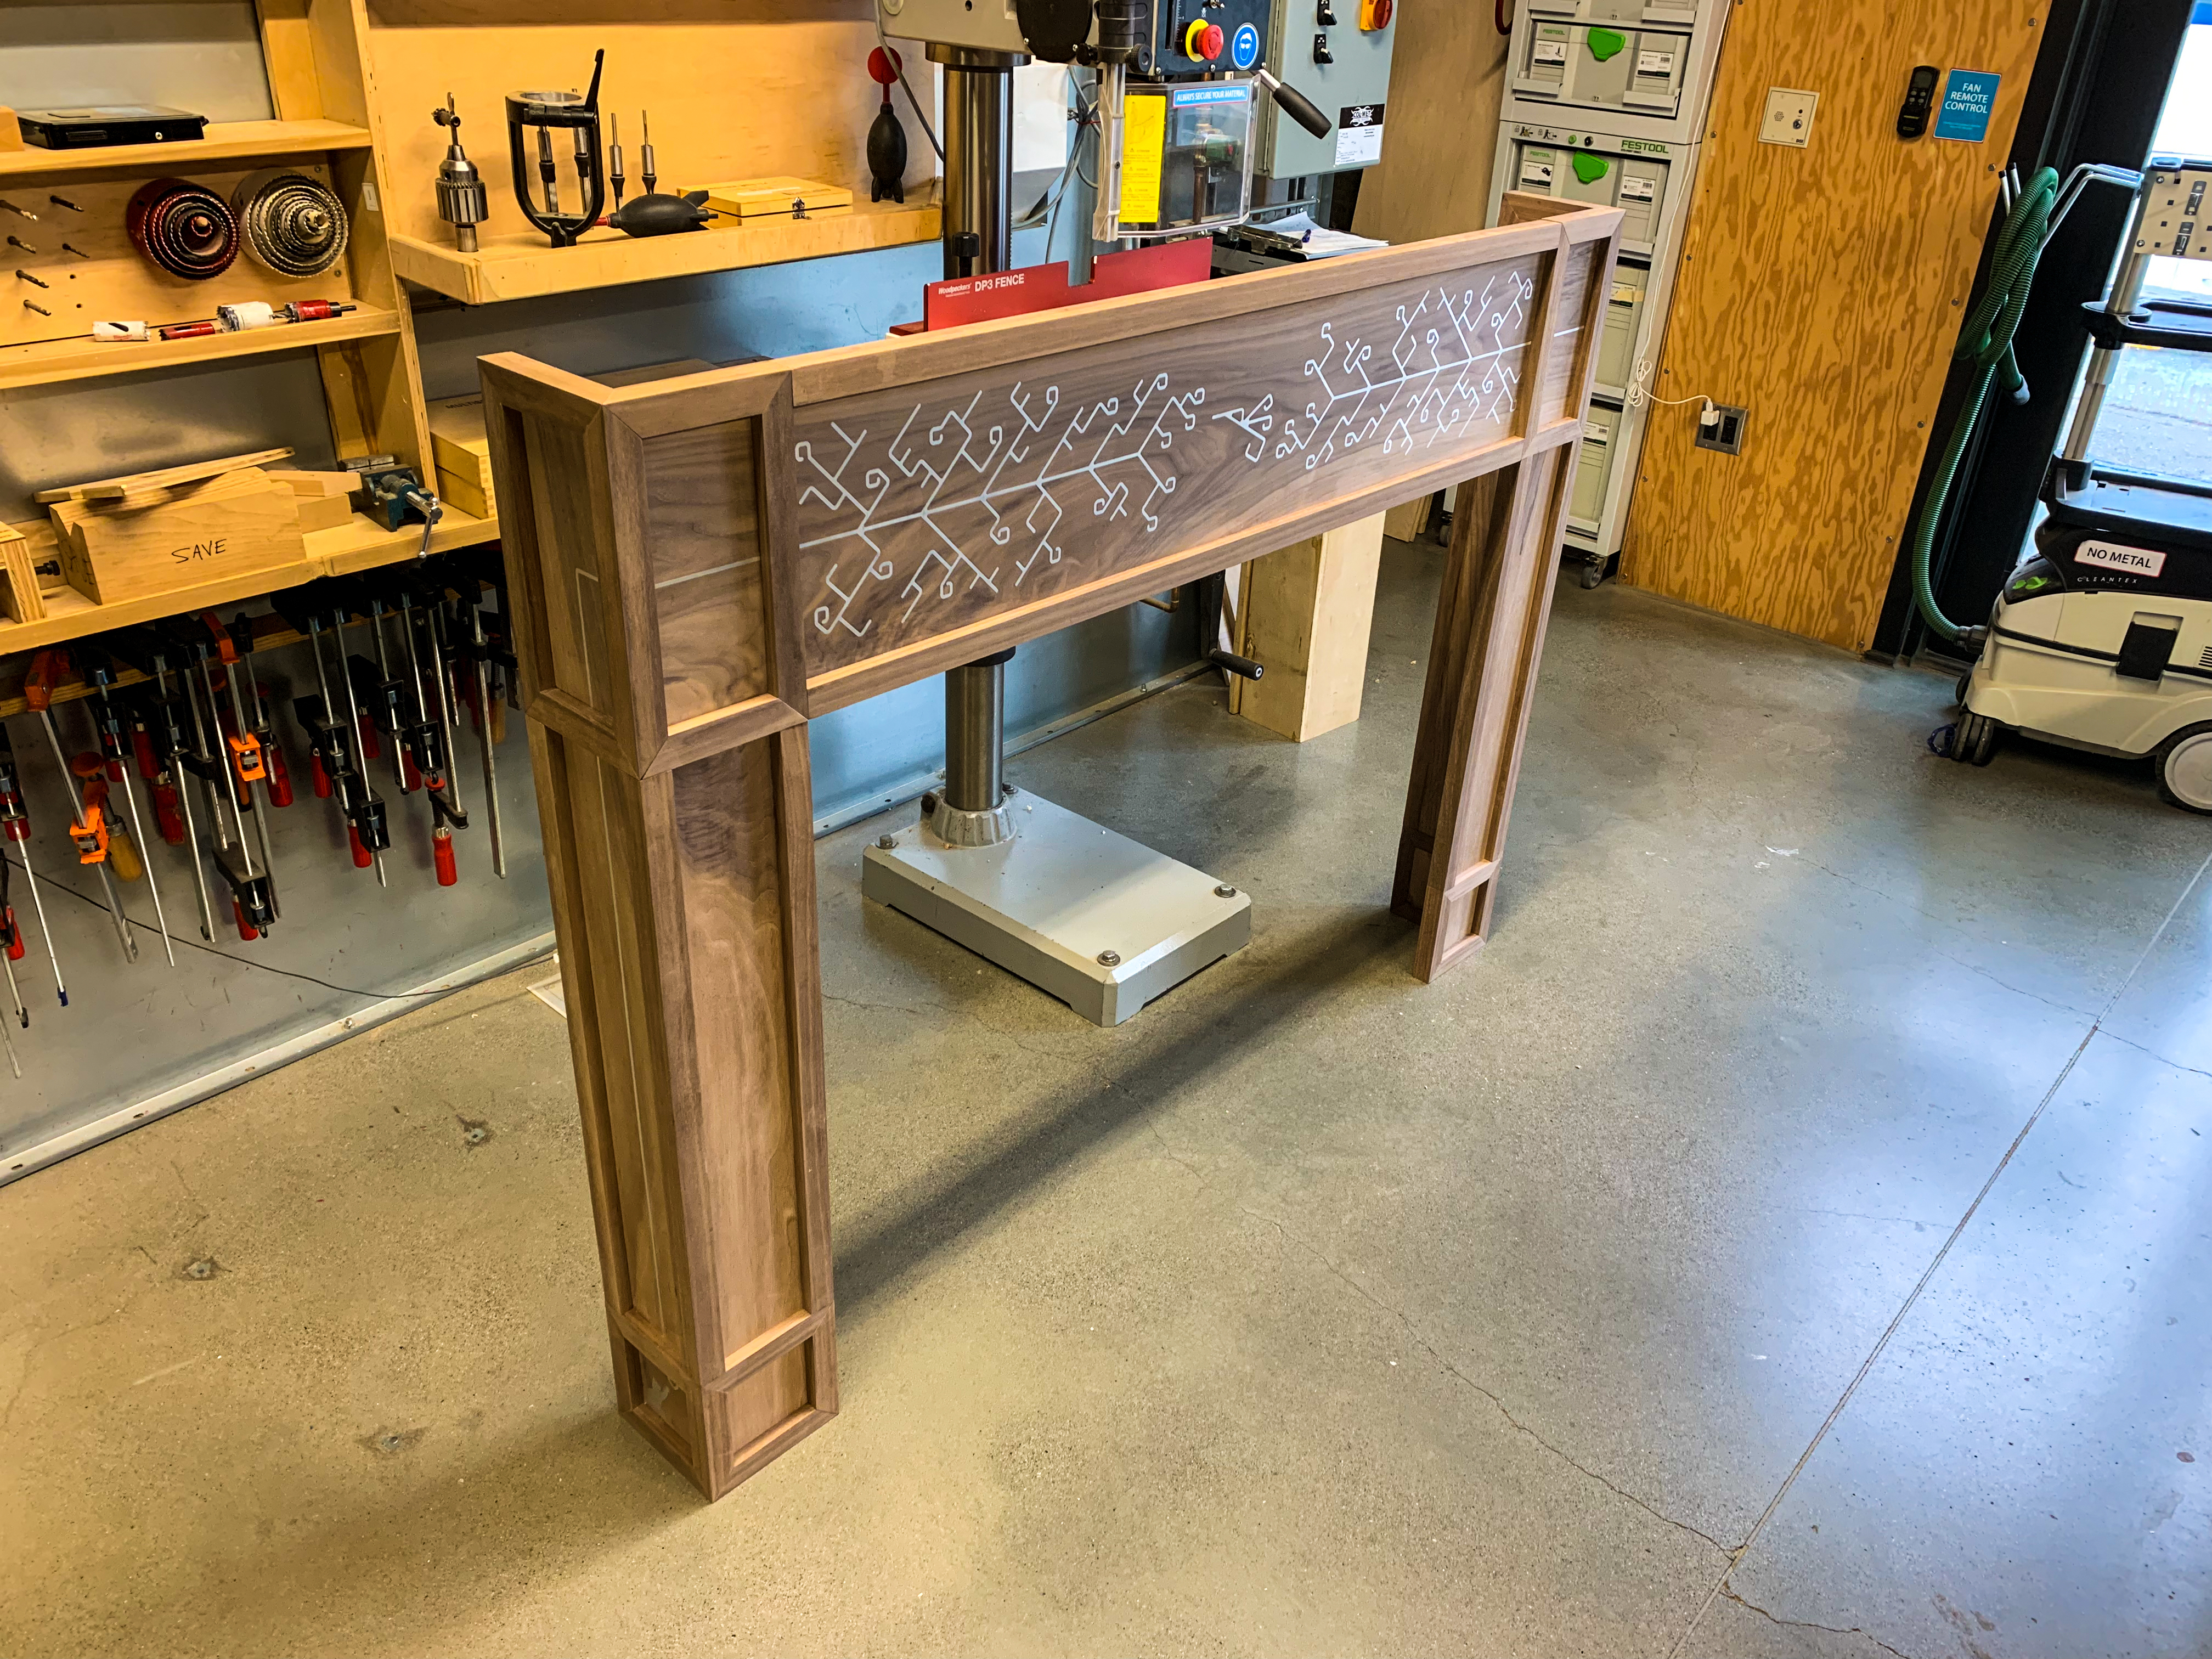
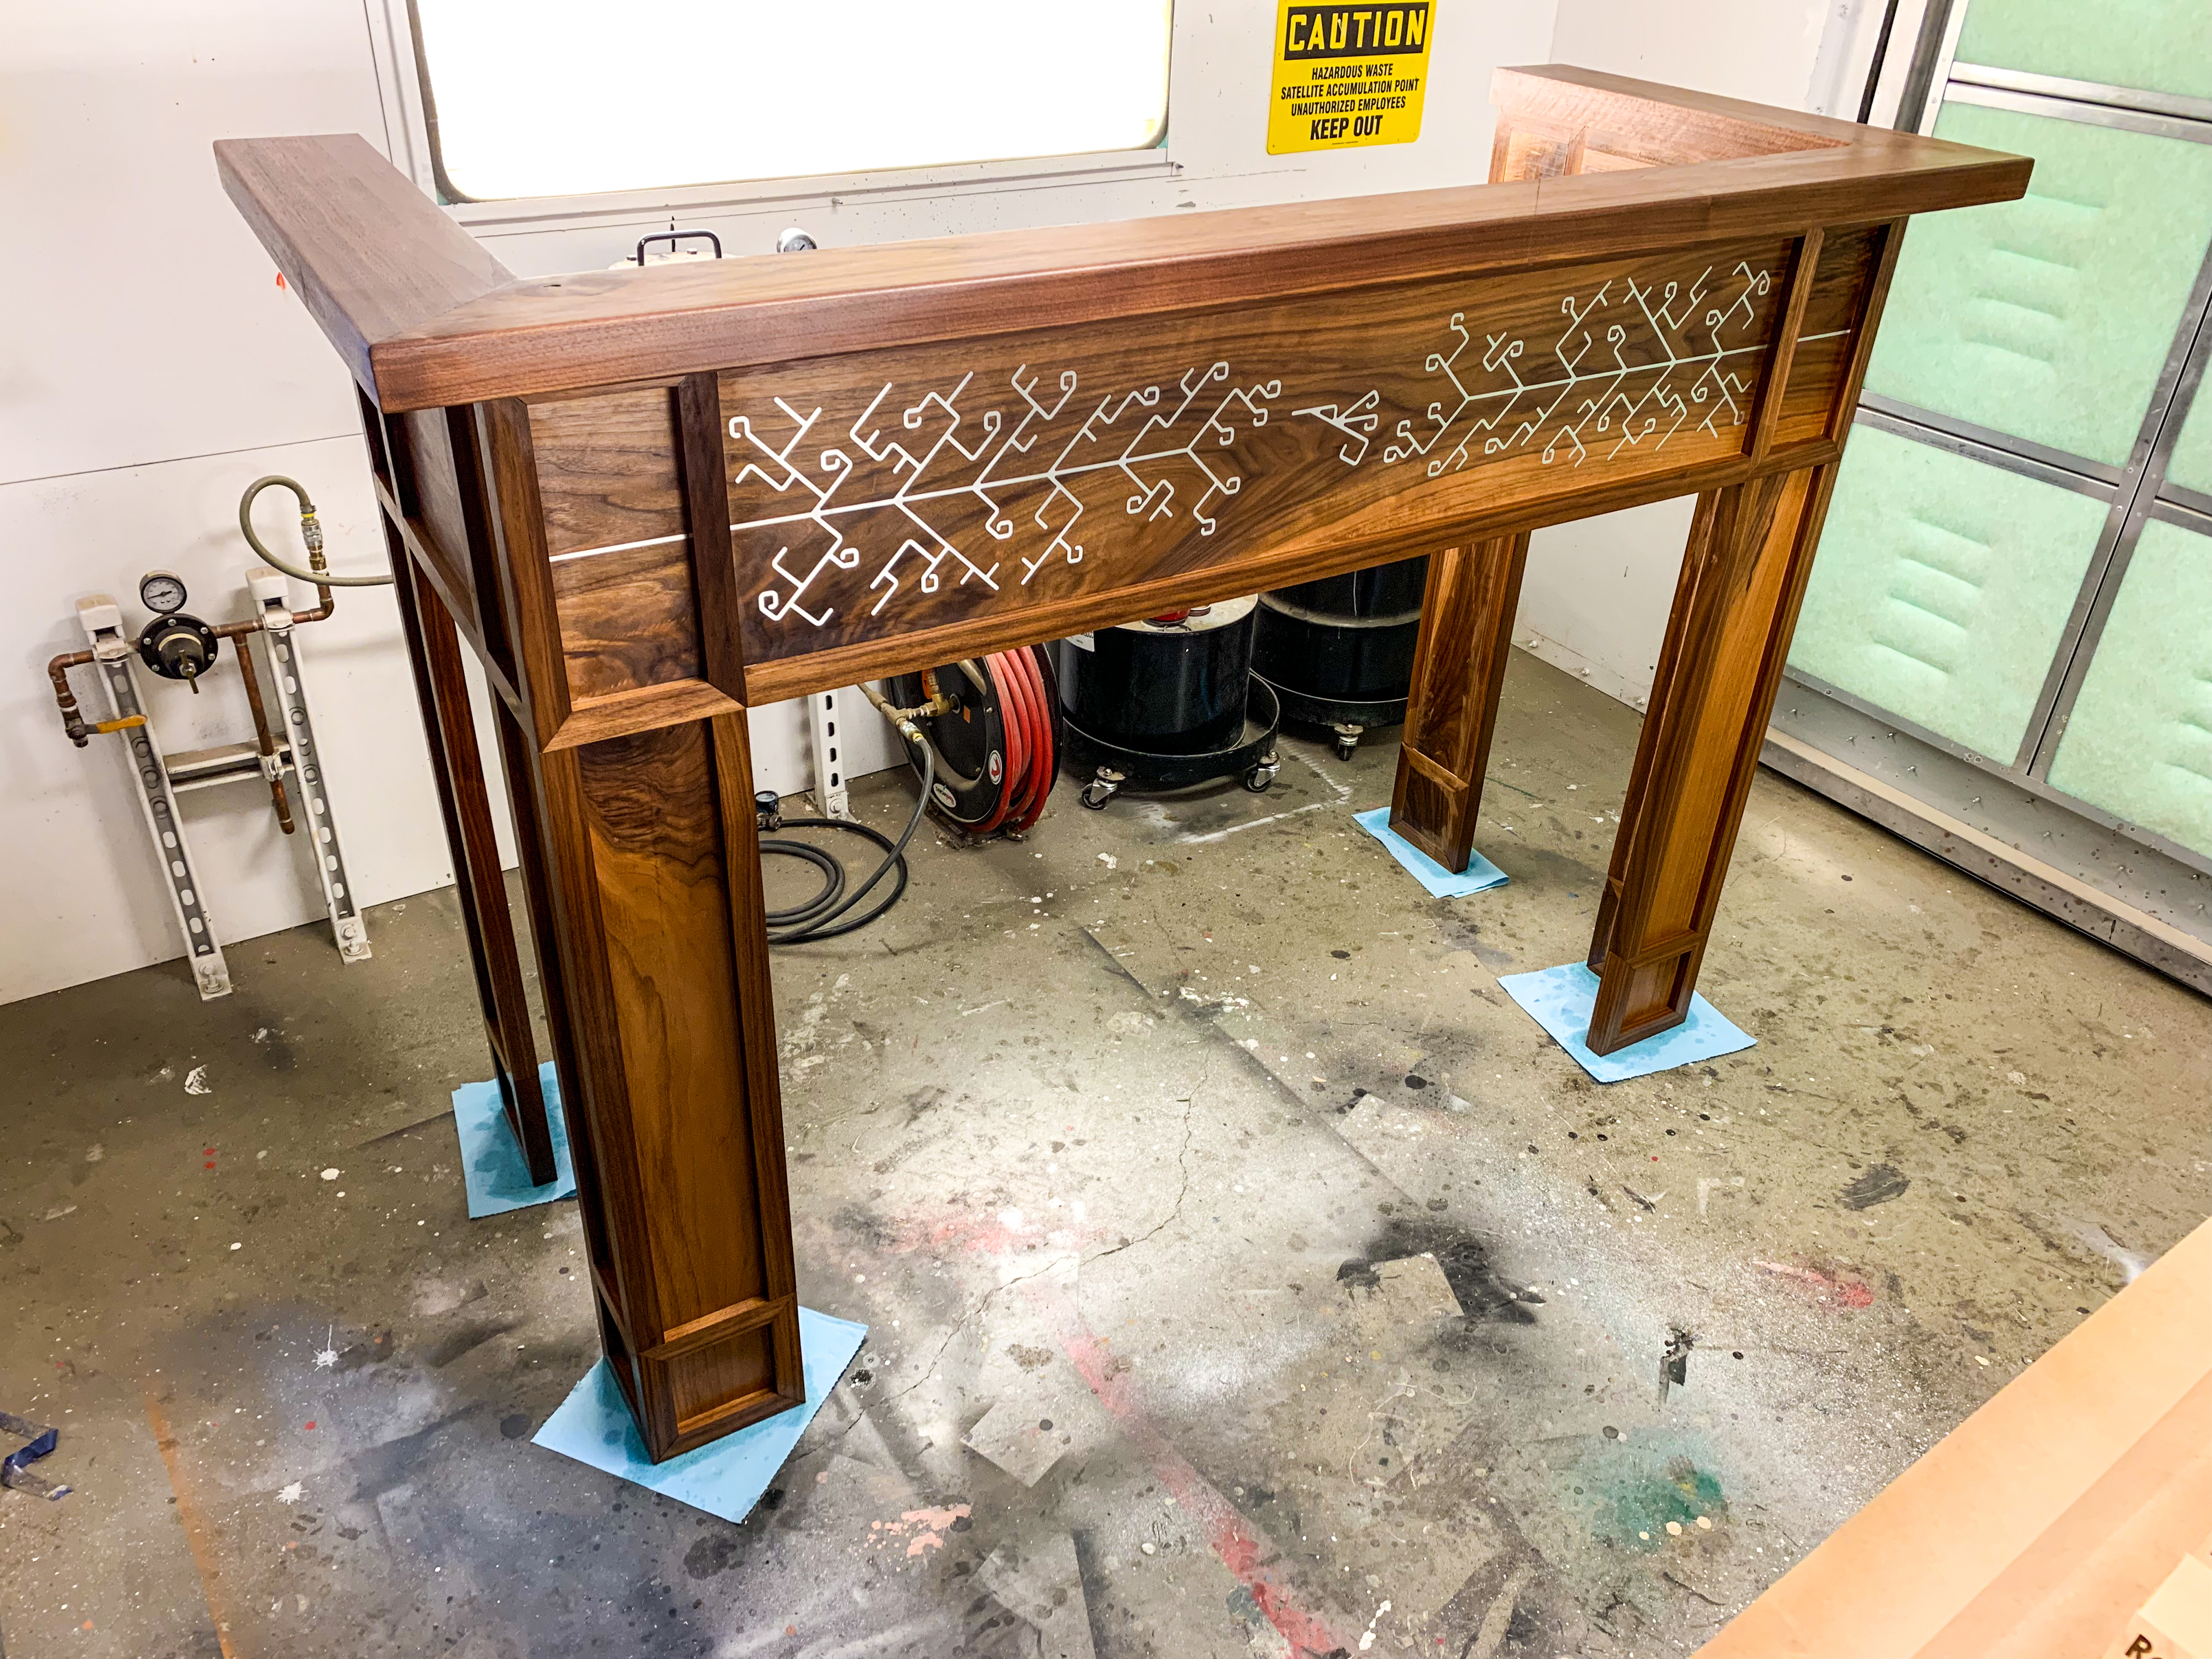
I also wanted to experiment with a design that’s inherently flat but that could wrap around a three-dimensional object. Here the stylized hummingbird-in-eucalyptus-tree pattern on the front panel turns at the corners to drop down the sides of the front columns. On the right side of the fireplace the aluminum goes straight into the ground, as though it’s the trunk of the eucalyptus…
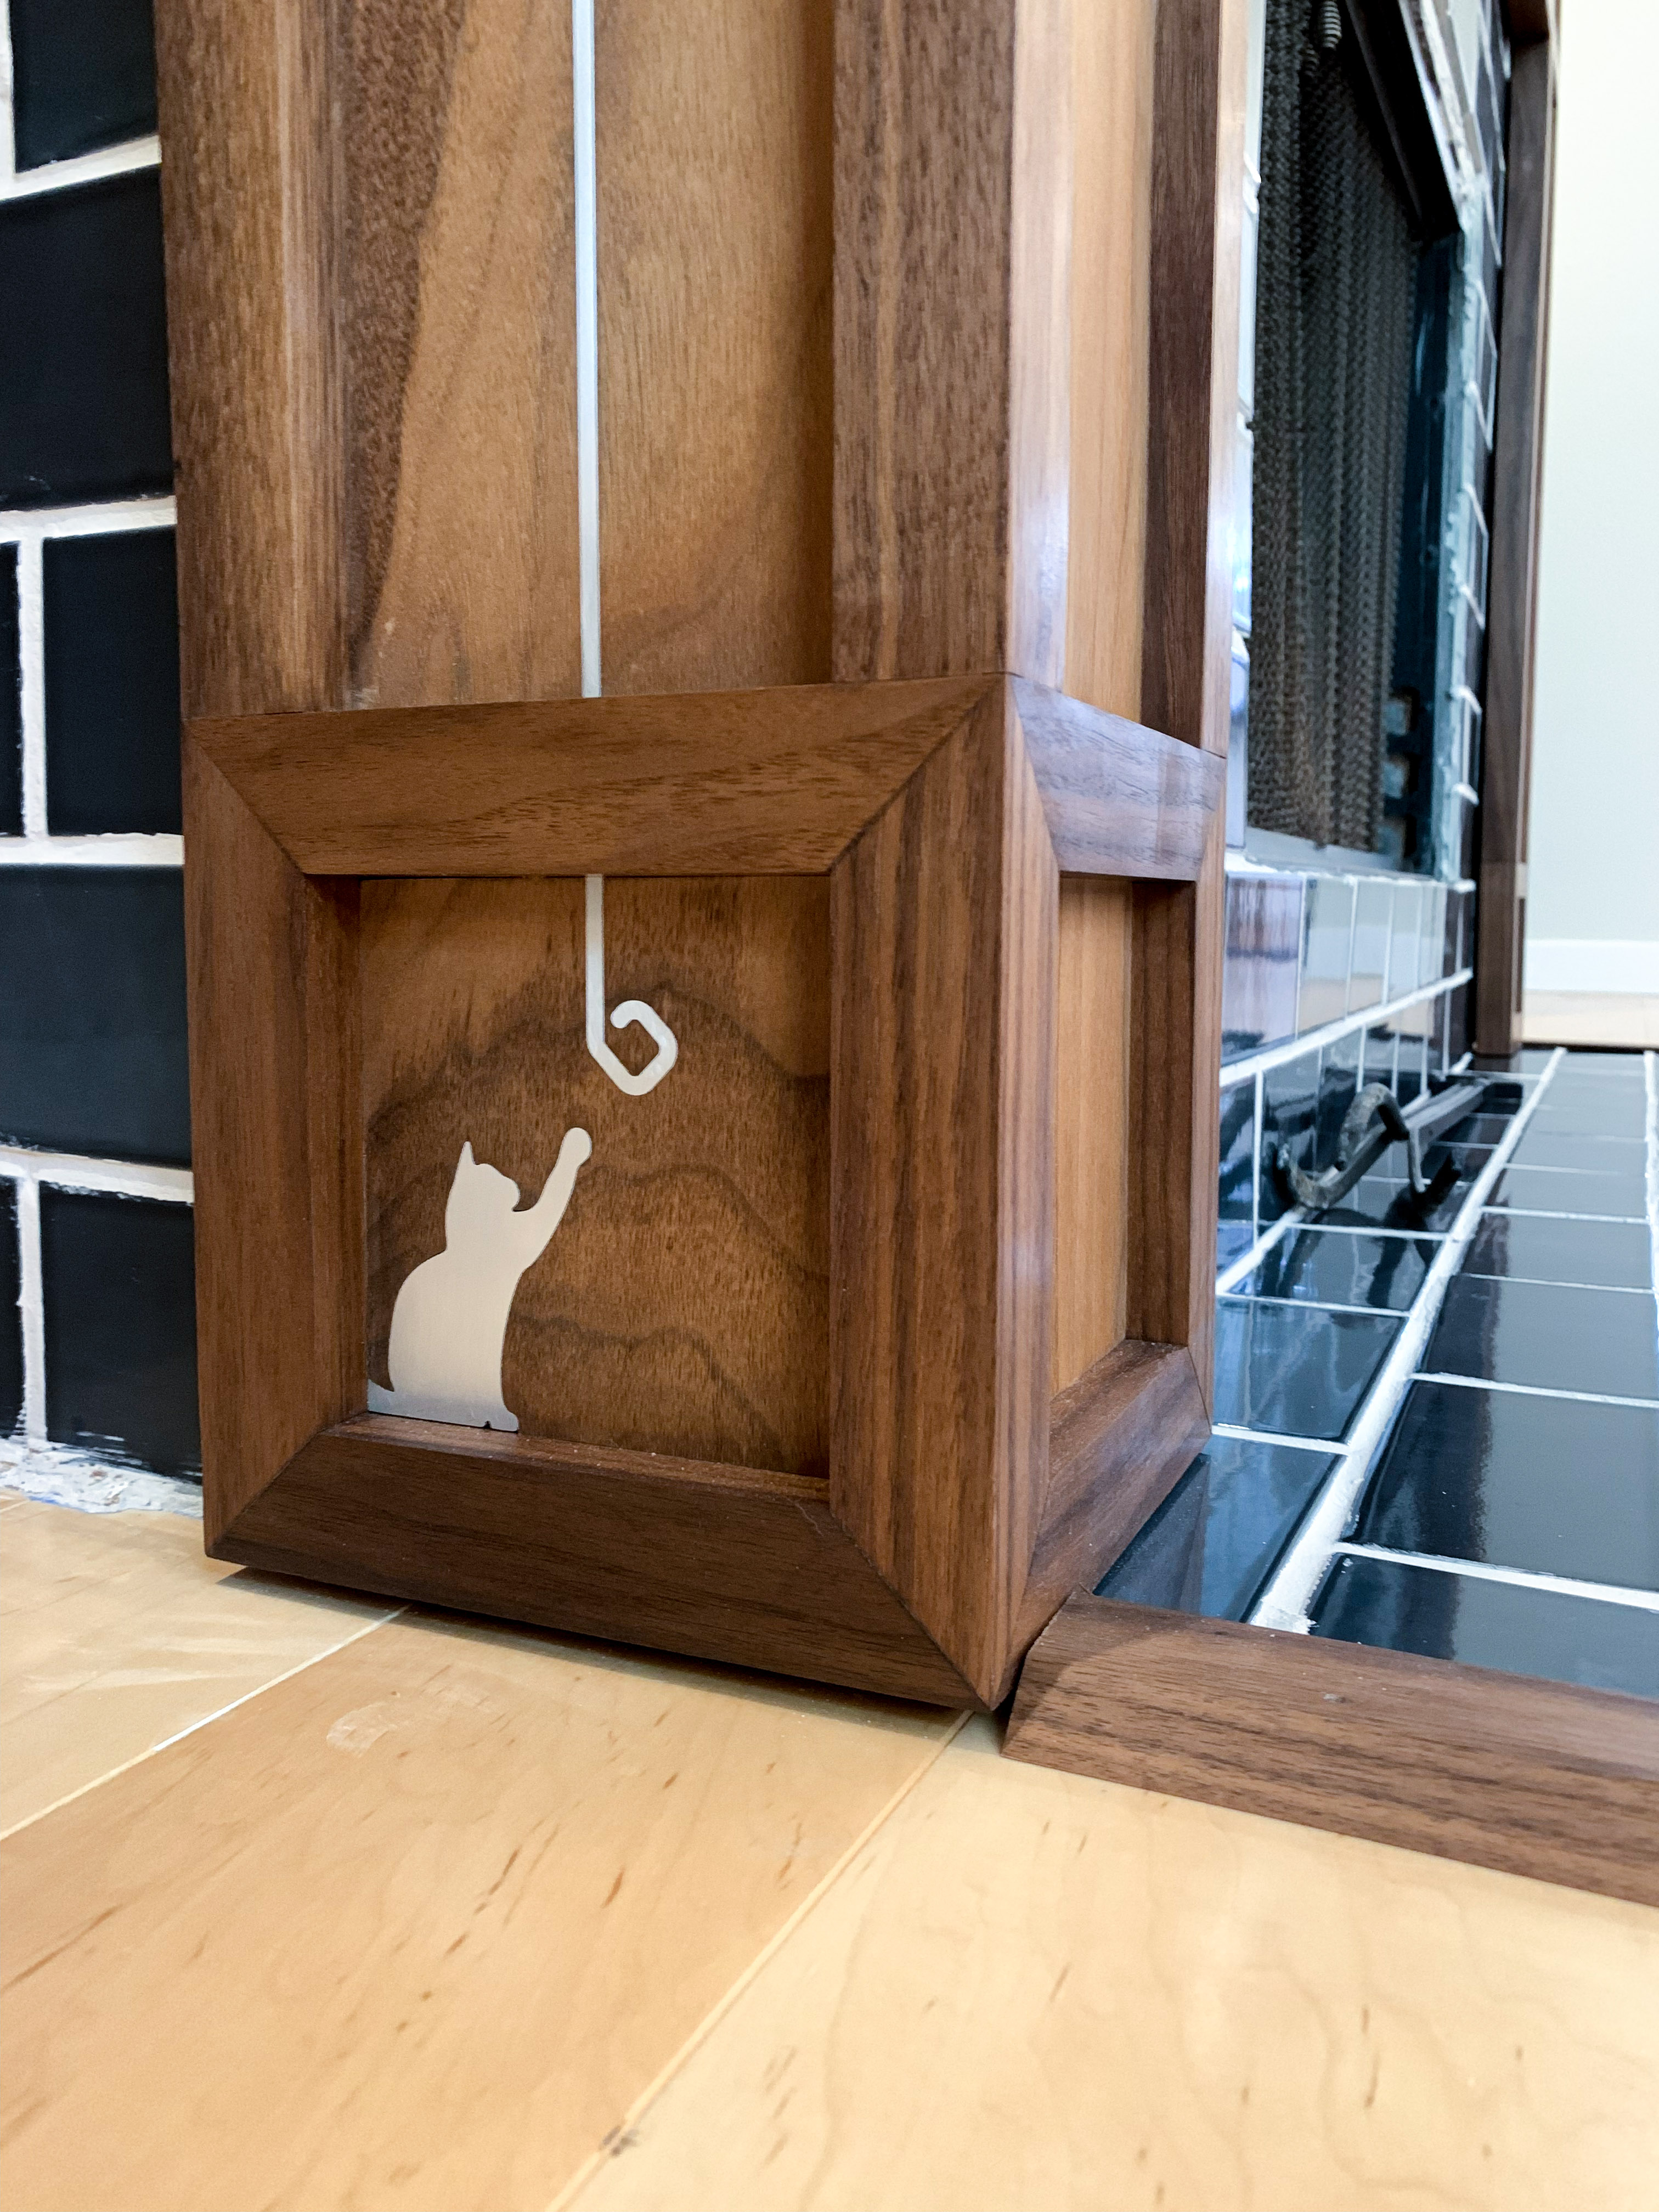
…while on the left side it drops to an Easter egg at the bottom of the column.
It’s a representation of our cat, swatting at the motif from the front panel.
I’m fortunate to be a resident at Autodesk’s exceptional San Francisco Technology Center on Pier 9, so I’ve got access to first-rate tools and guidance from the shop staff. I have some experience with CNC machining and CAD, but I’m a novice woodworker and learned a lot of fundamental techniques from scratch while I worked on this project.
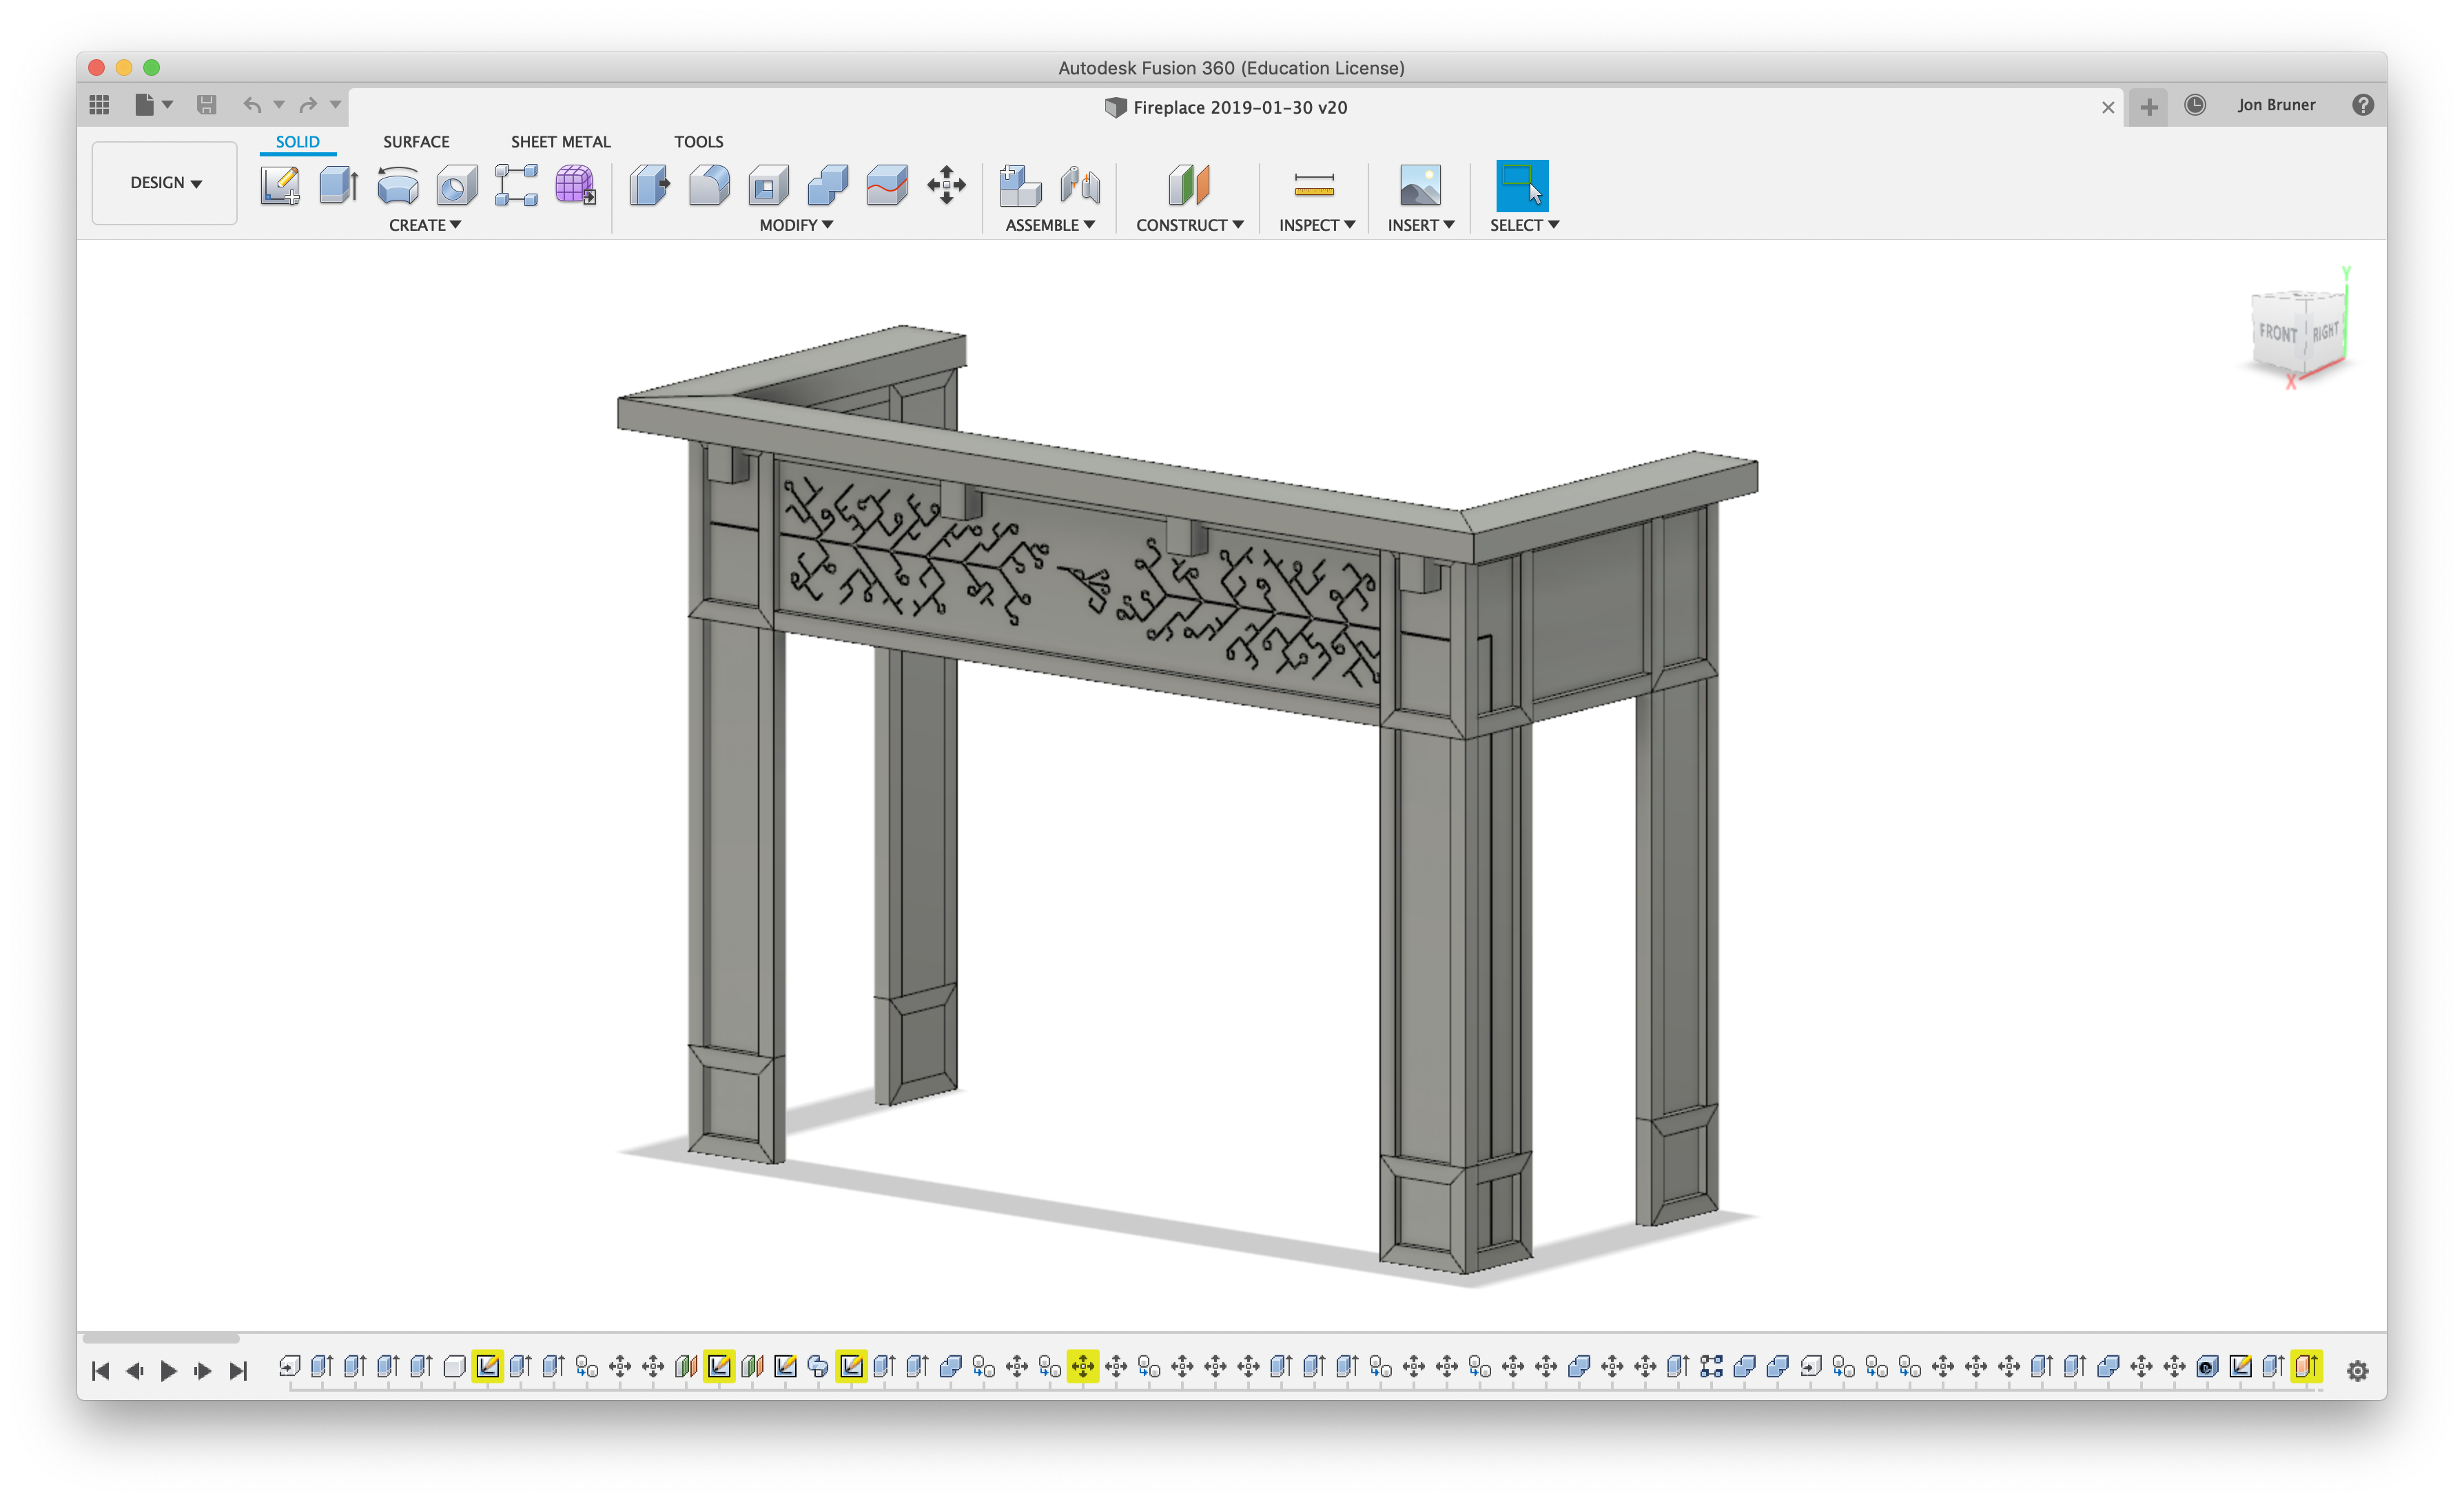
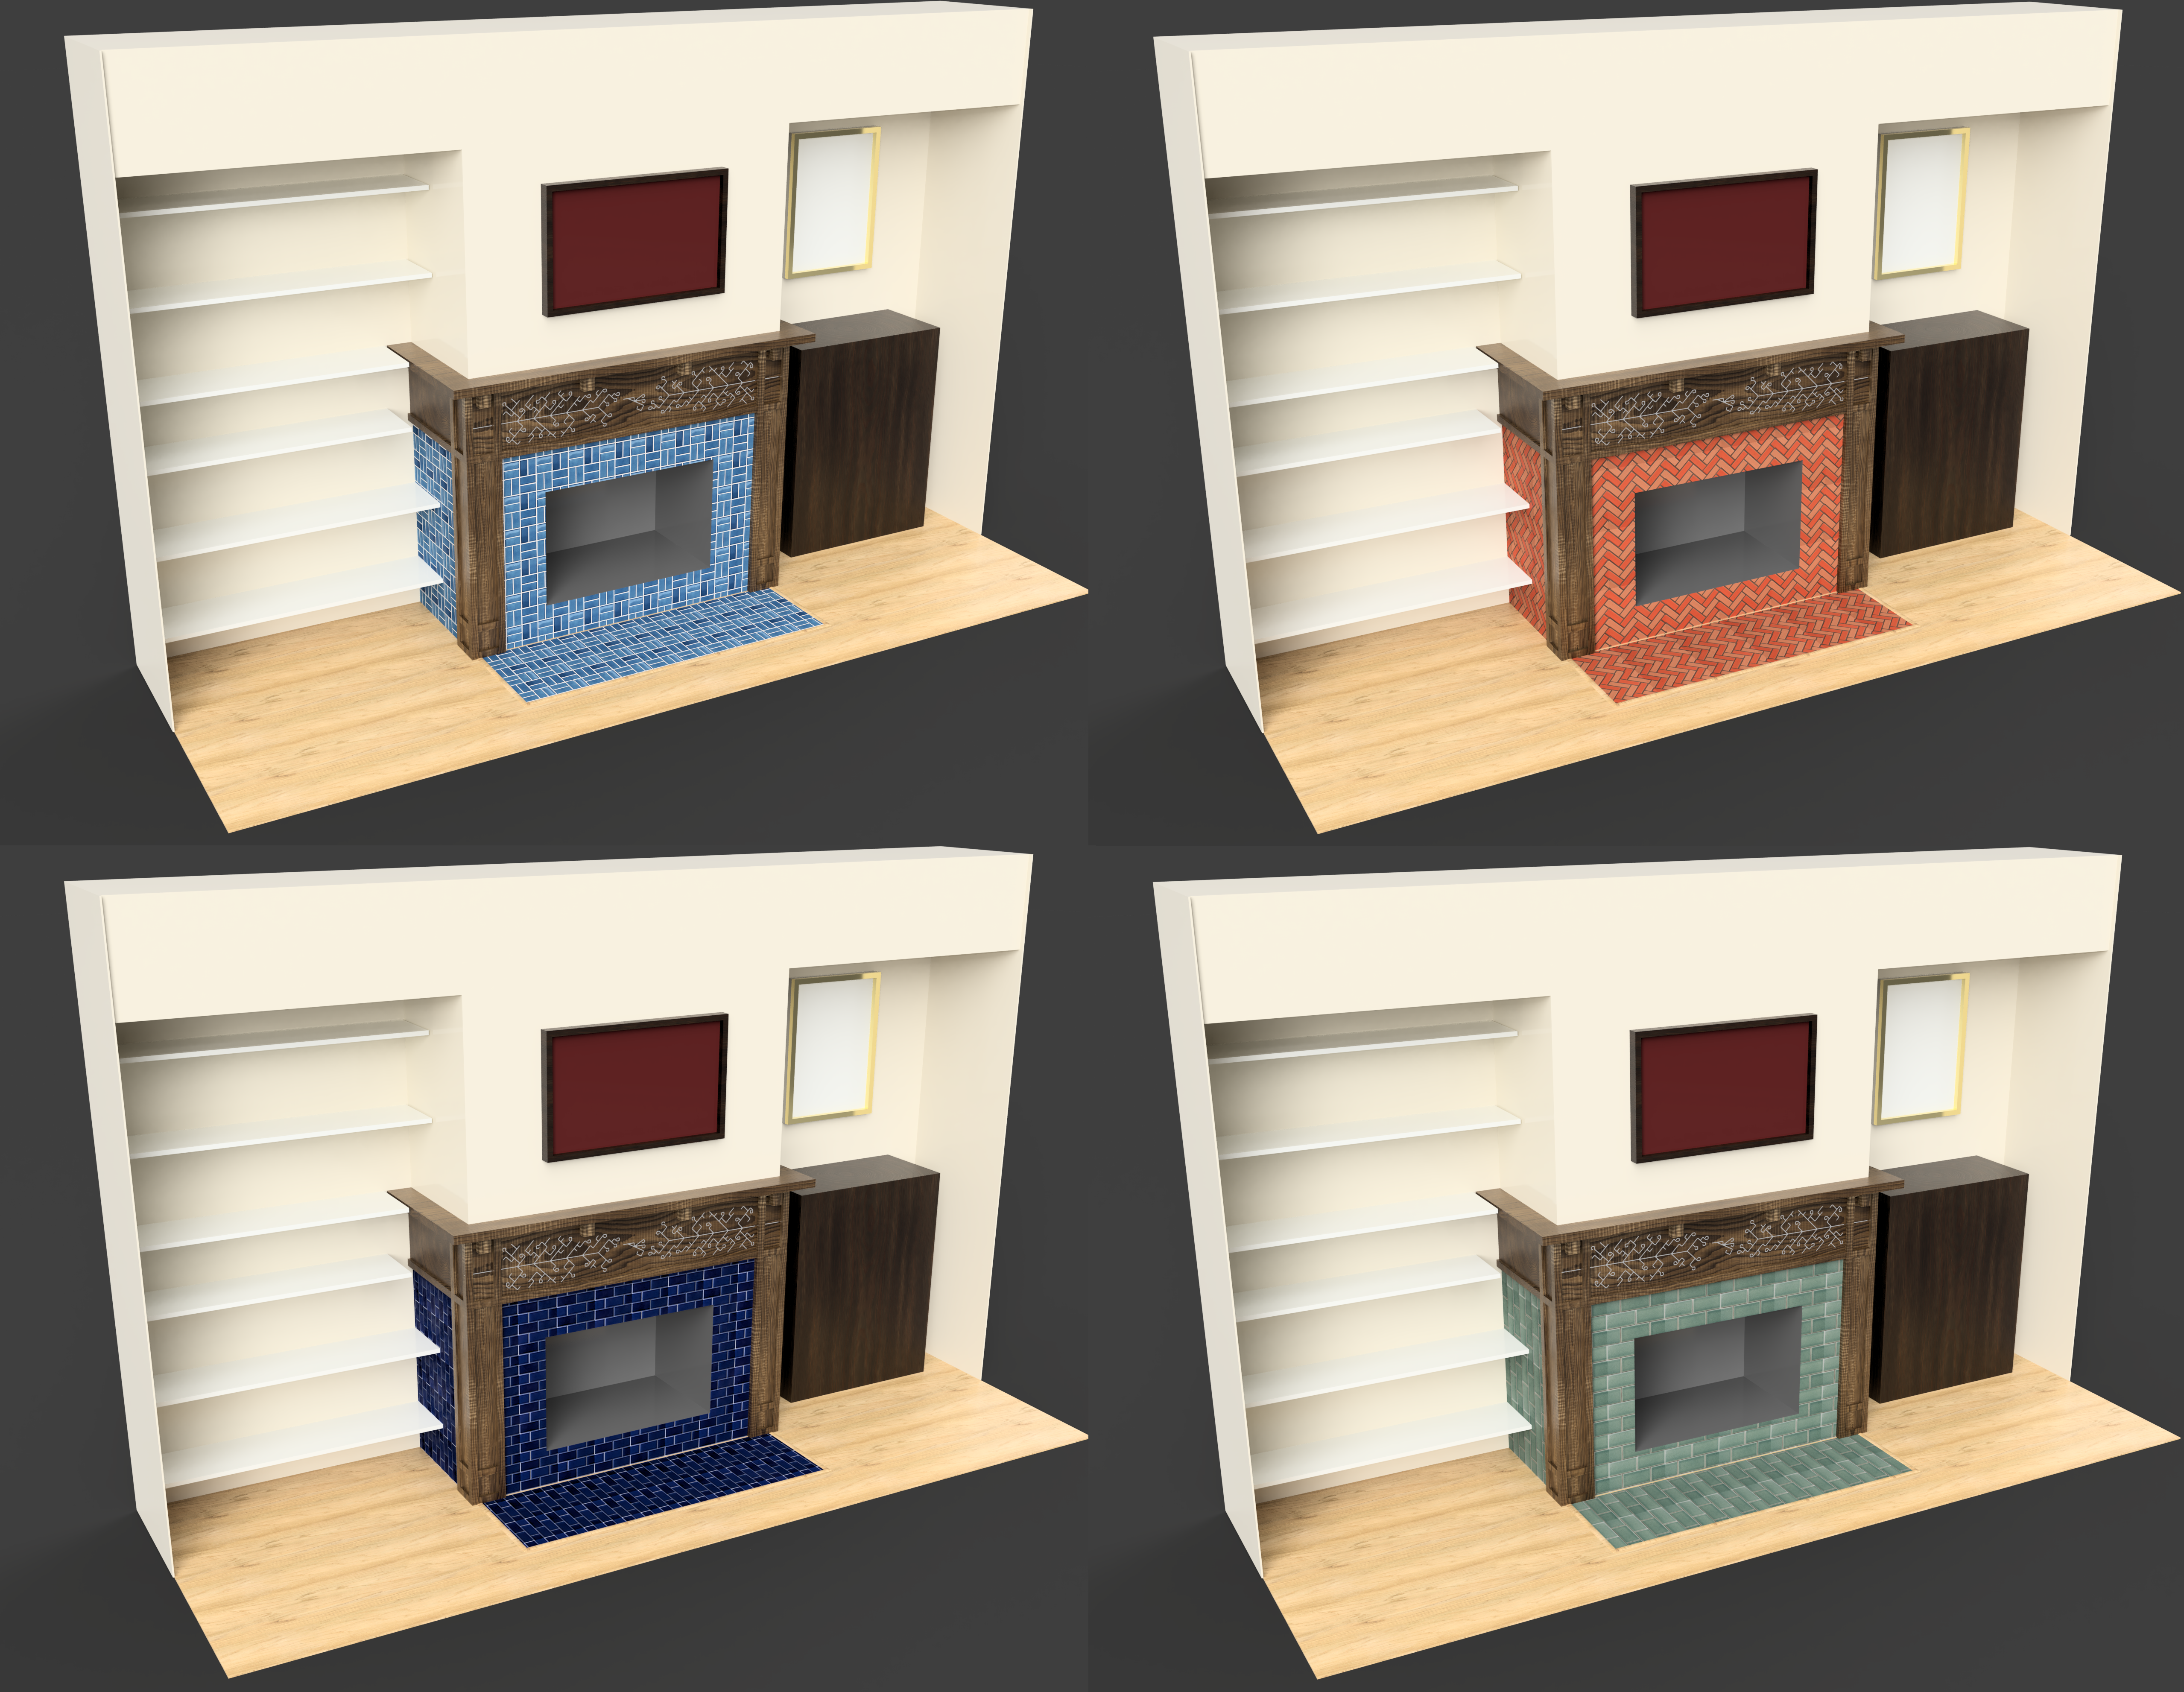
Back to the beginning! I started with a solid model in Fusion 360…
…which made it possible to test out a bunch of different tile choices through renderings. In the end we went with tile closest to the blue at bottom left; it was remaindered and on sale at Heath Ceramics. (You can download my Fusion 360 model on GitHub.)
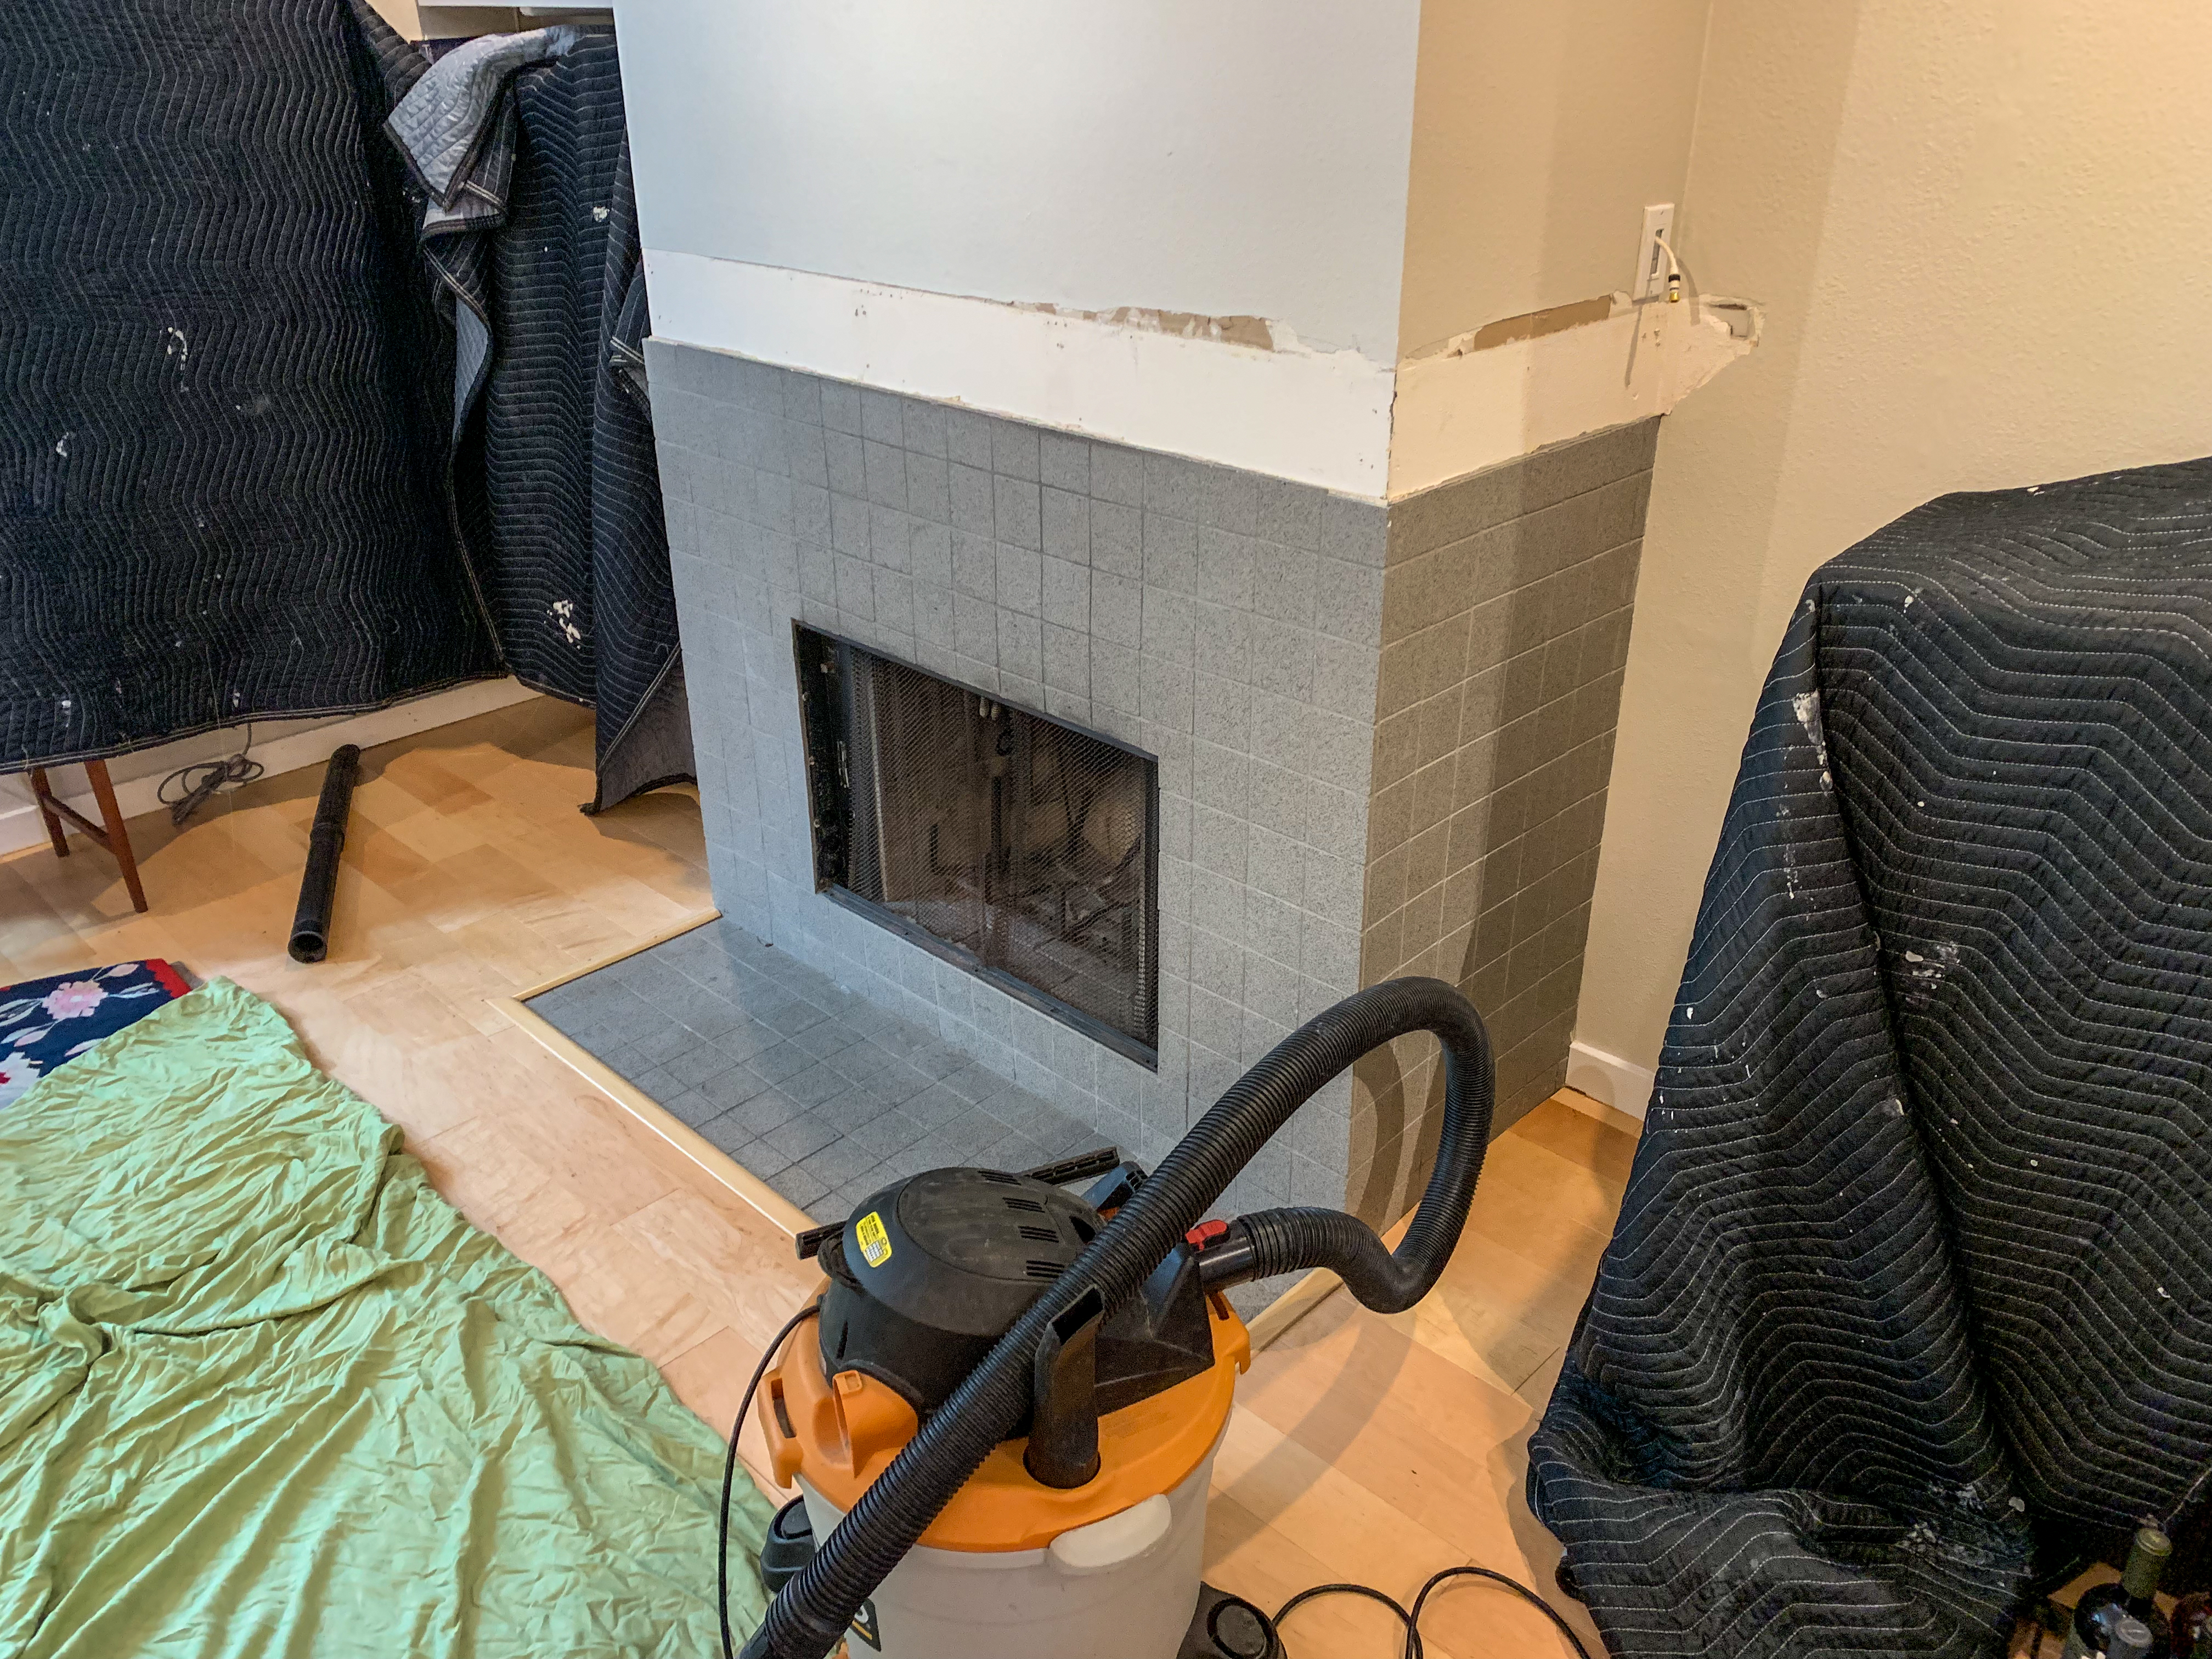
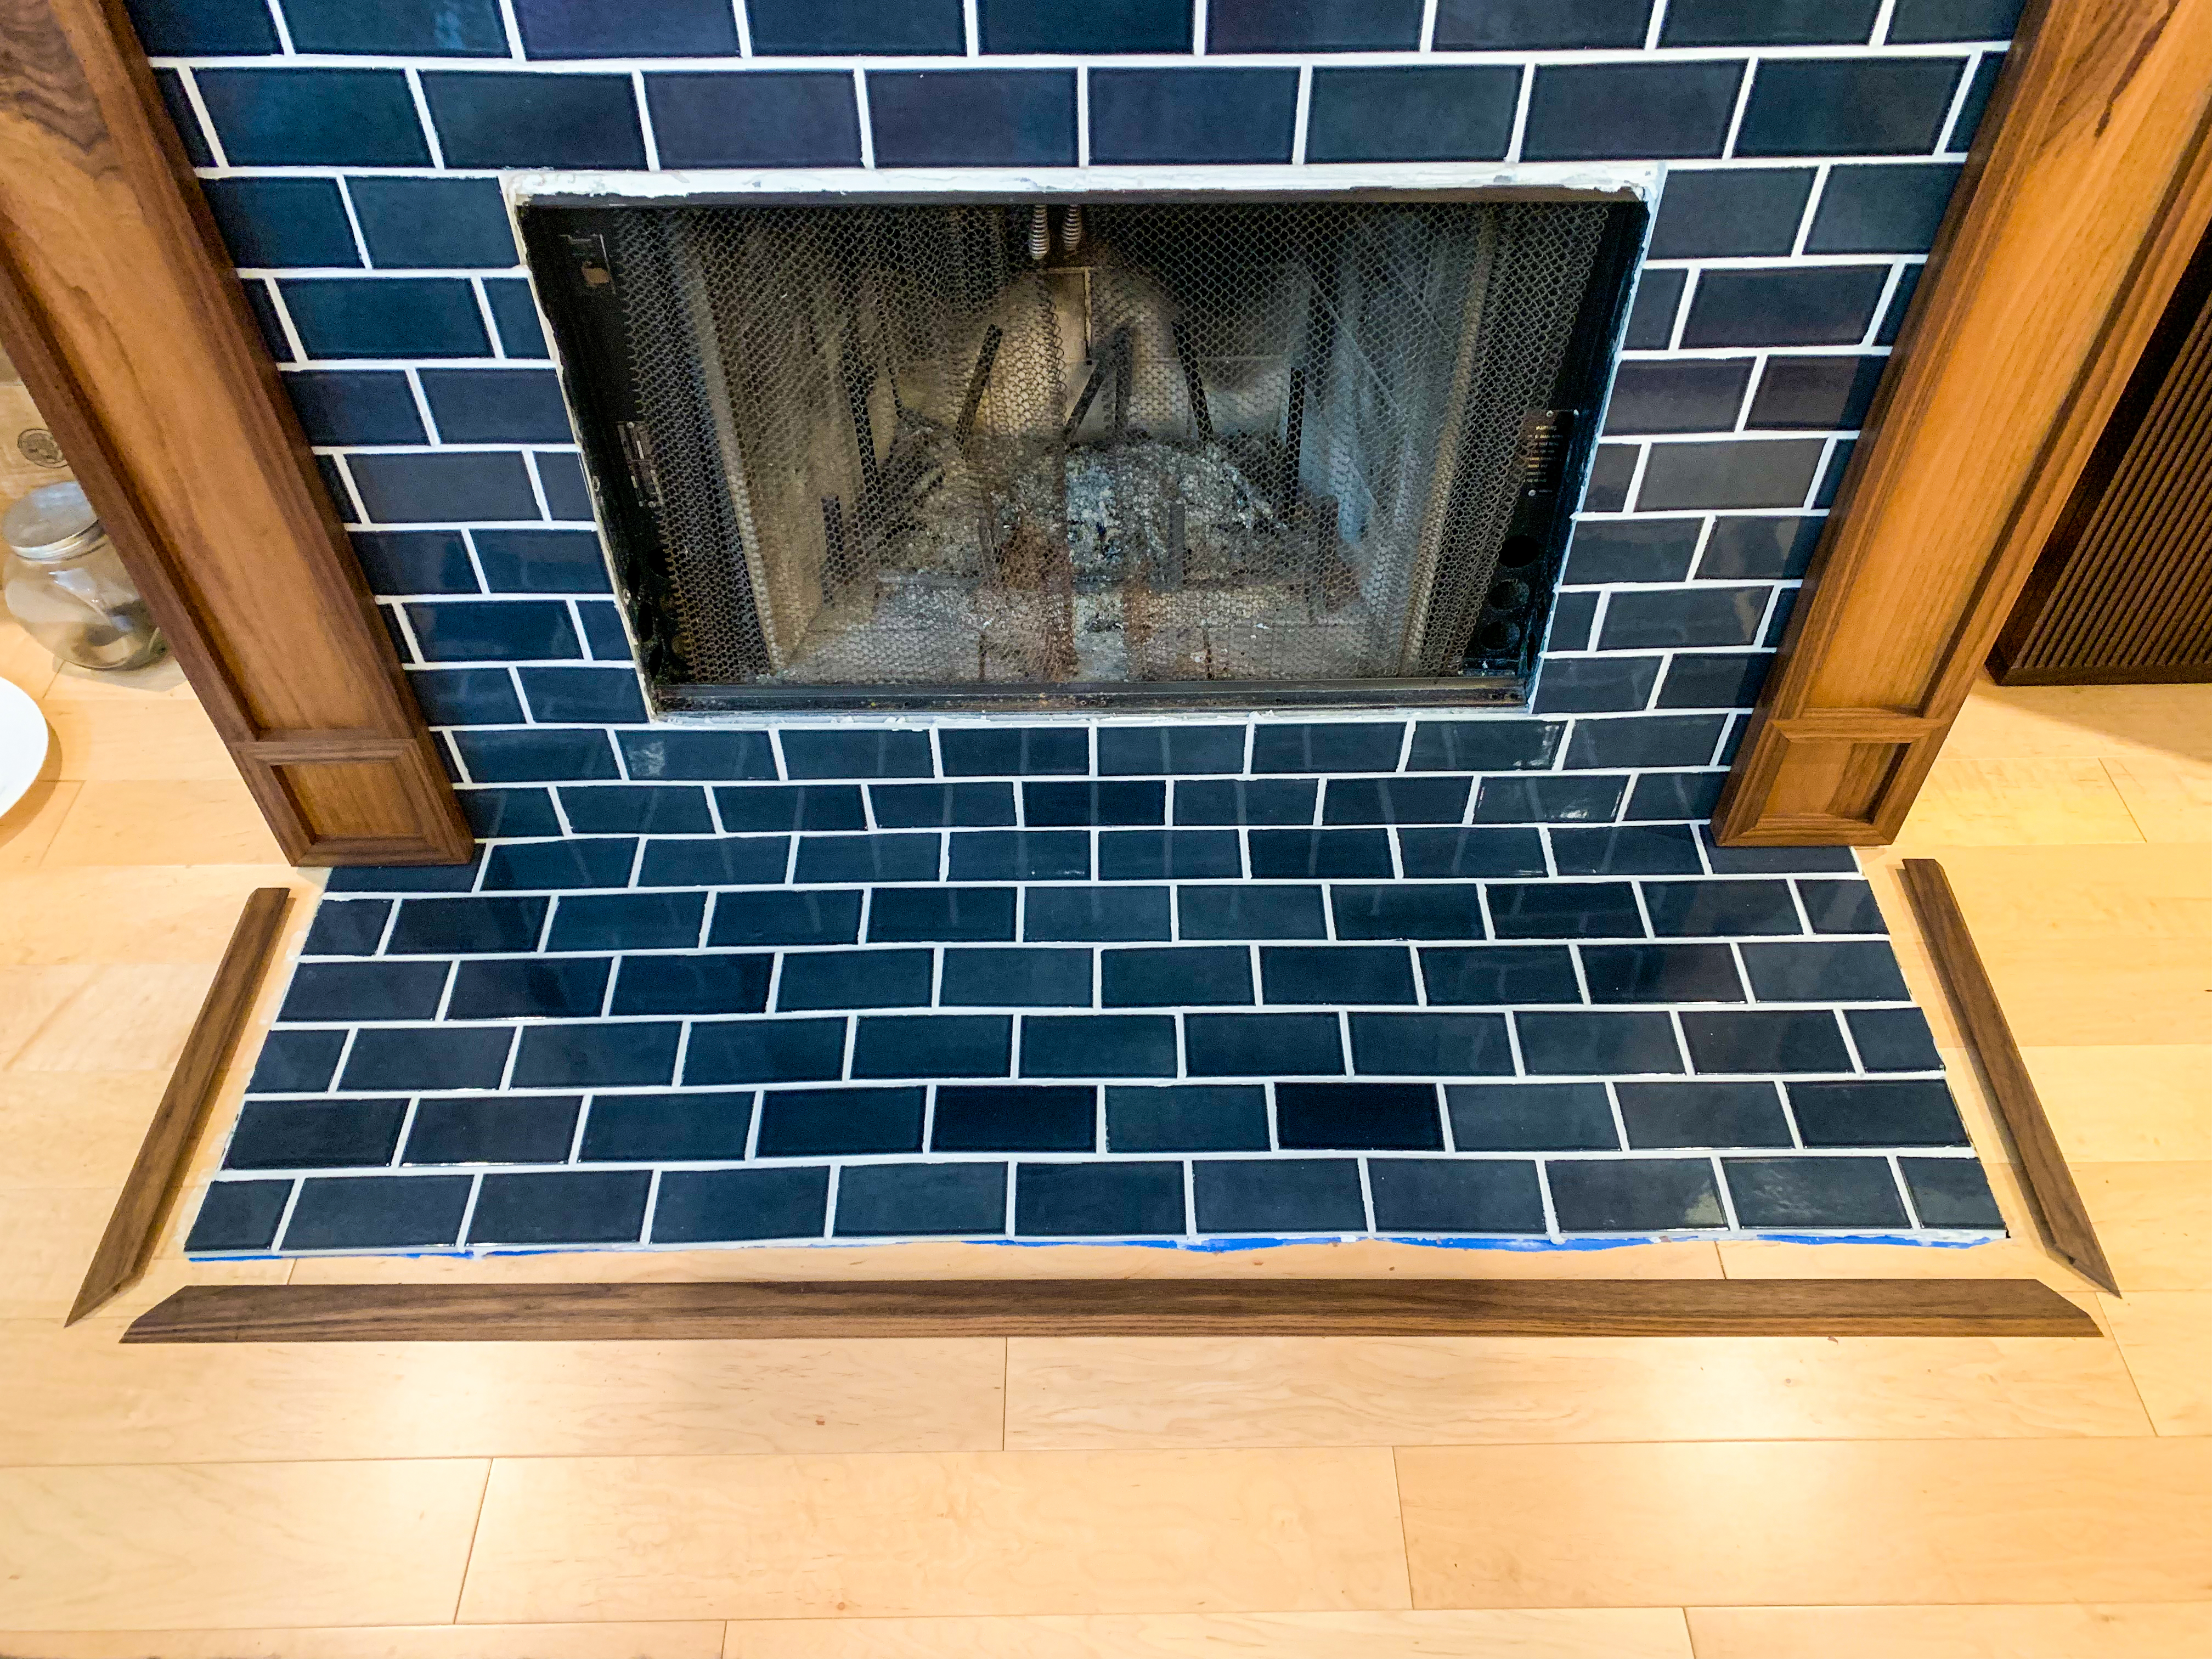
Time to start demolishing: here’s another before picture. Can’t wait to be done with that drab grey tile.
Beginning to explore the old mantel with a Sawzall: it’s hollow plywood…
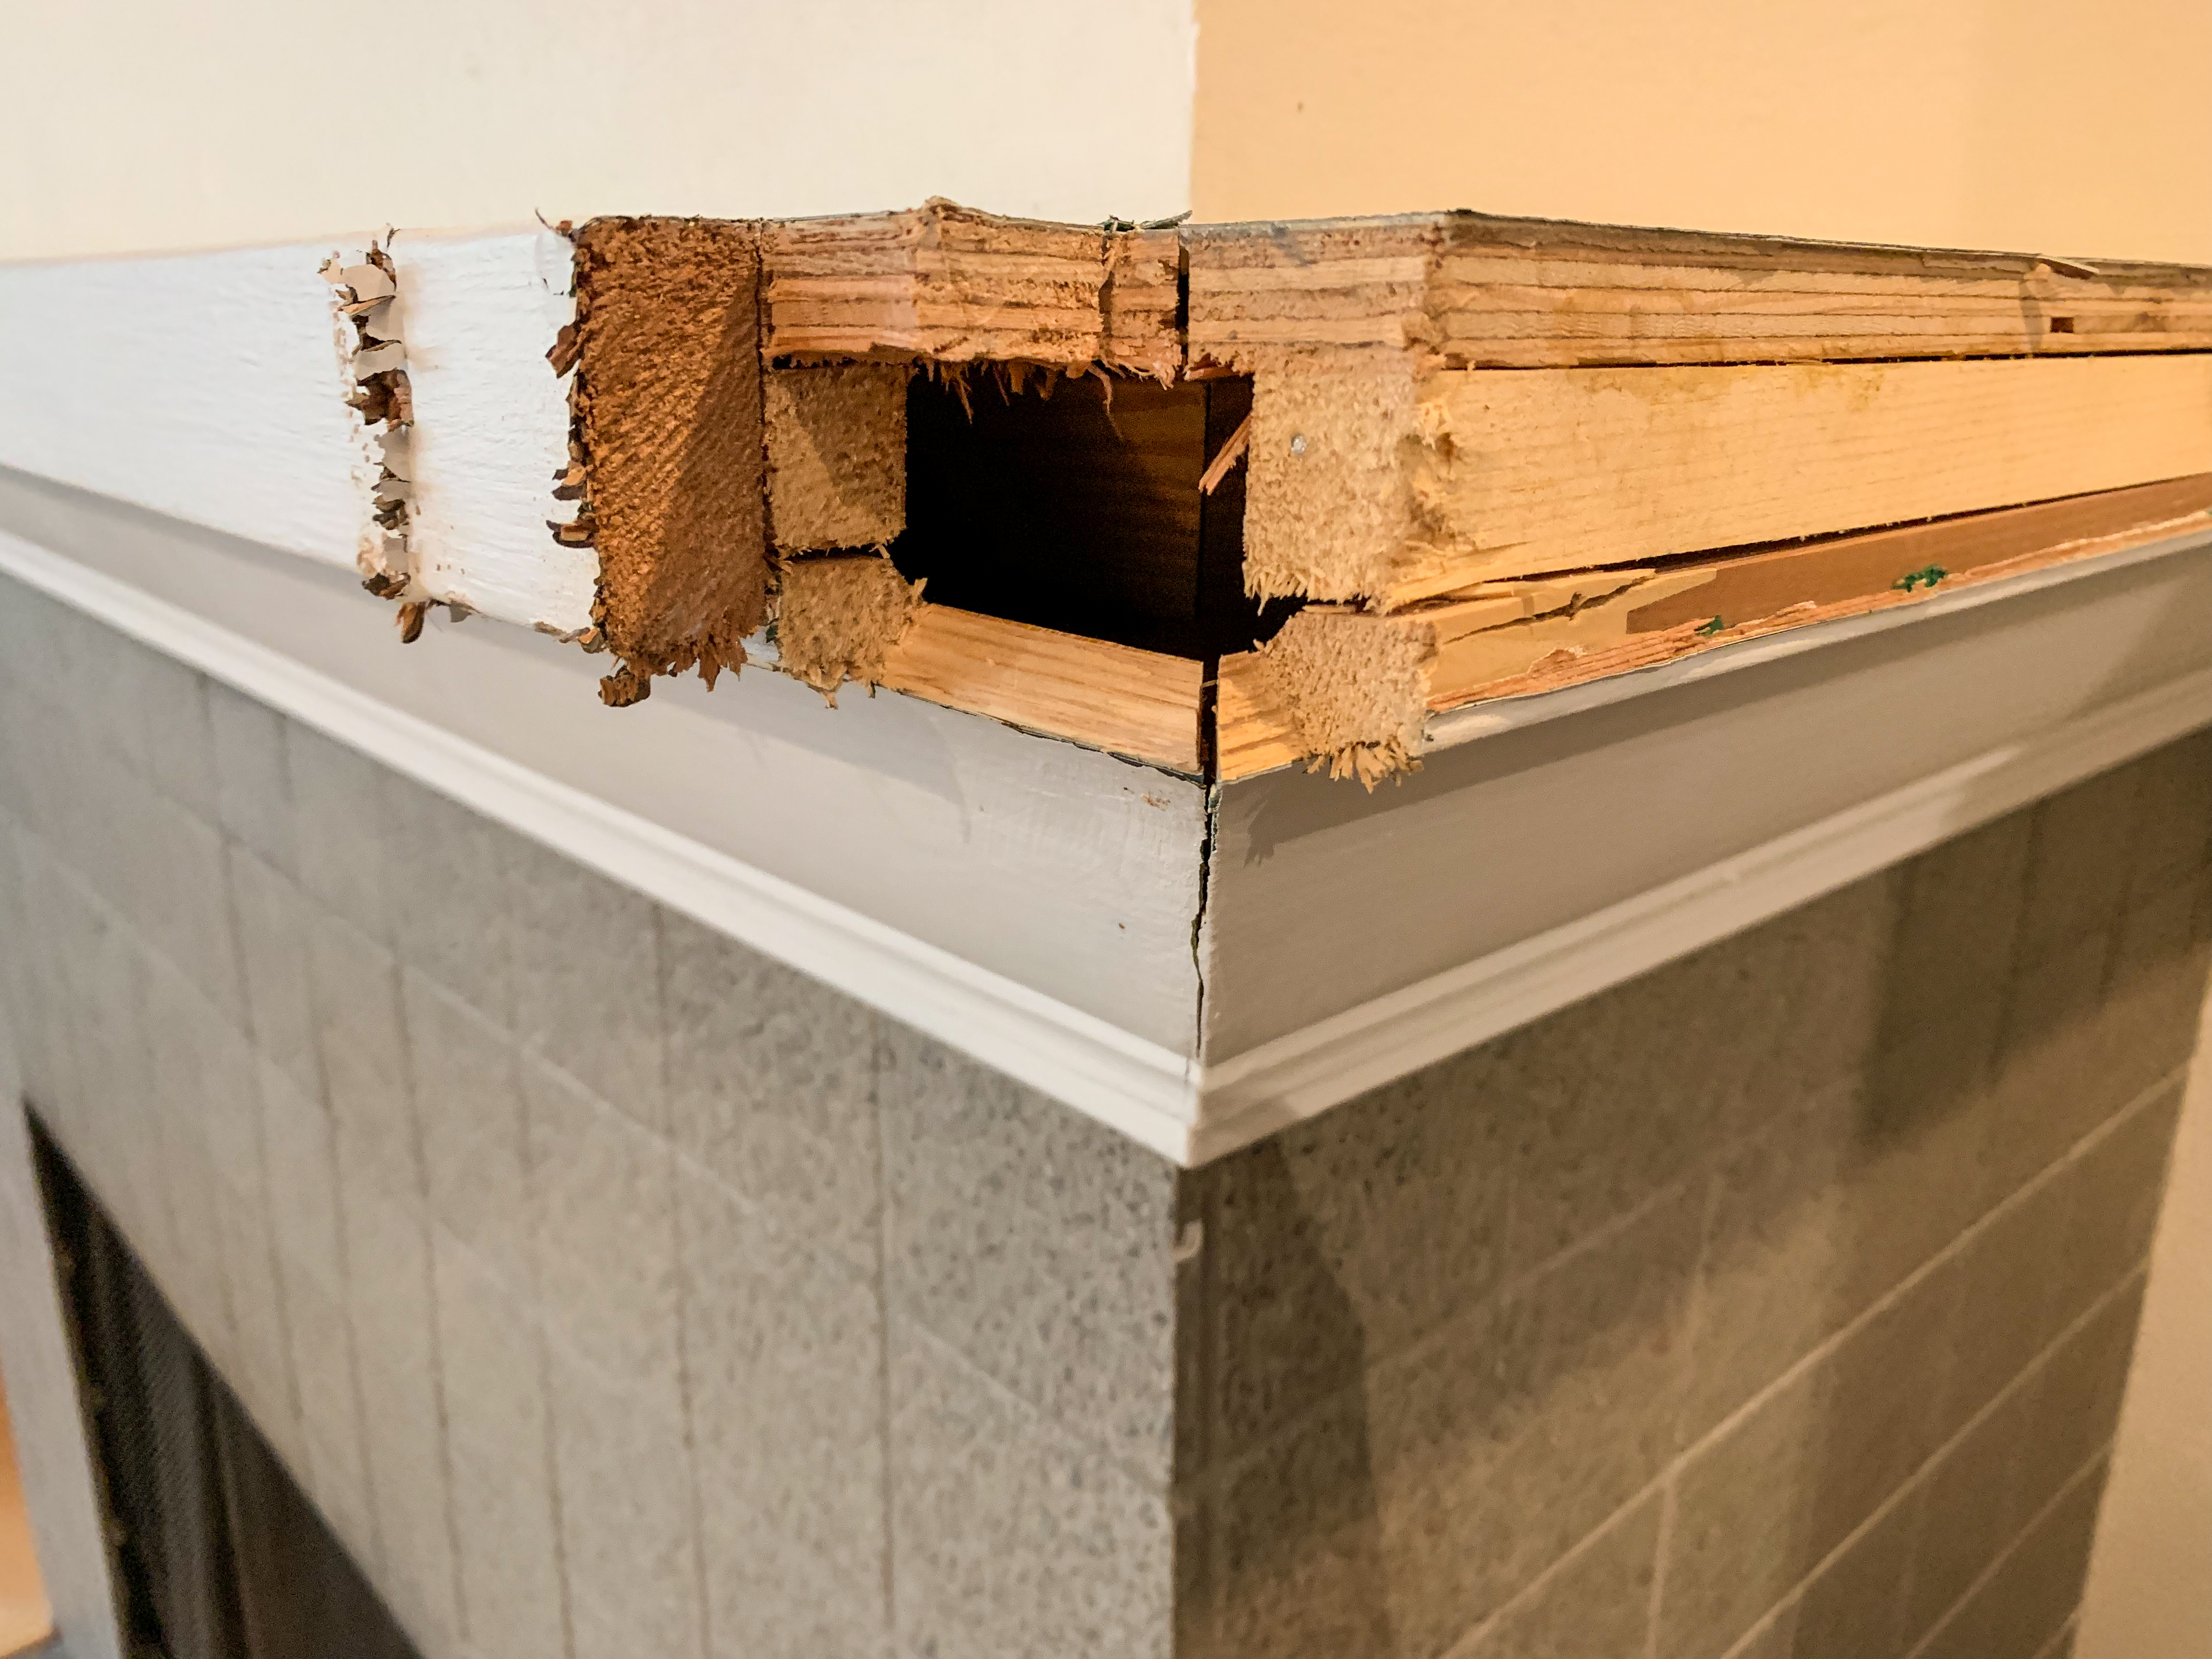
…and it’s just tacked to the drywall. A regular hammer claw has no problem pulling it out.
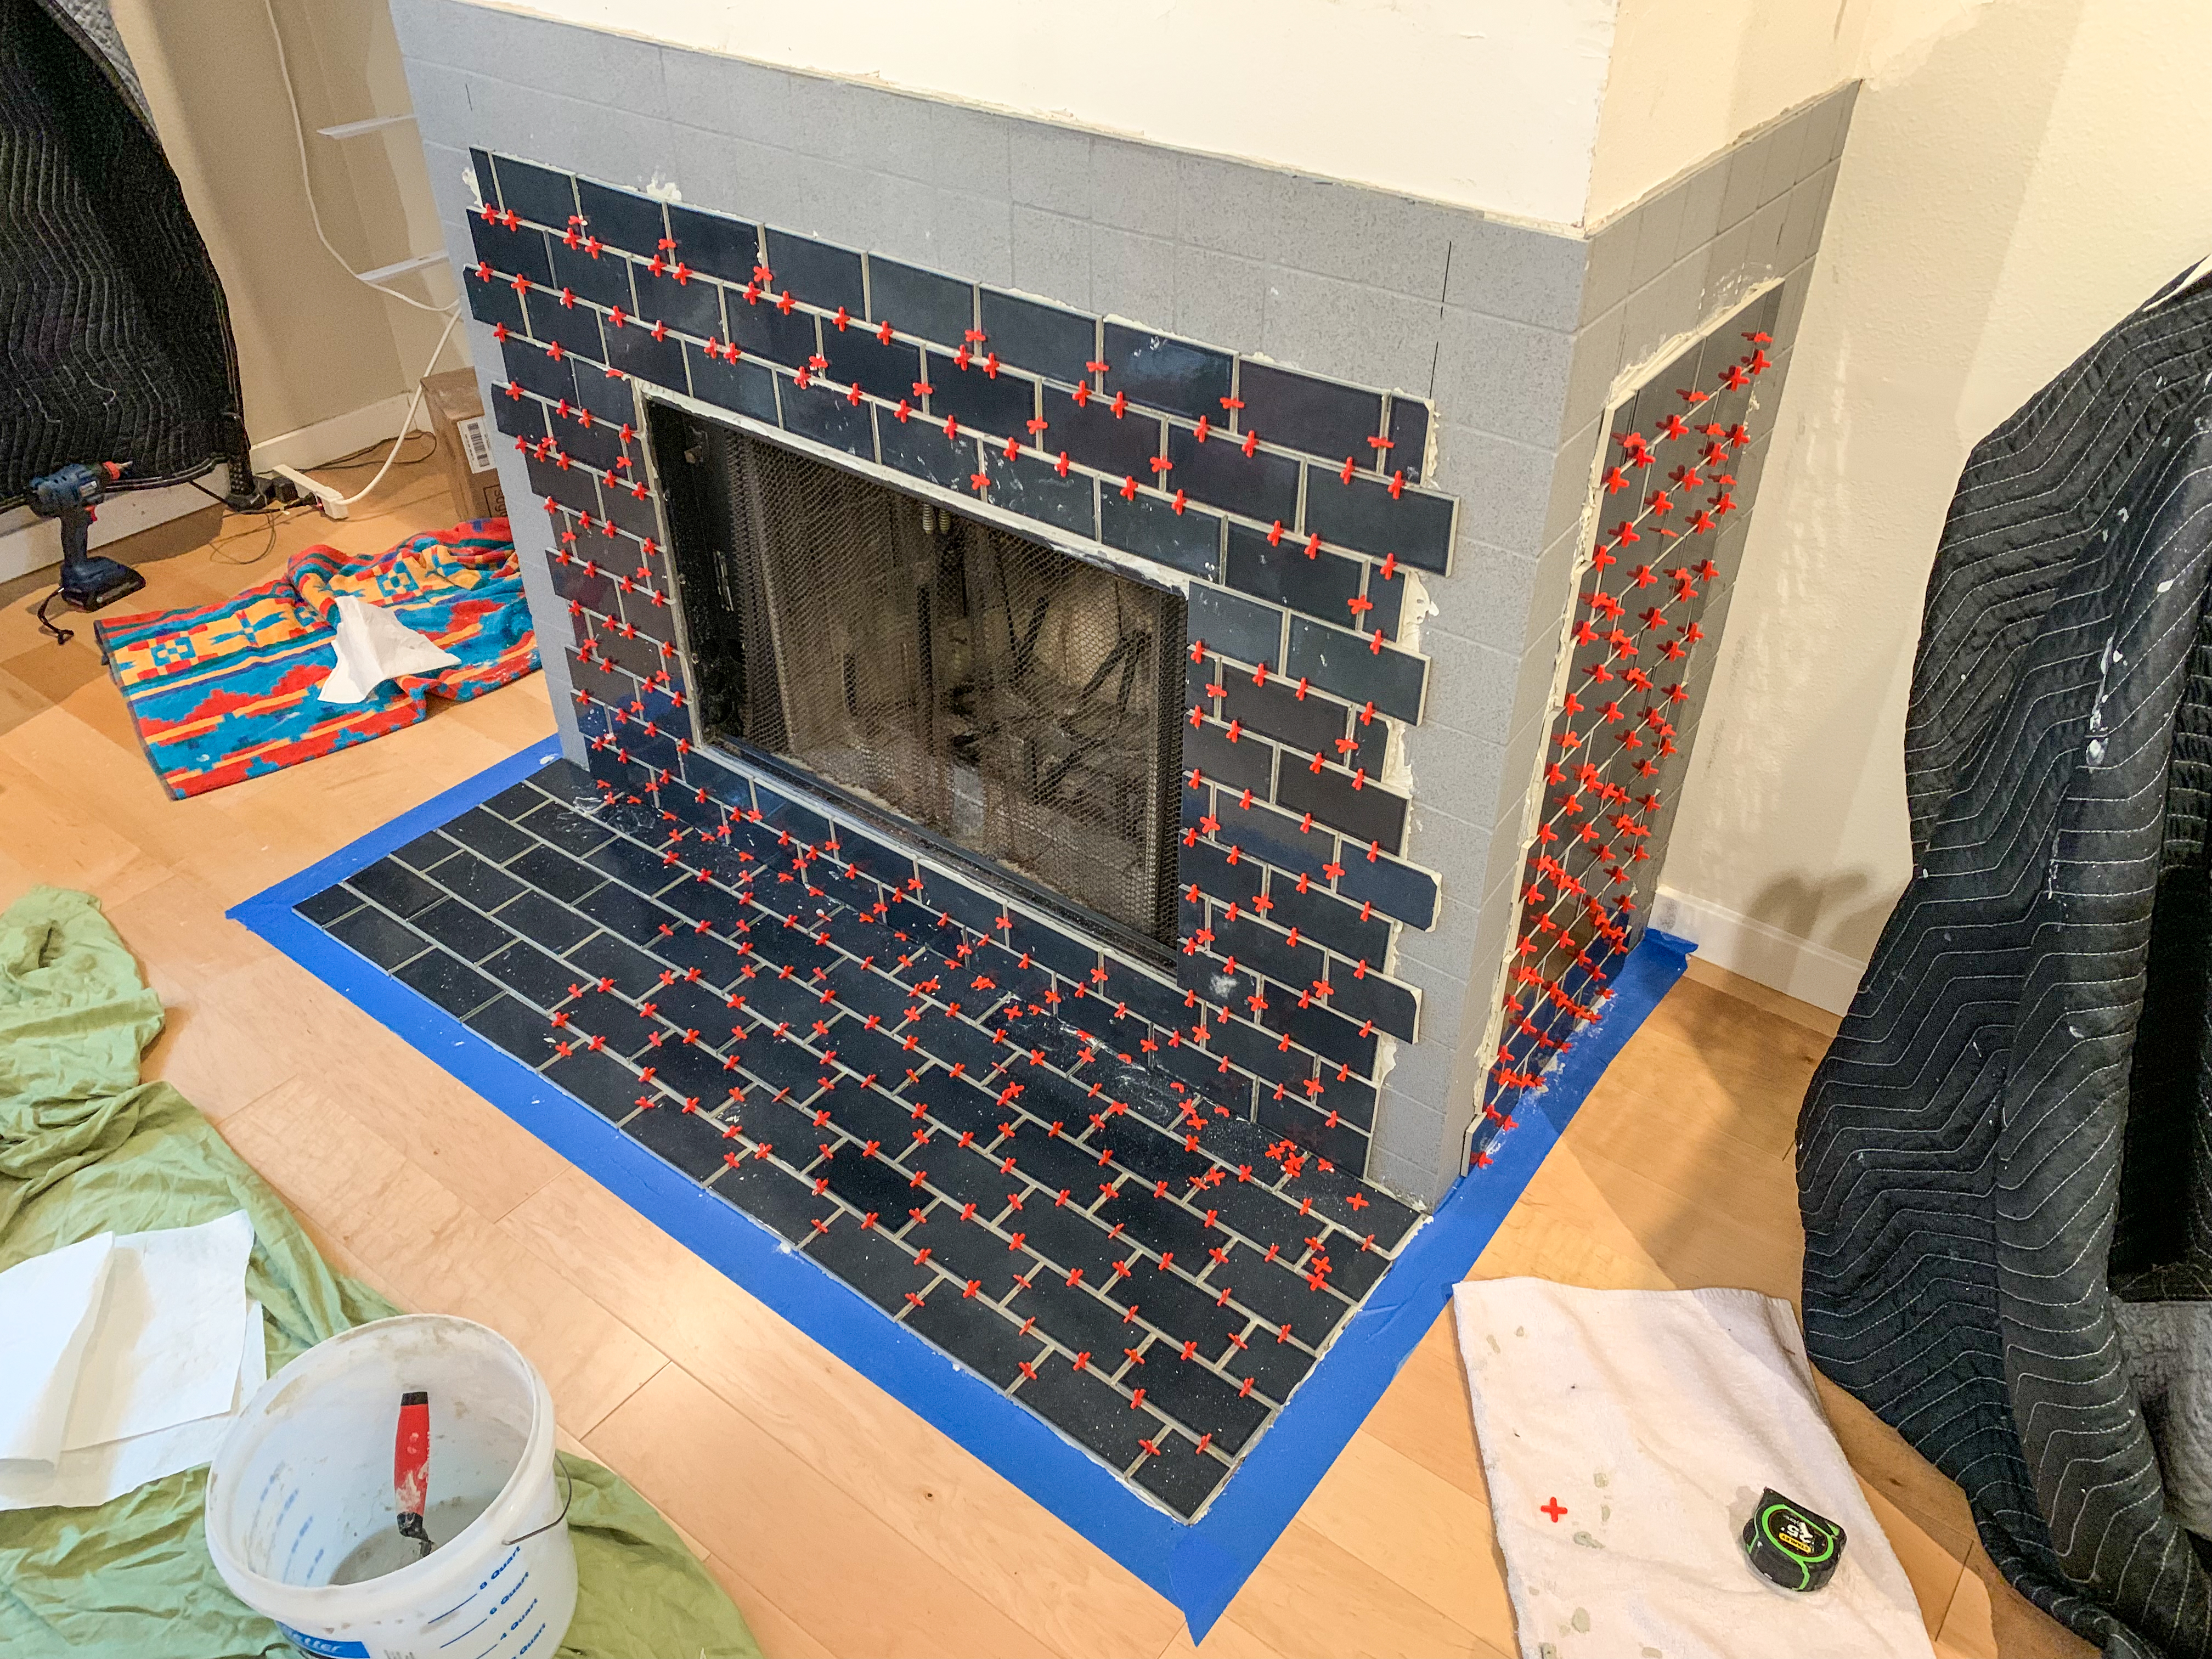
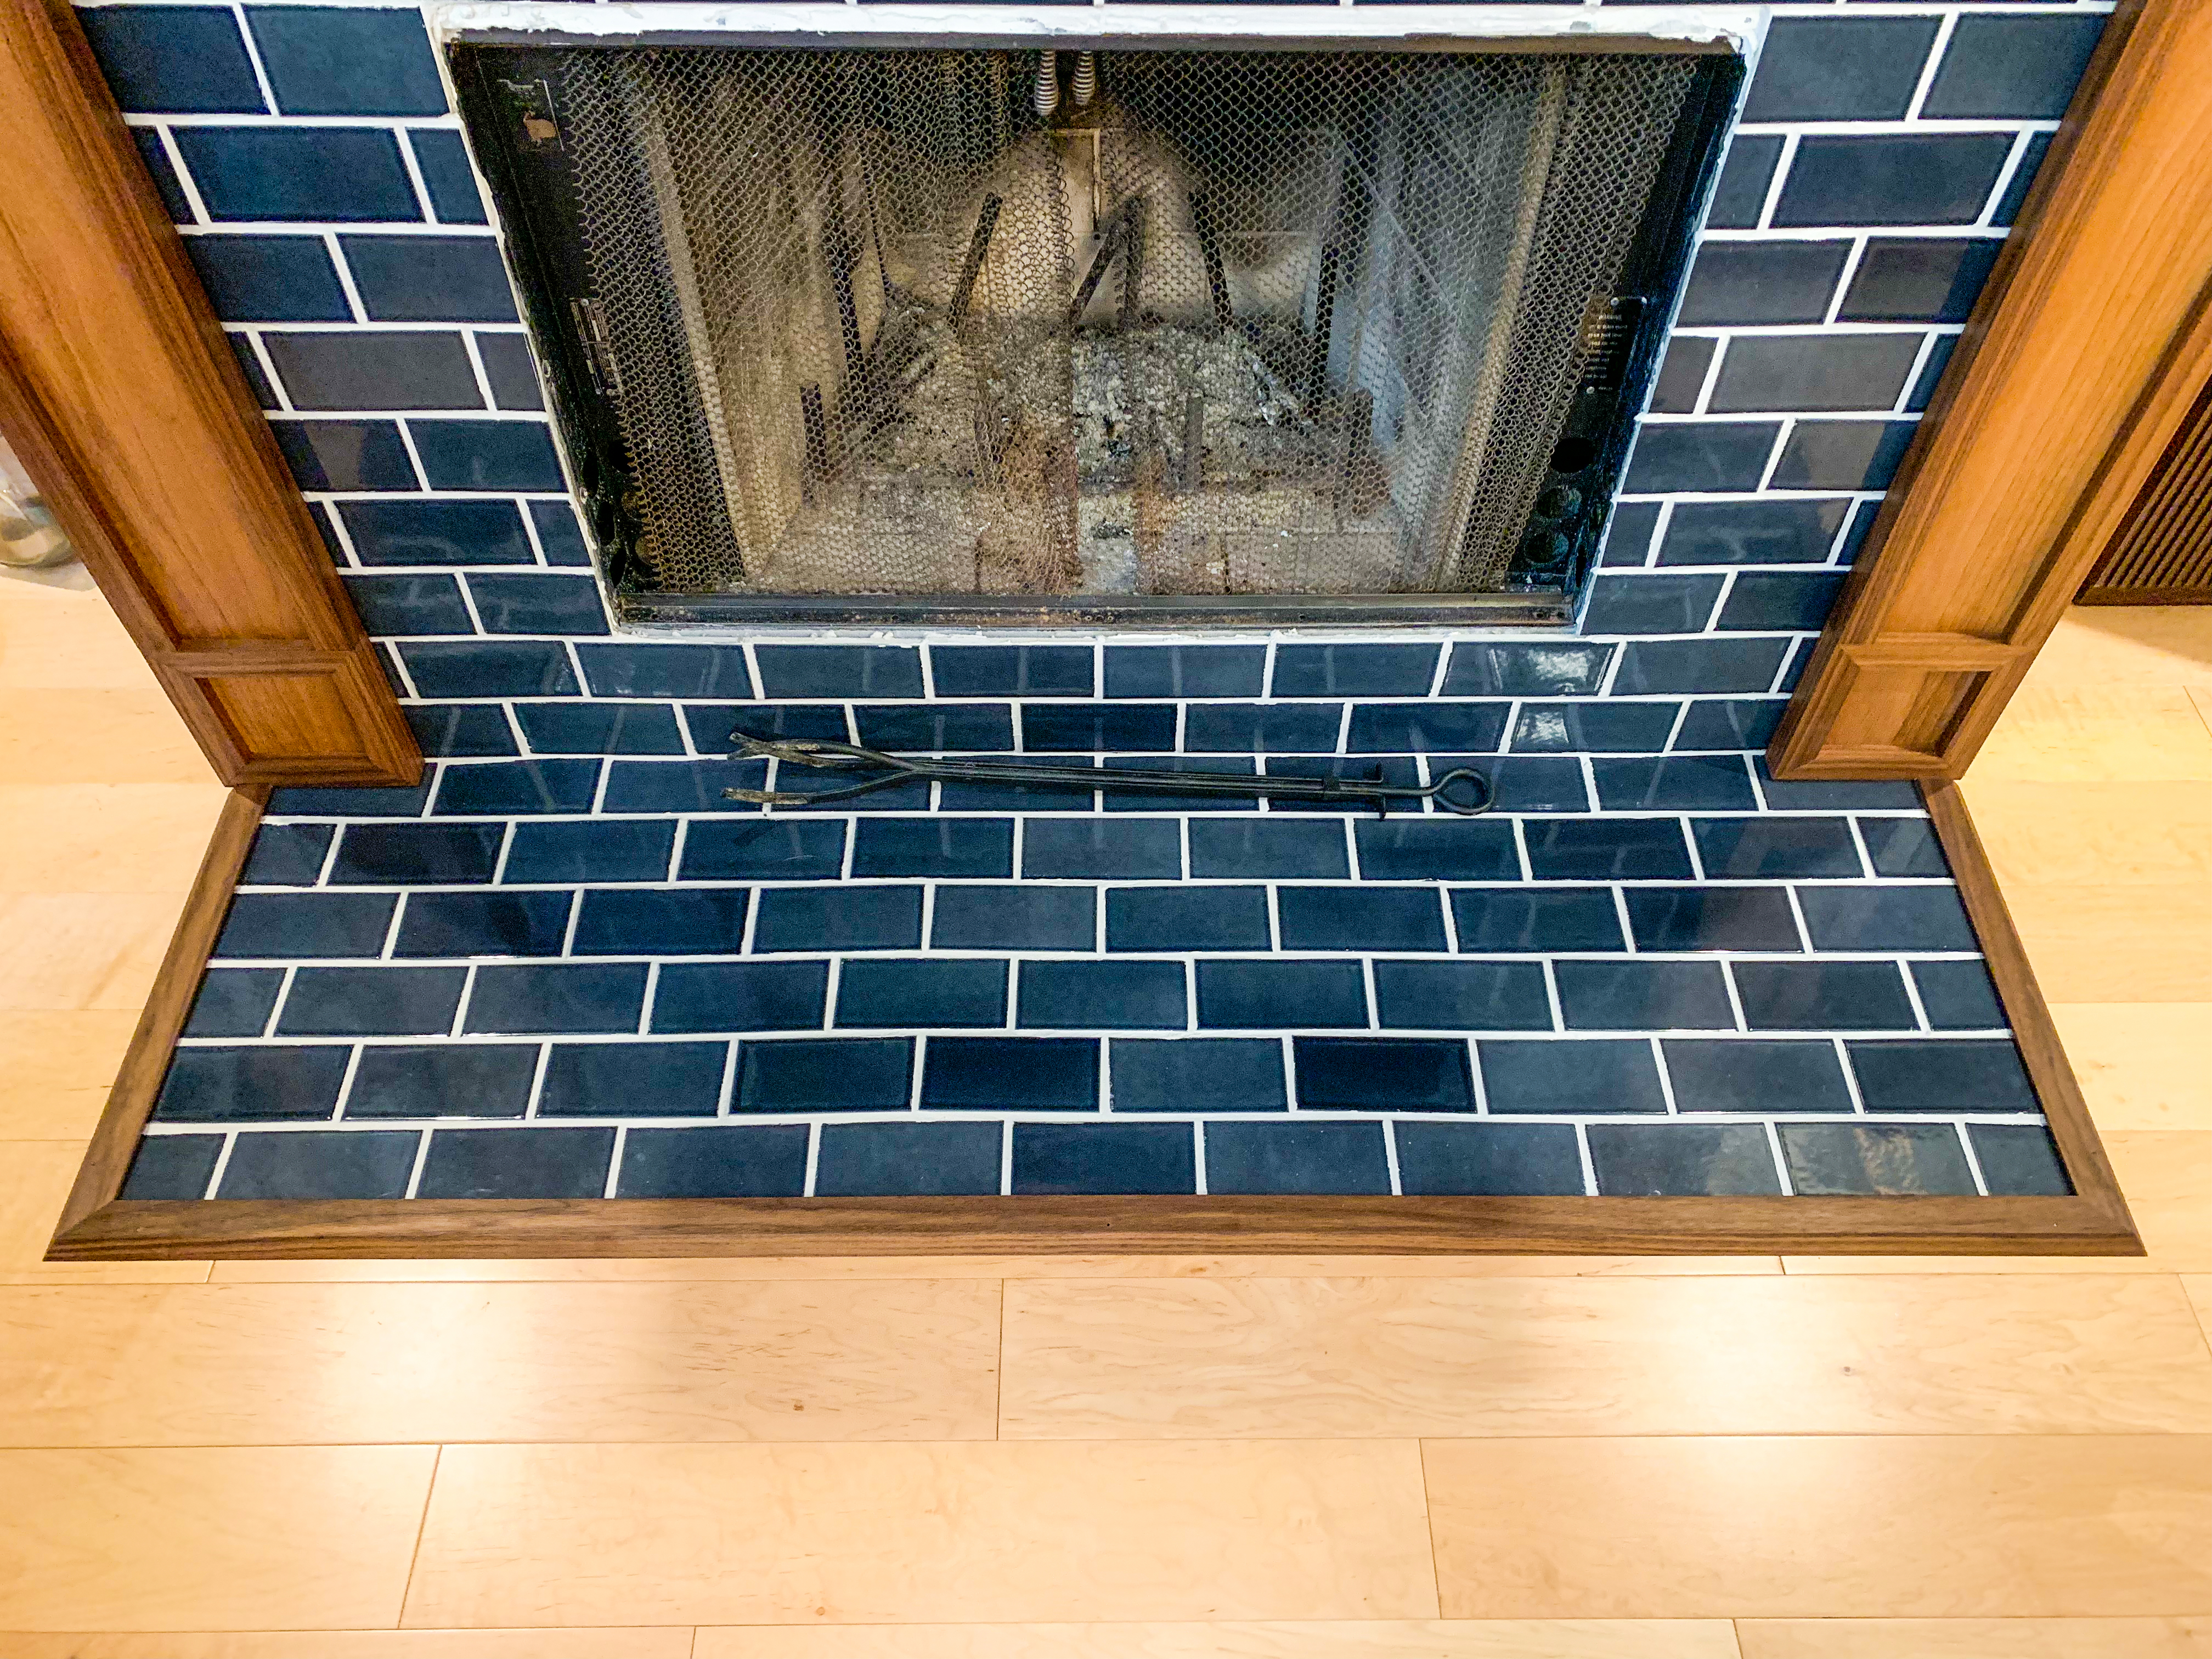
We decided to tile over the old tile instead of ripping it out and redoing the sheetrock. The new mantel design conceals the corners, so all we had to do was fill in the exposed areas. My wife and I managed to do the entire tile process (our first tiling job ever) in a few hours.
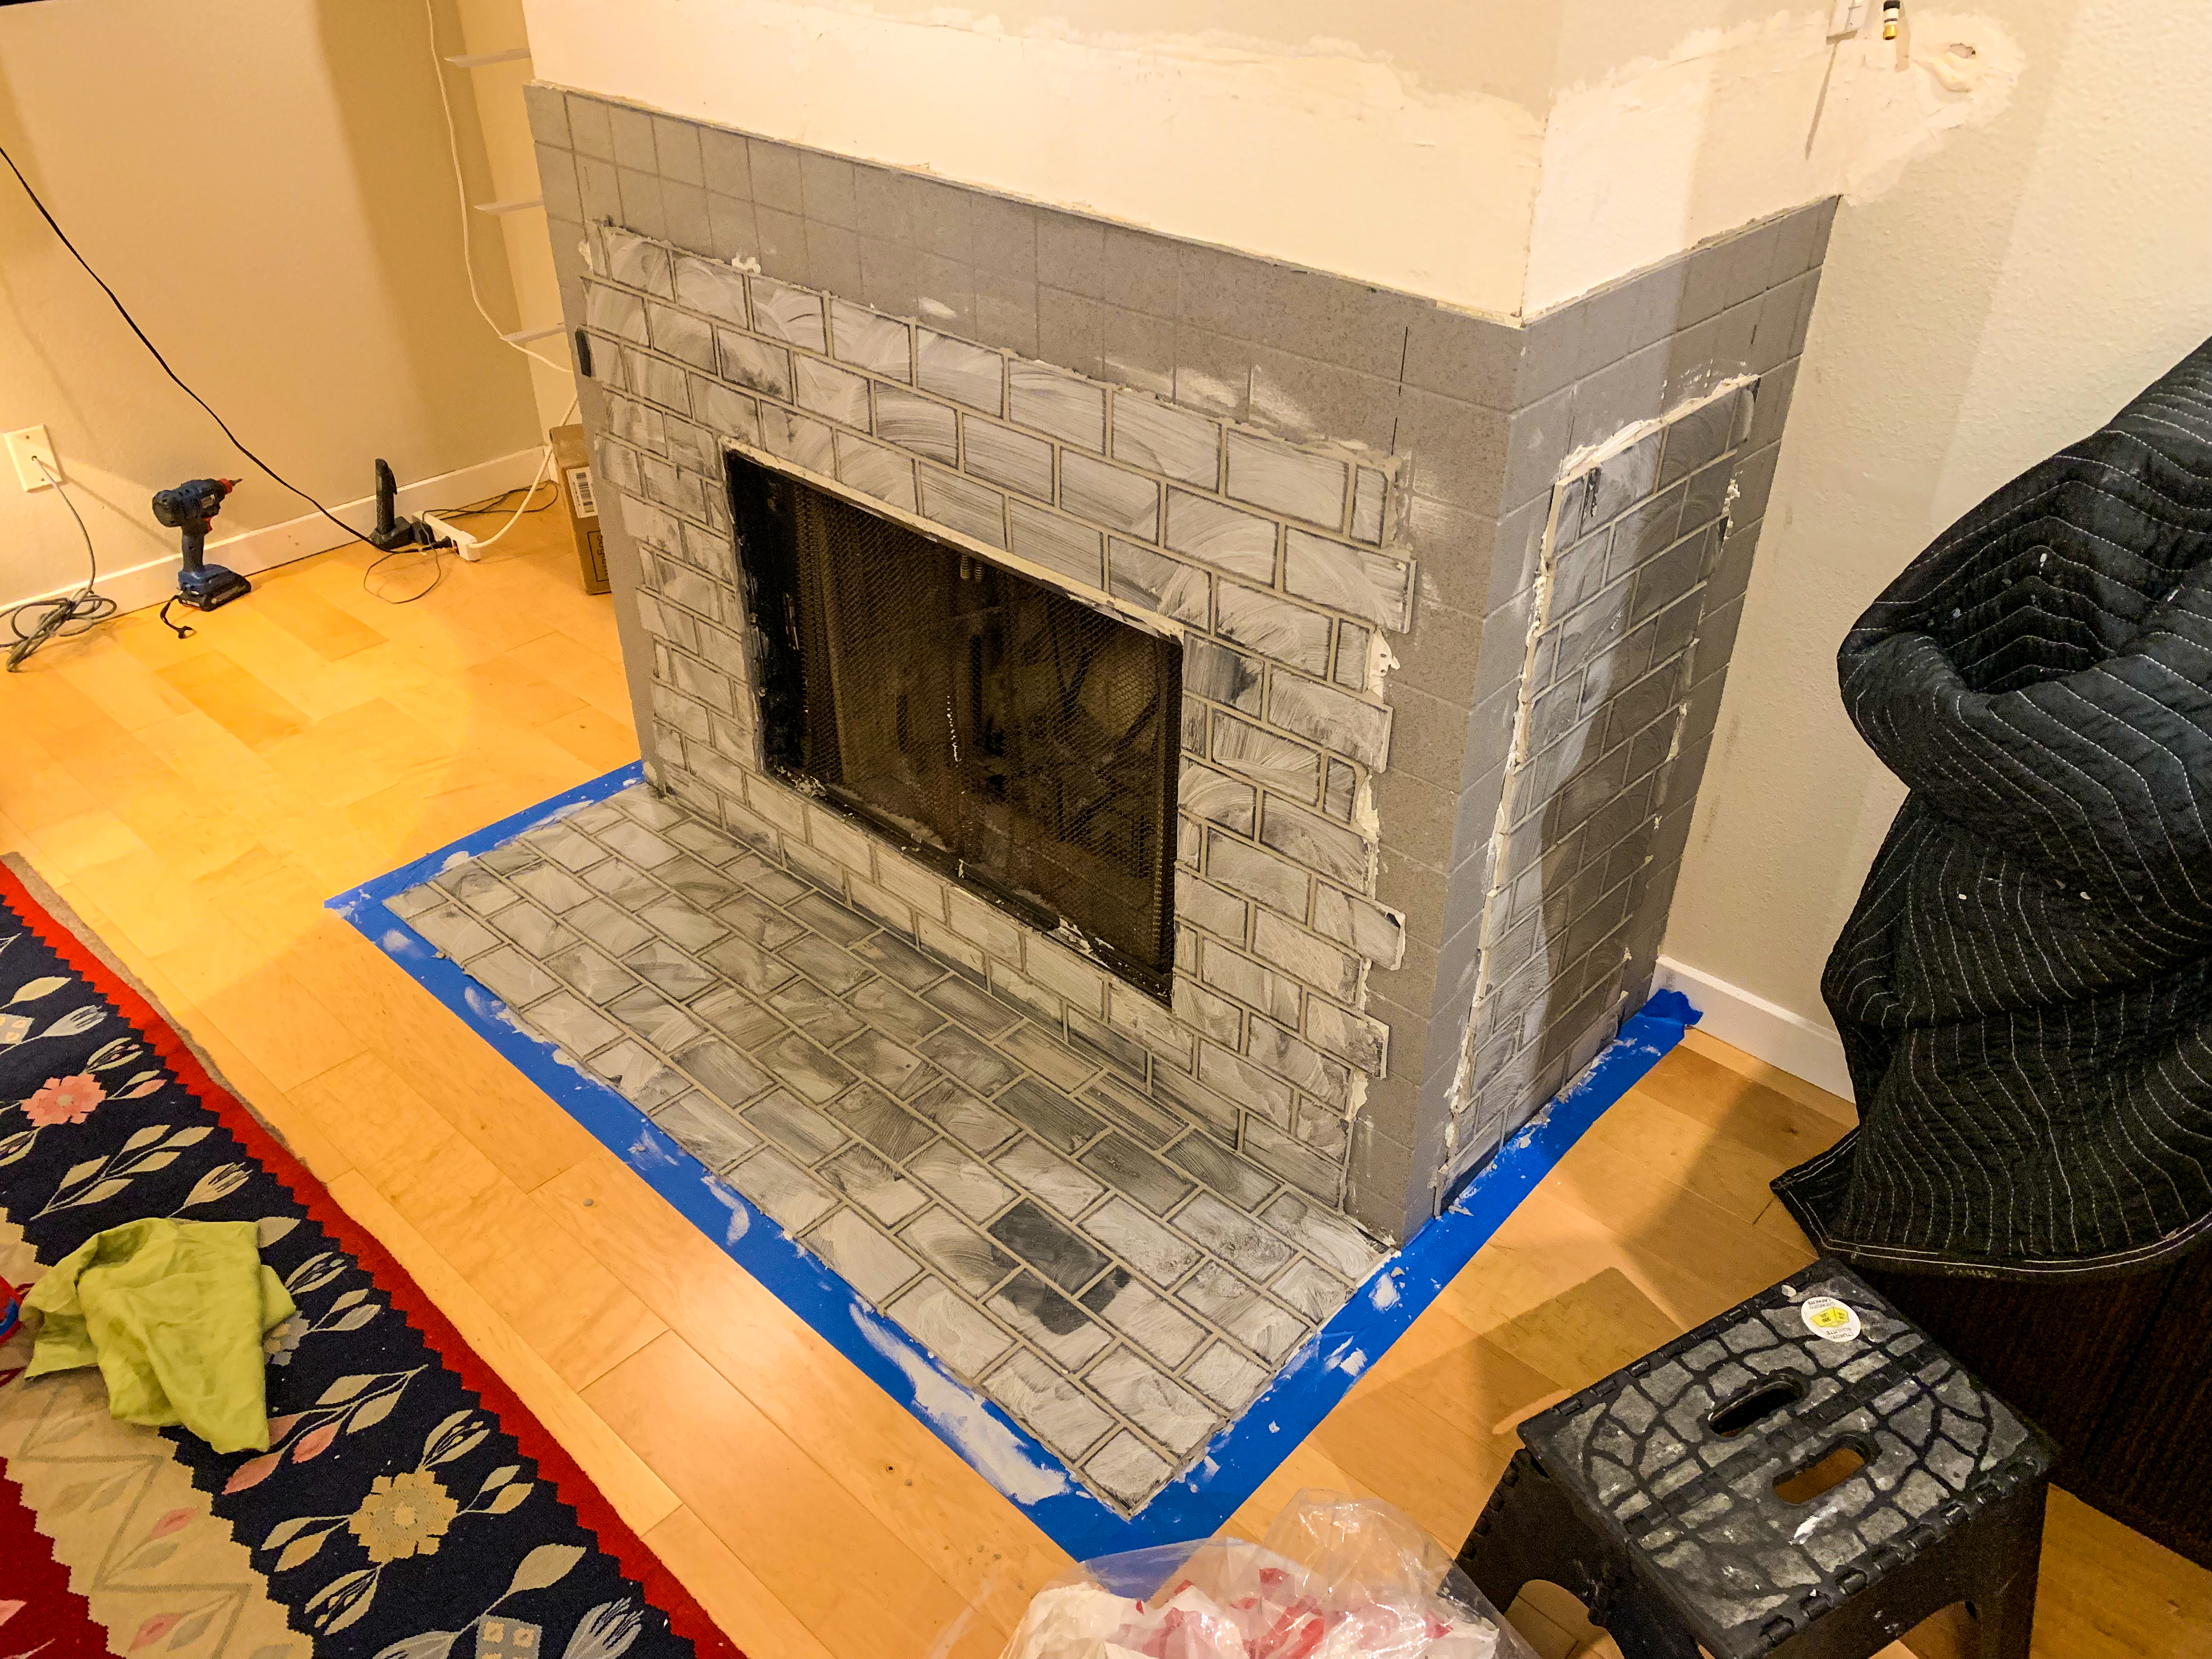
We smooshed on the grout…
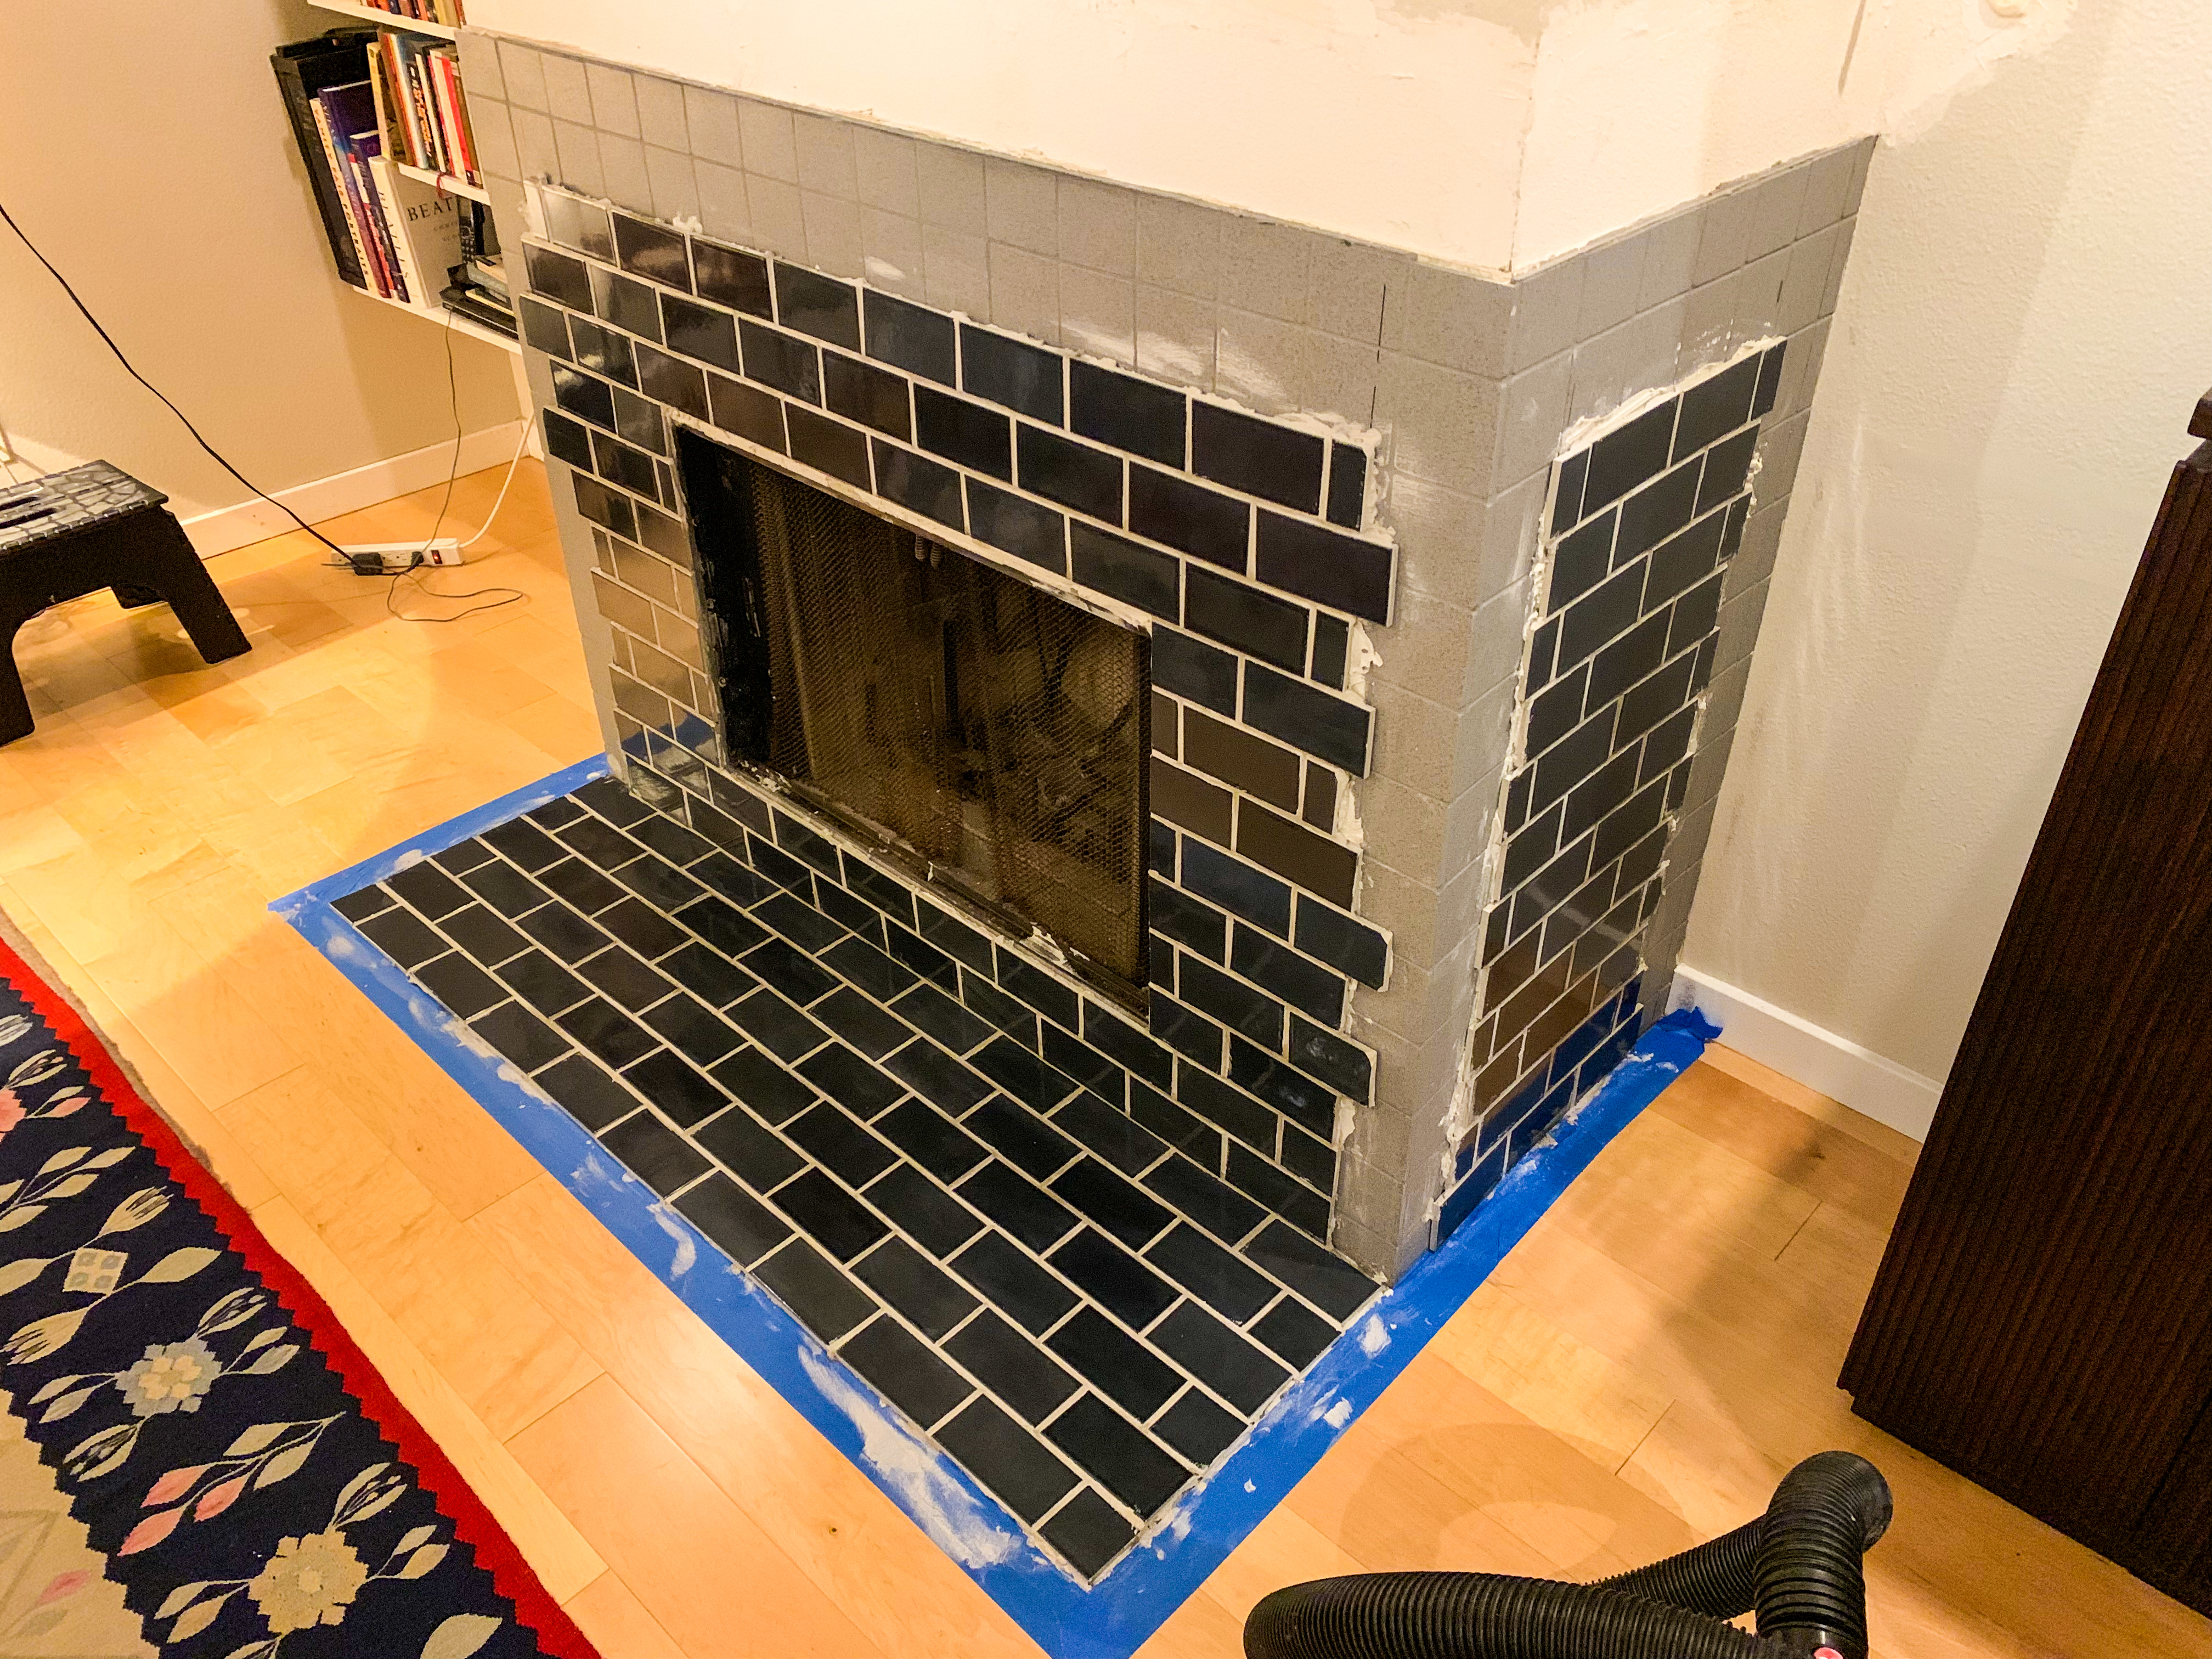
…and washed off the excess.
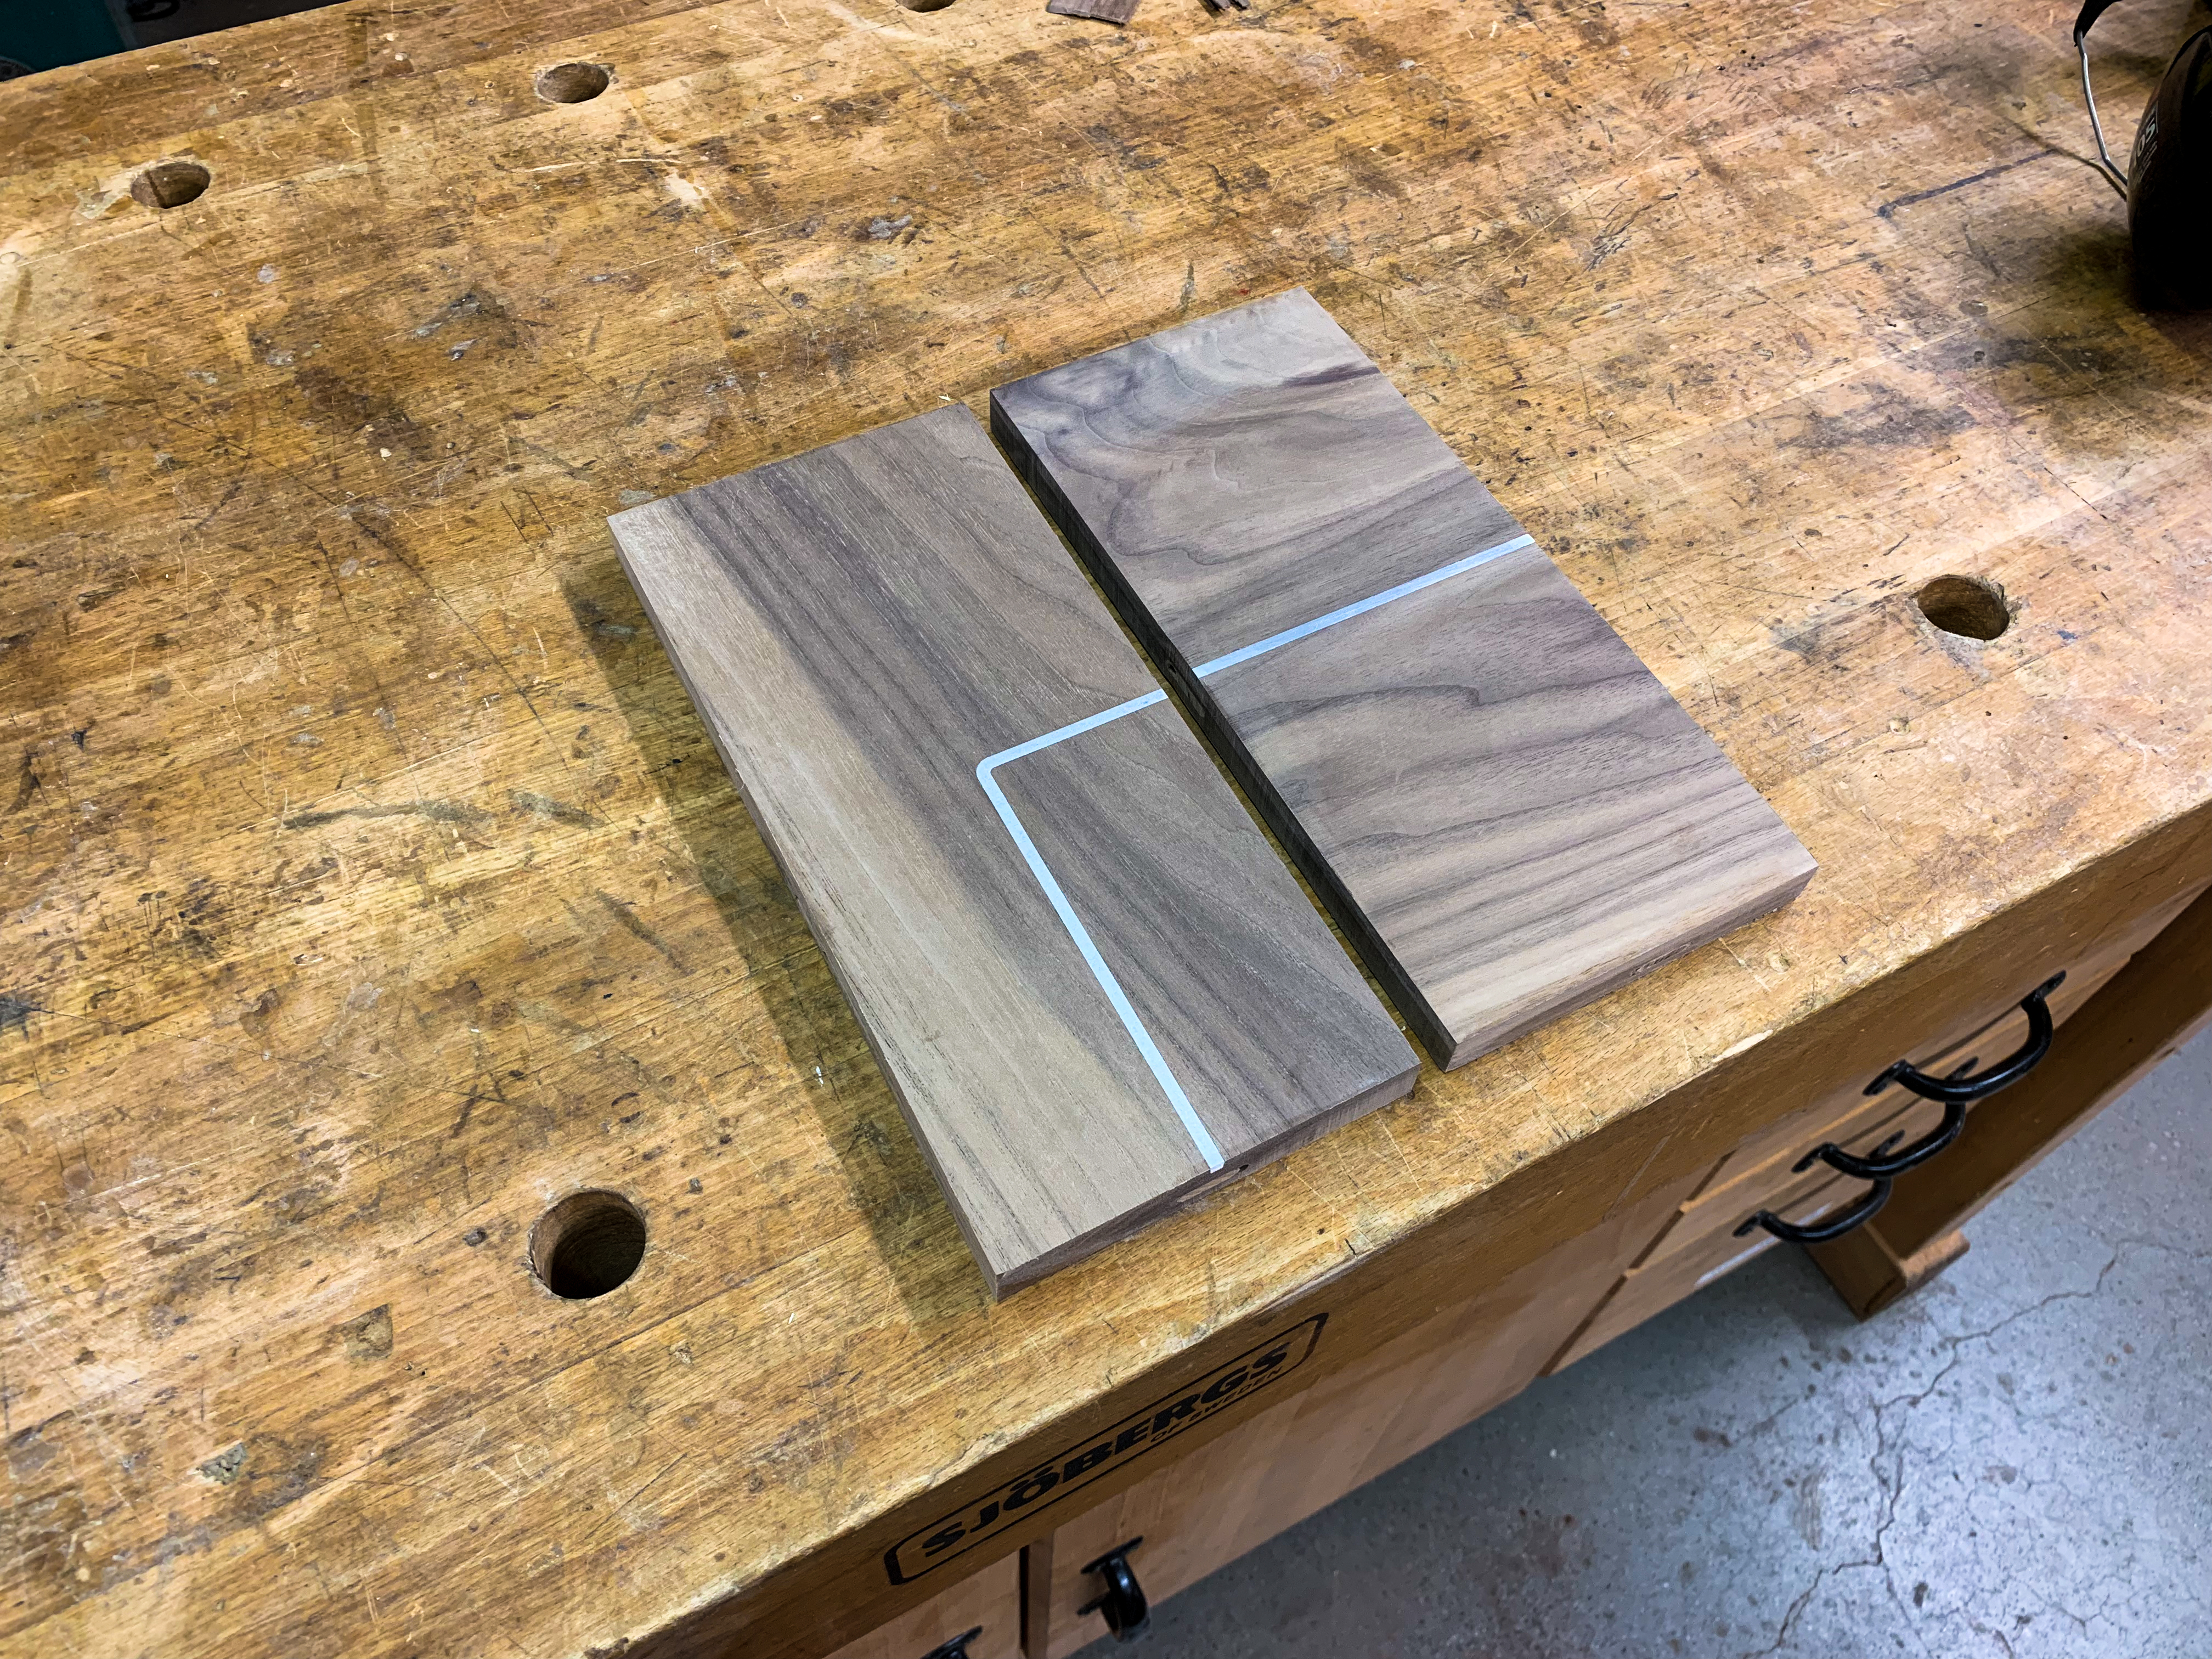
Meanwhile in the workshop I started doing some tests to understand how the inlay could work. Here I tried out a few different radii of curvature in the hummingbird.
I wound up making an entire panel from start to finish to make sure the inlay would work at every step I had in mind.
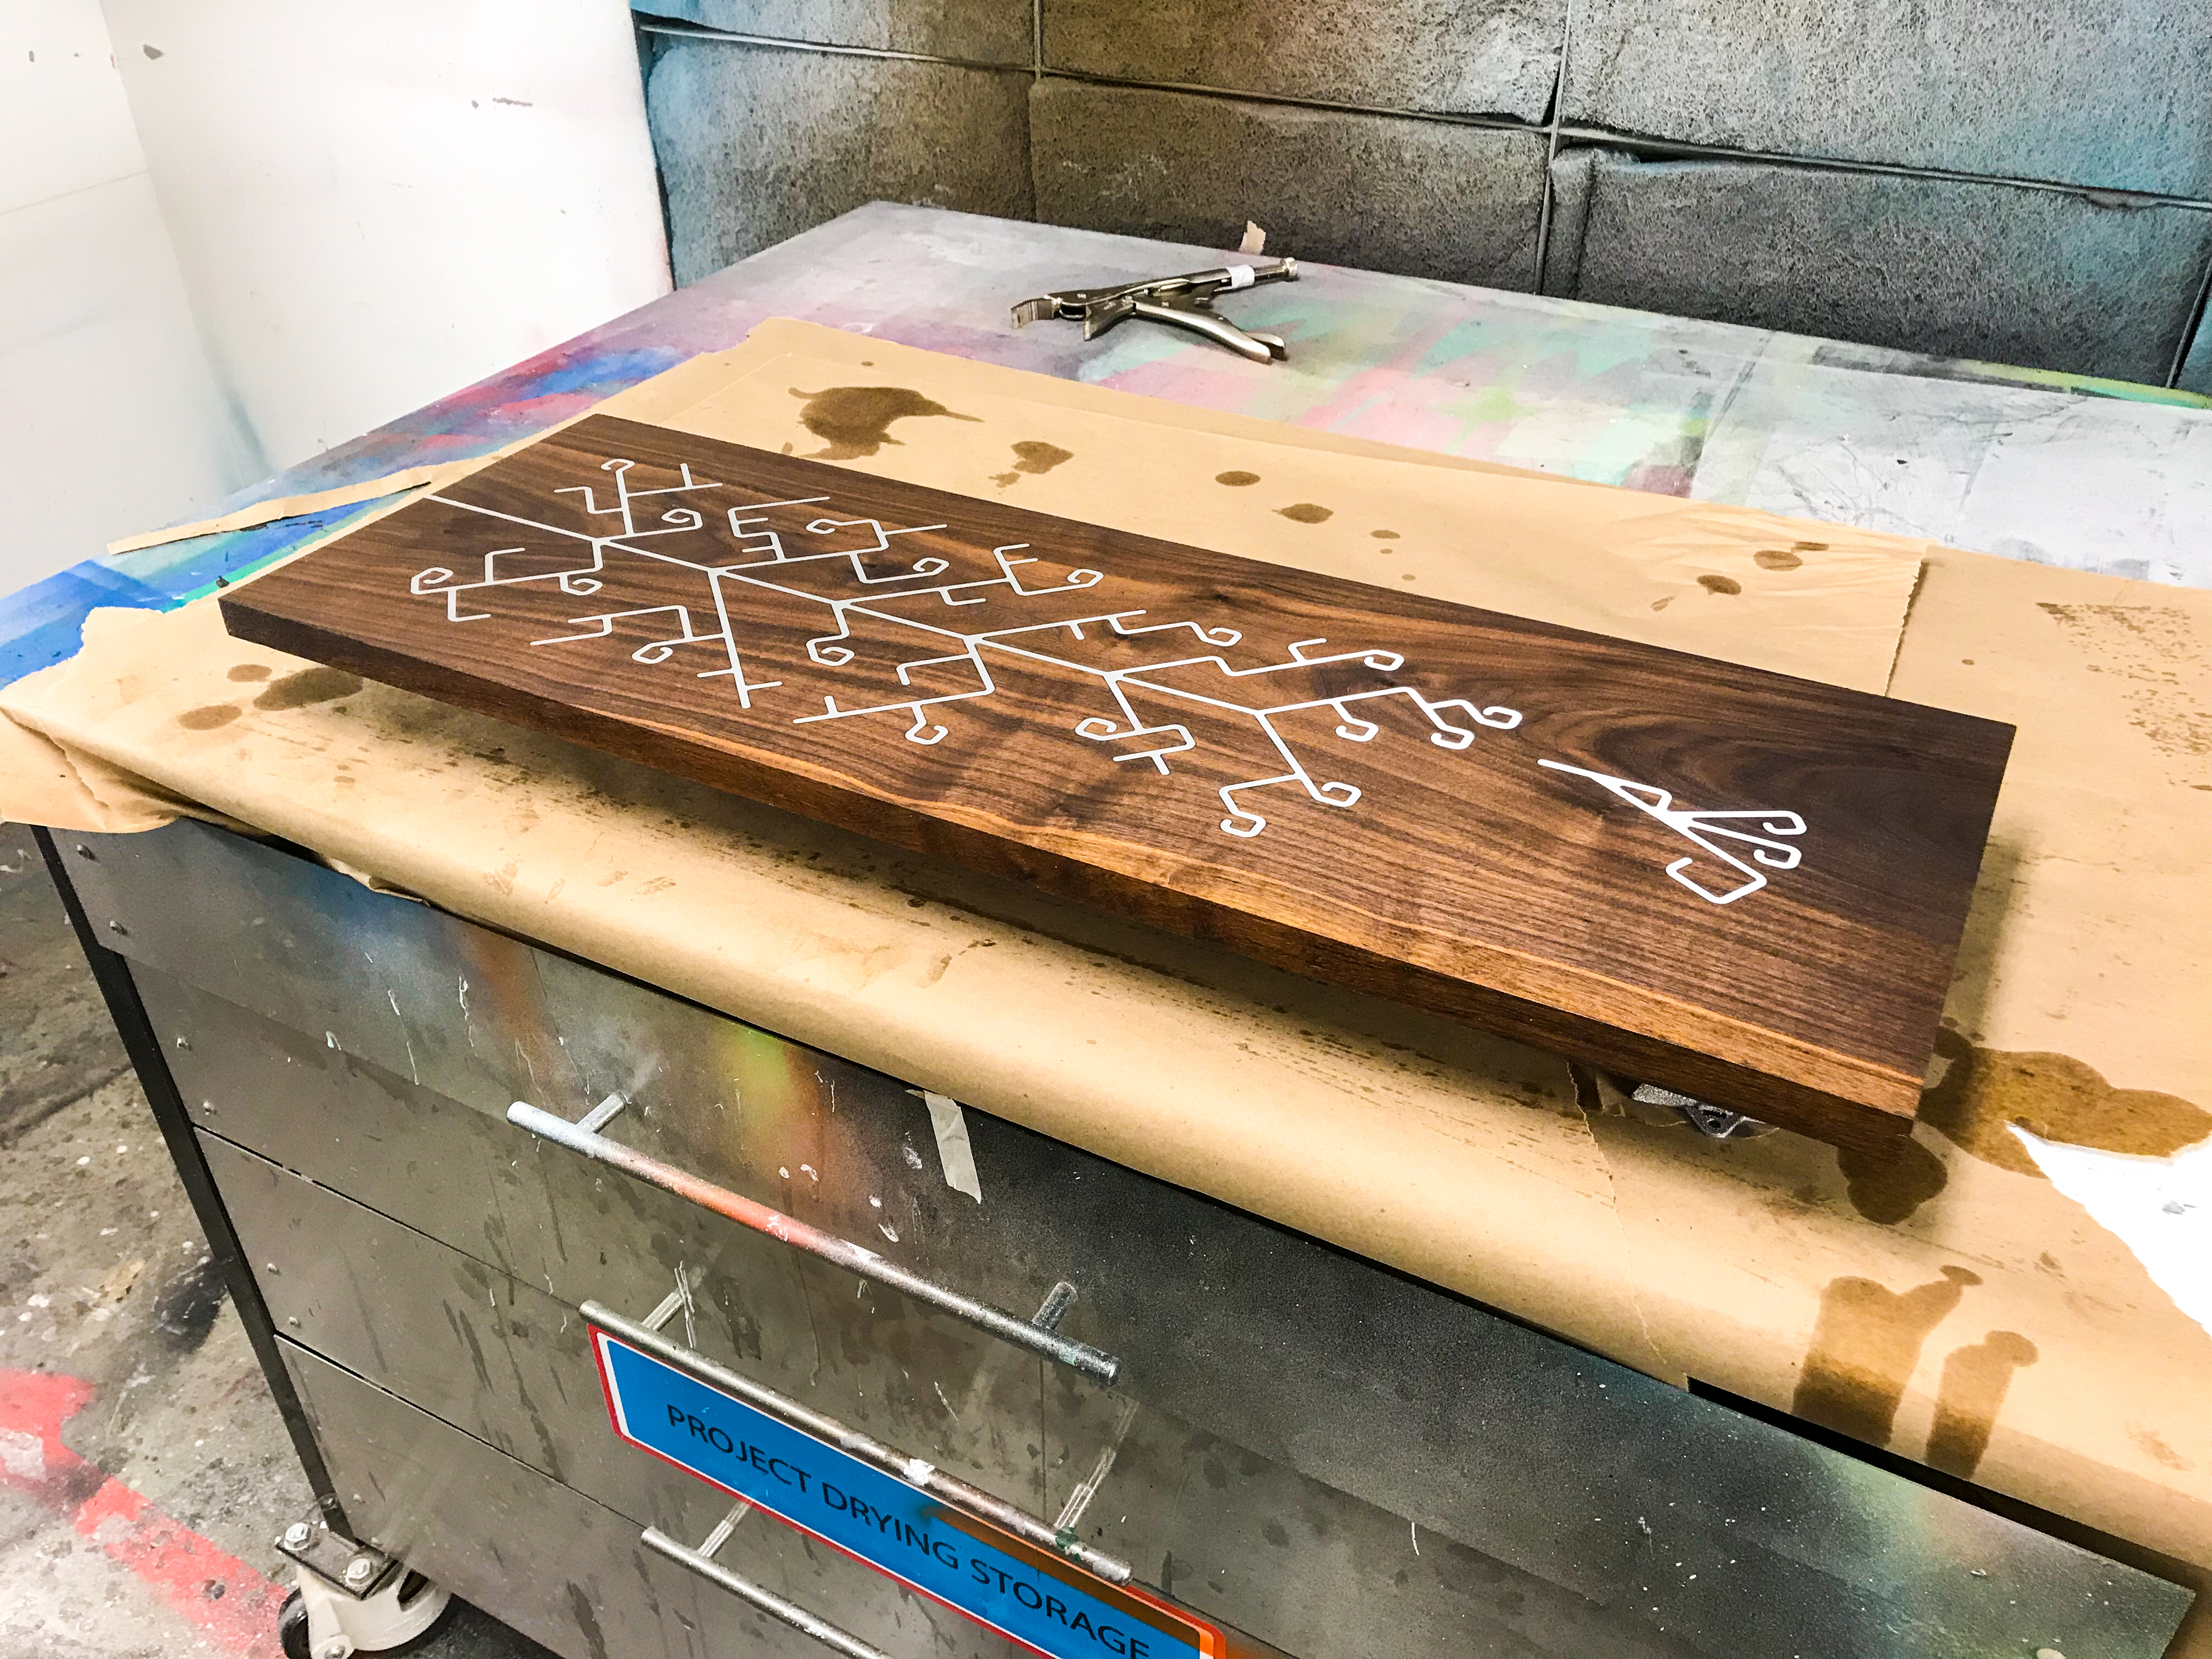
Here’s the lumber for the project after a little initial dimensioning and planing.
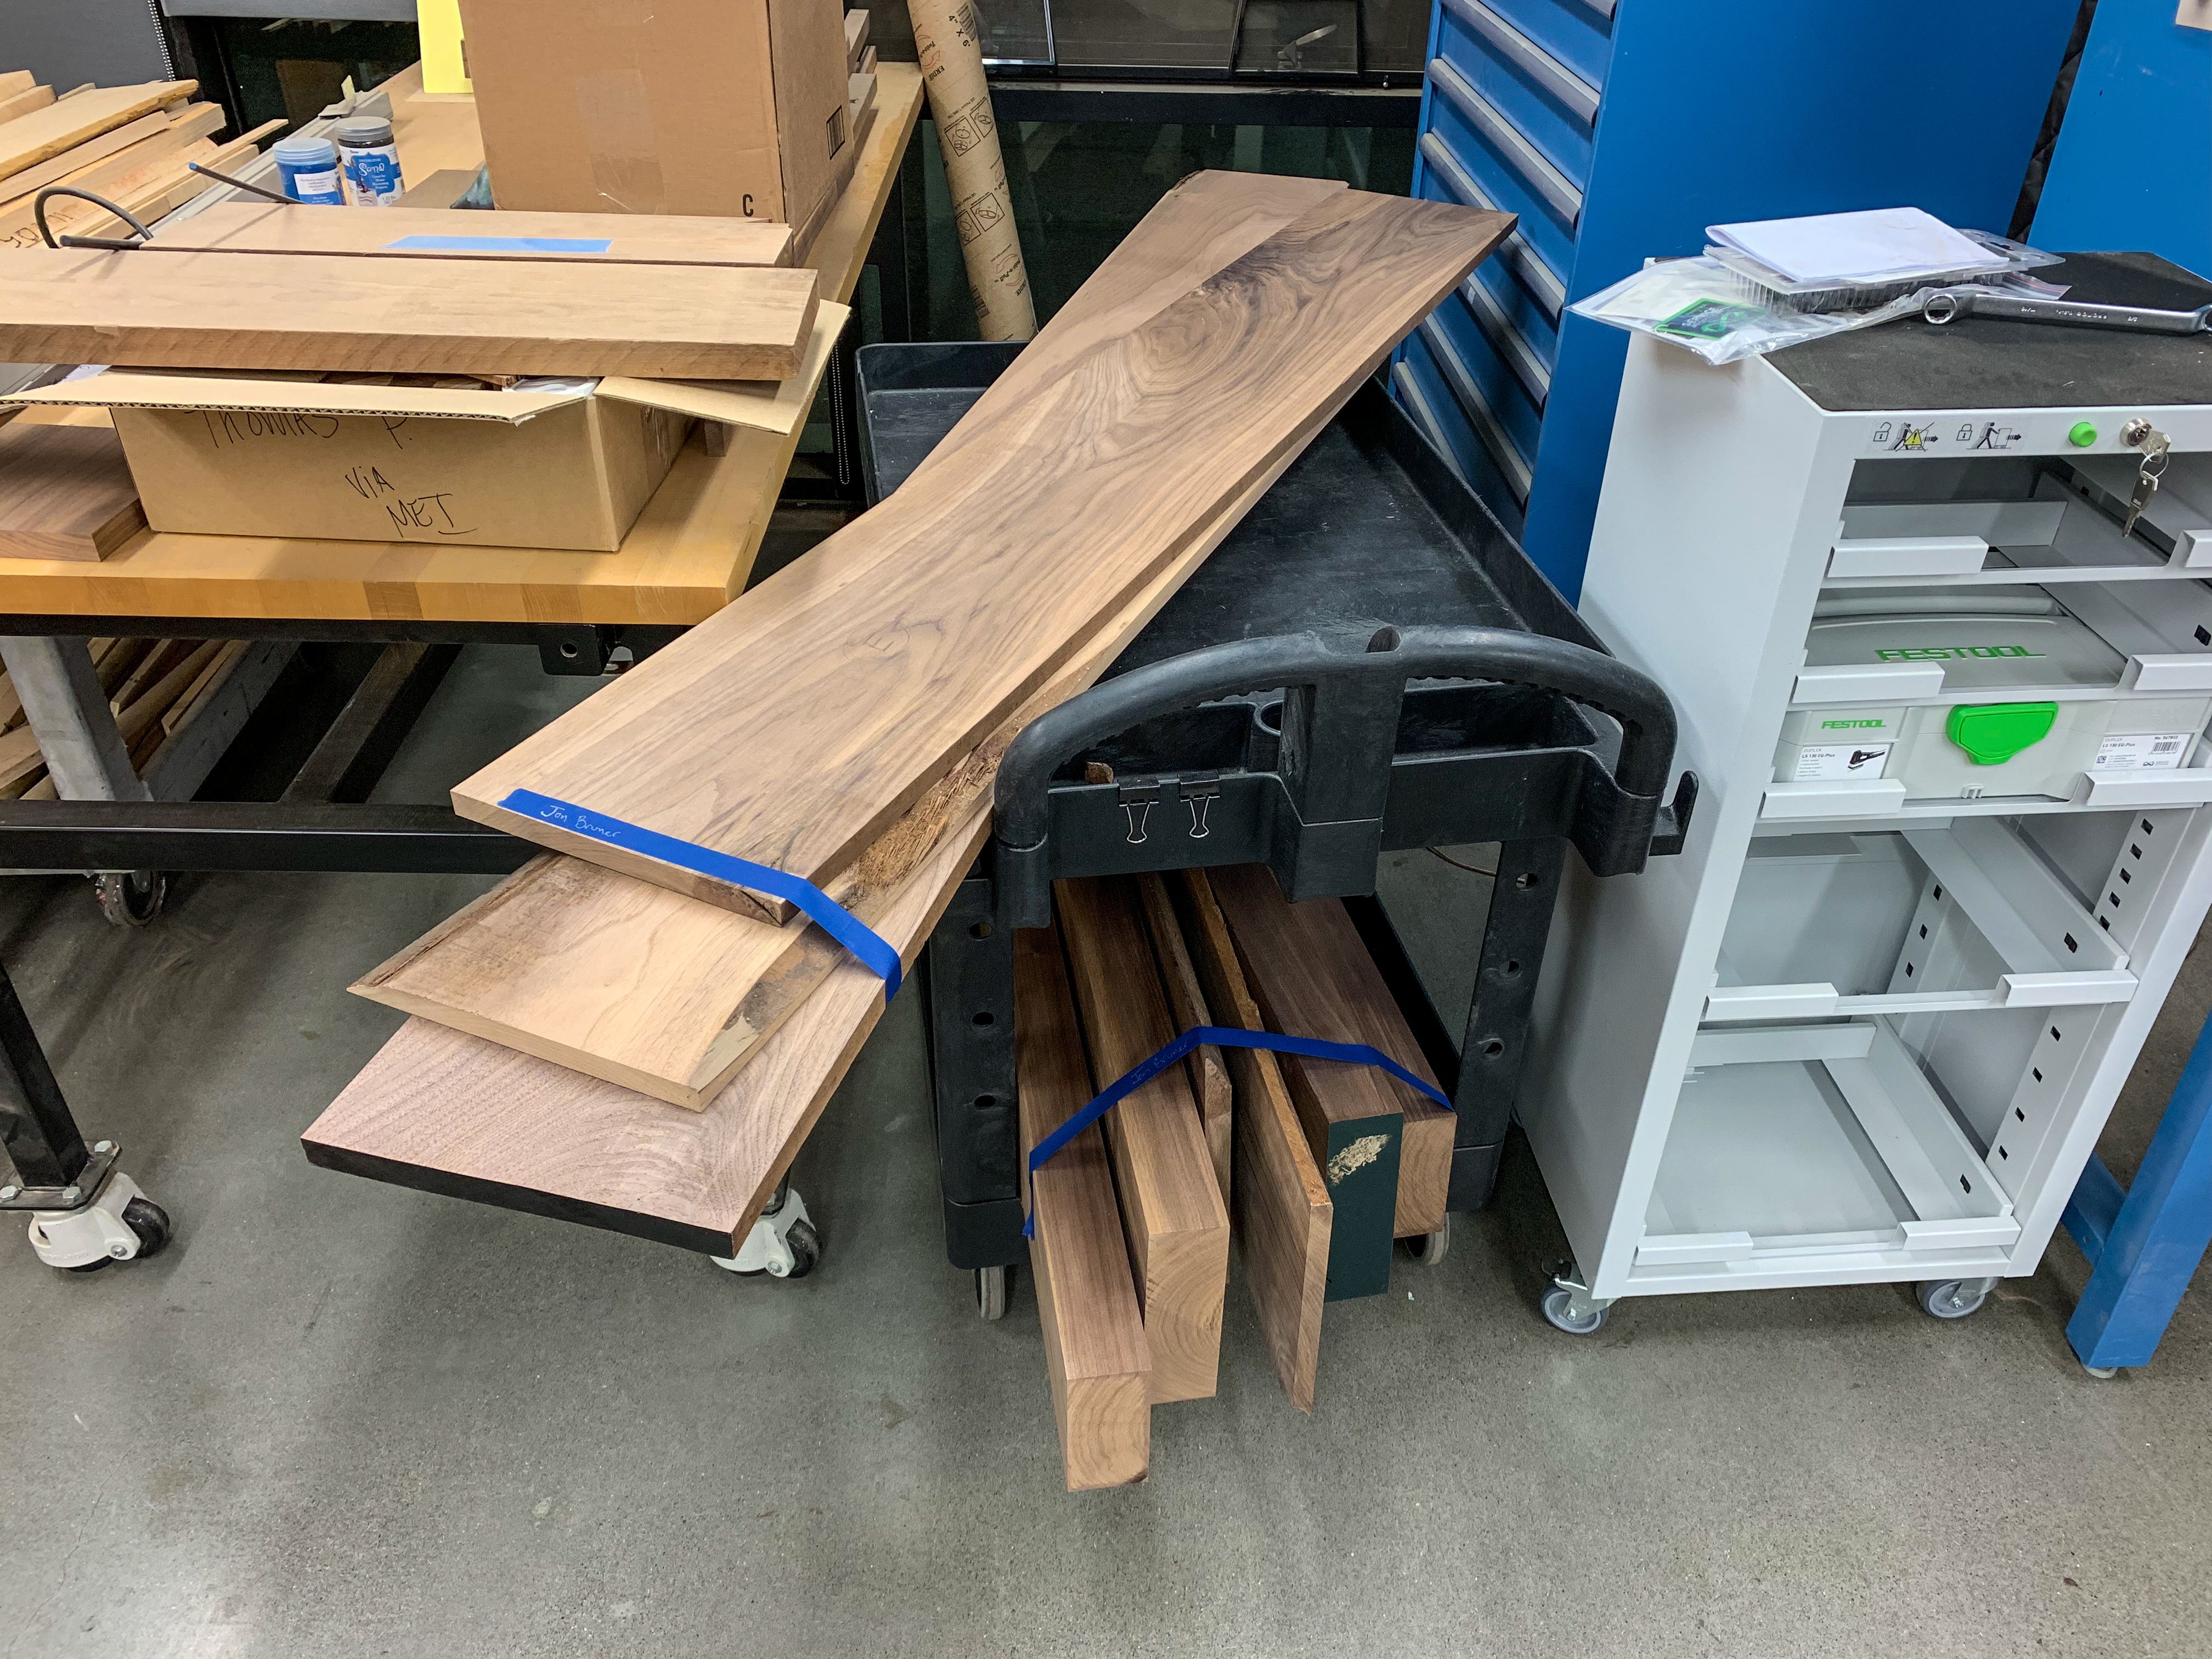
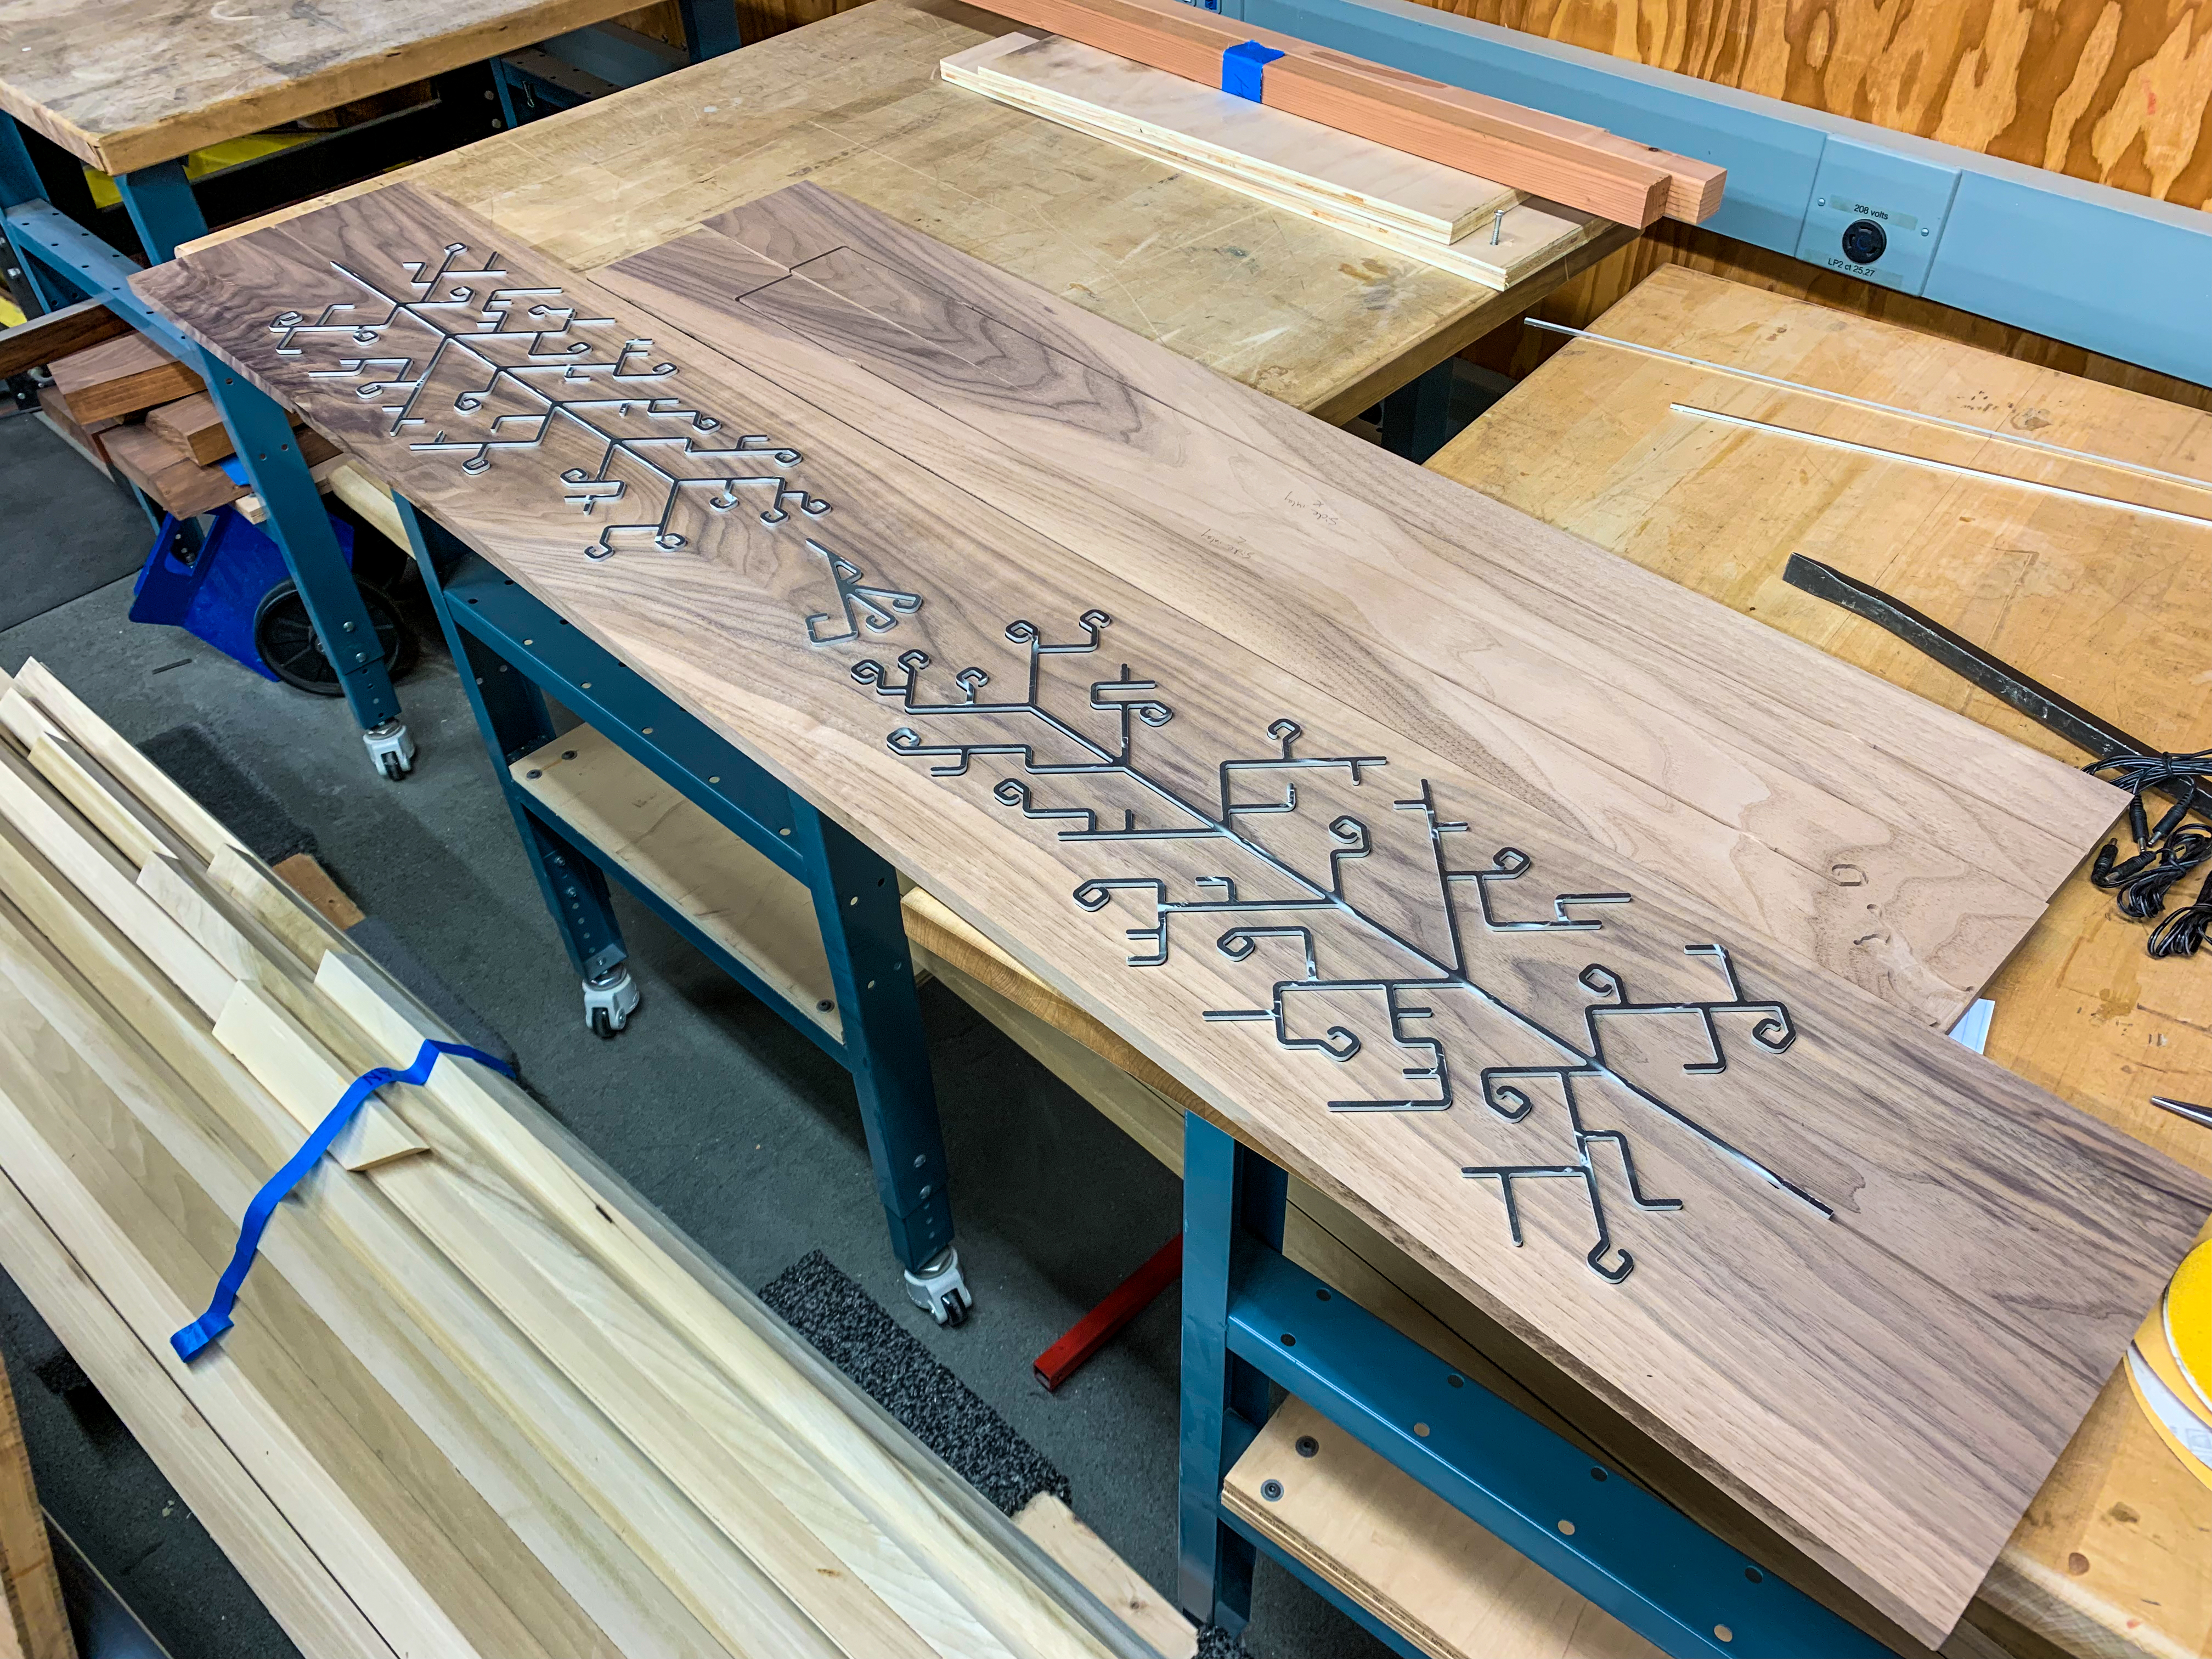
I used the Shopbot at Pier 9 to route the inlay channels into the walnut. Here’s a time-lapse view.
Here’s the center panel after routing is finished. It helps to have a big Shopbot!
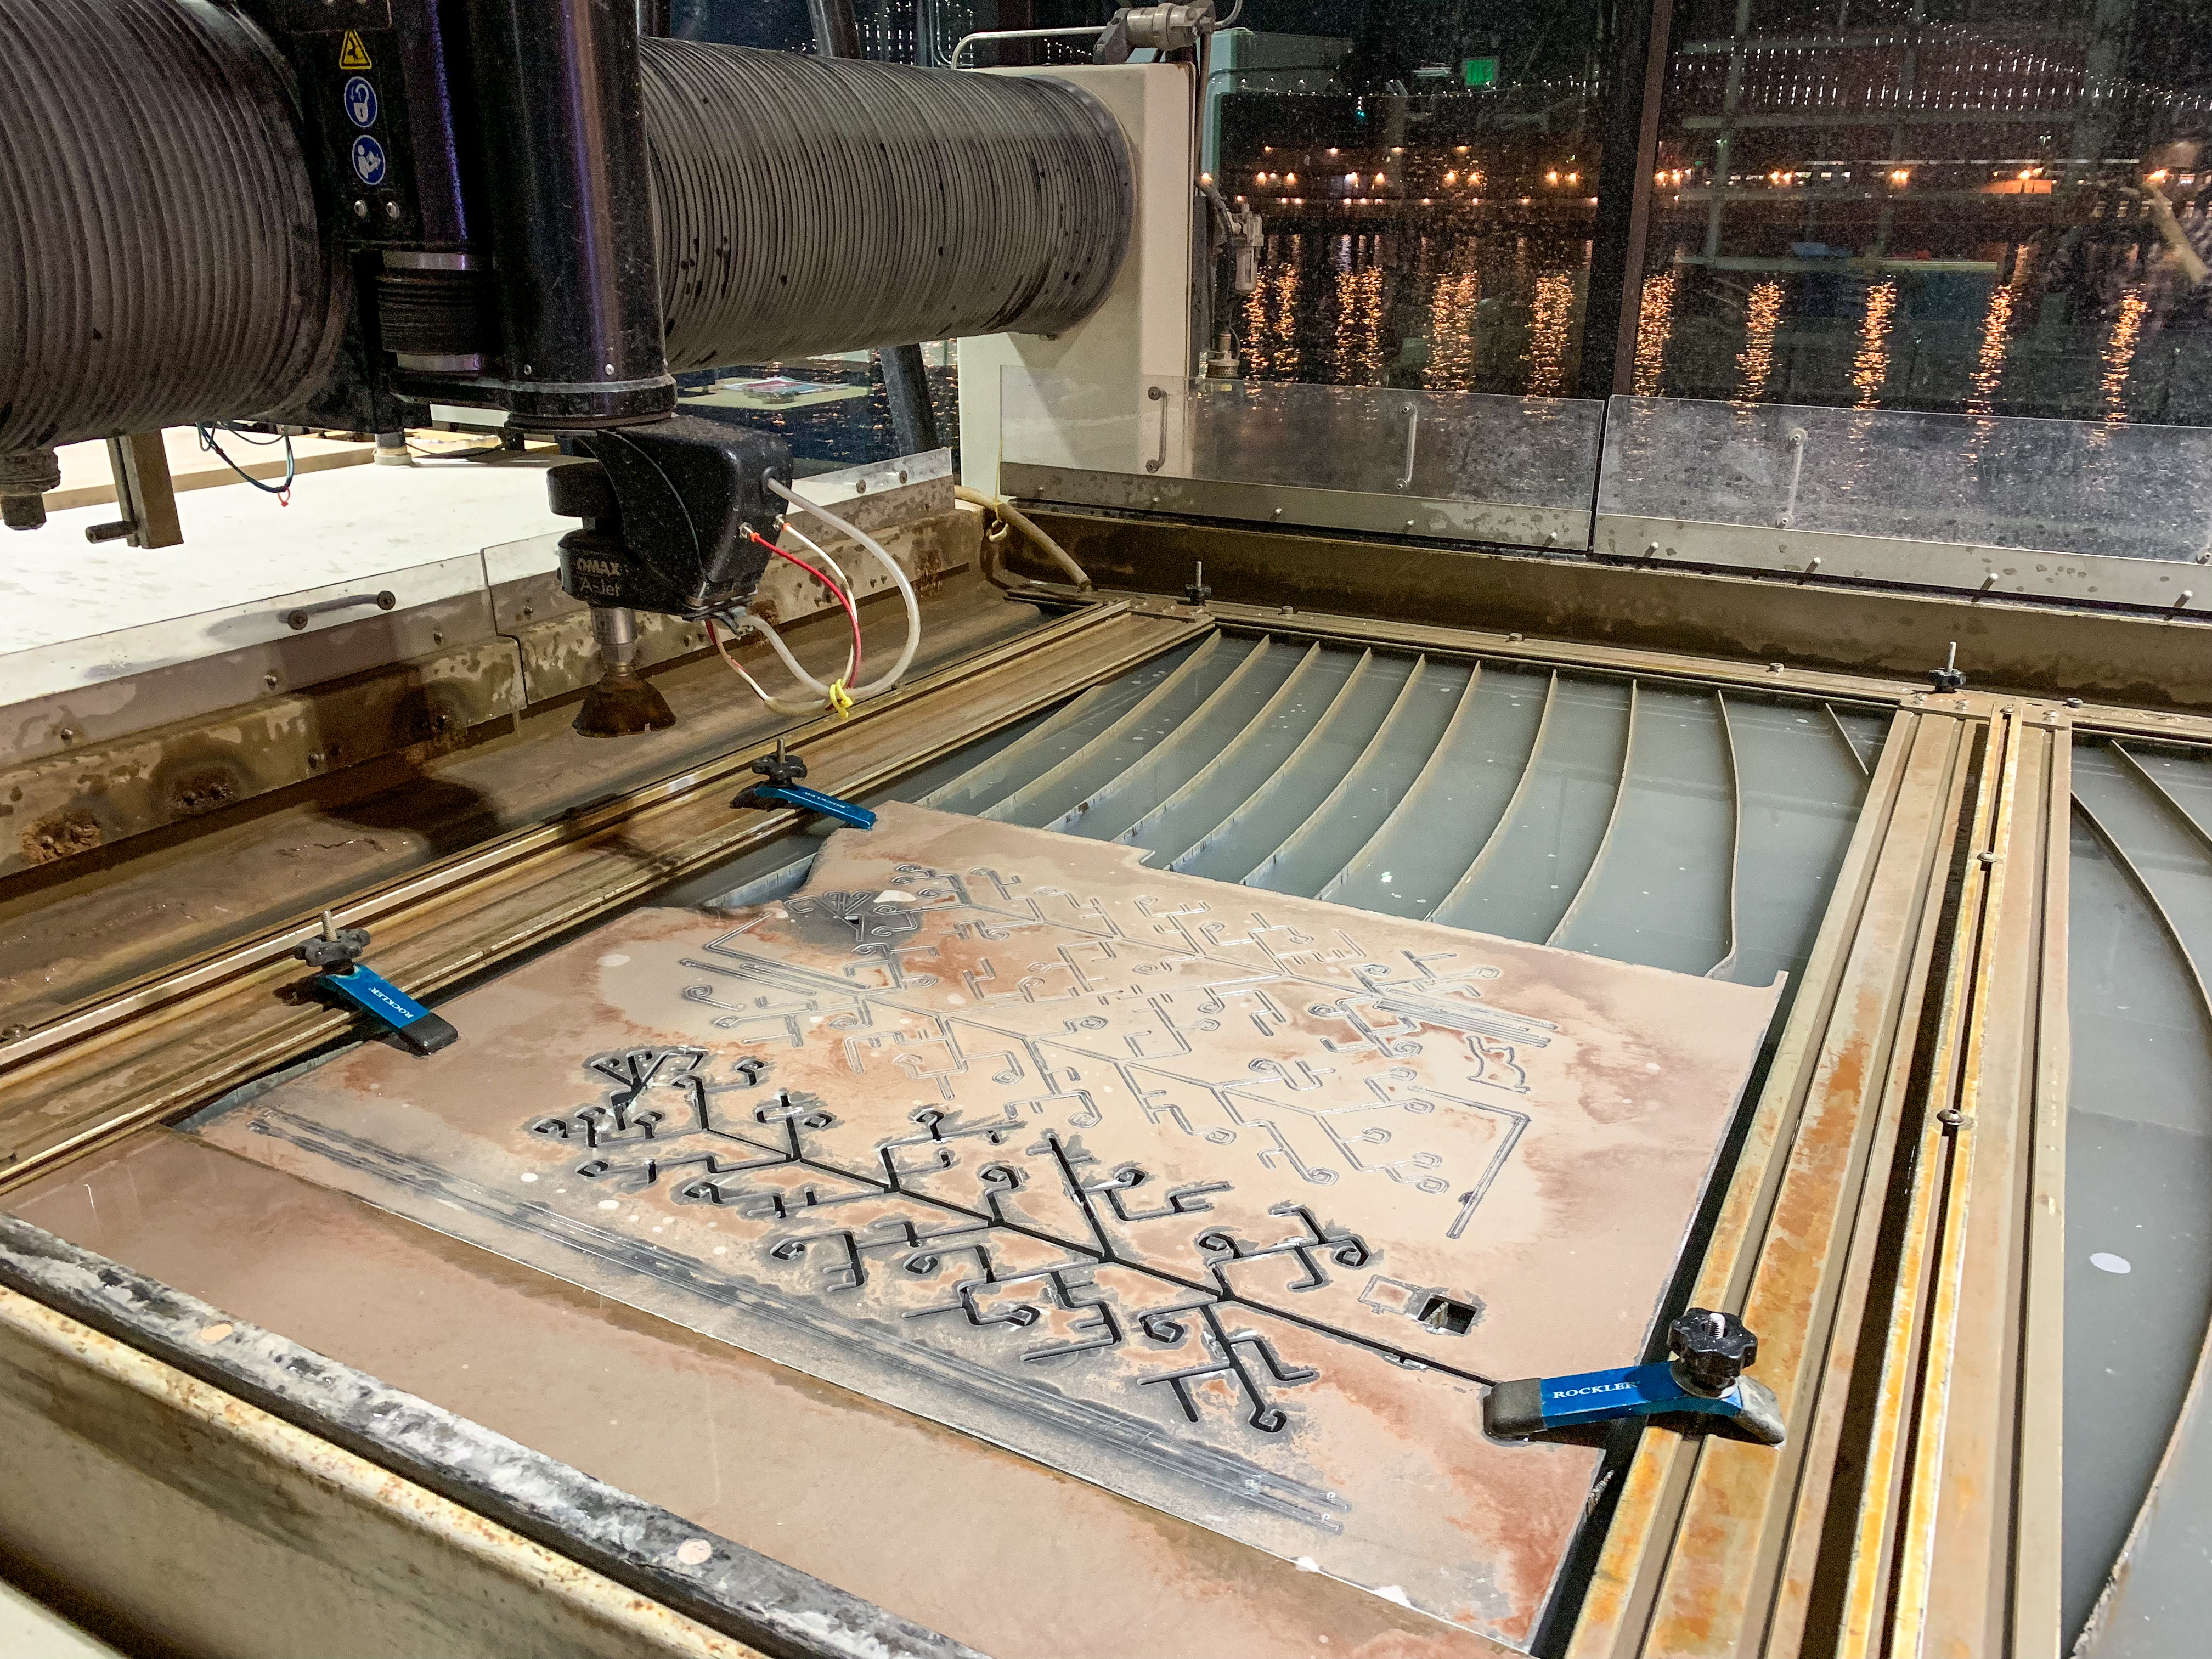
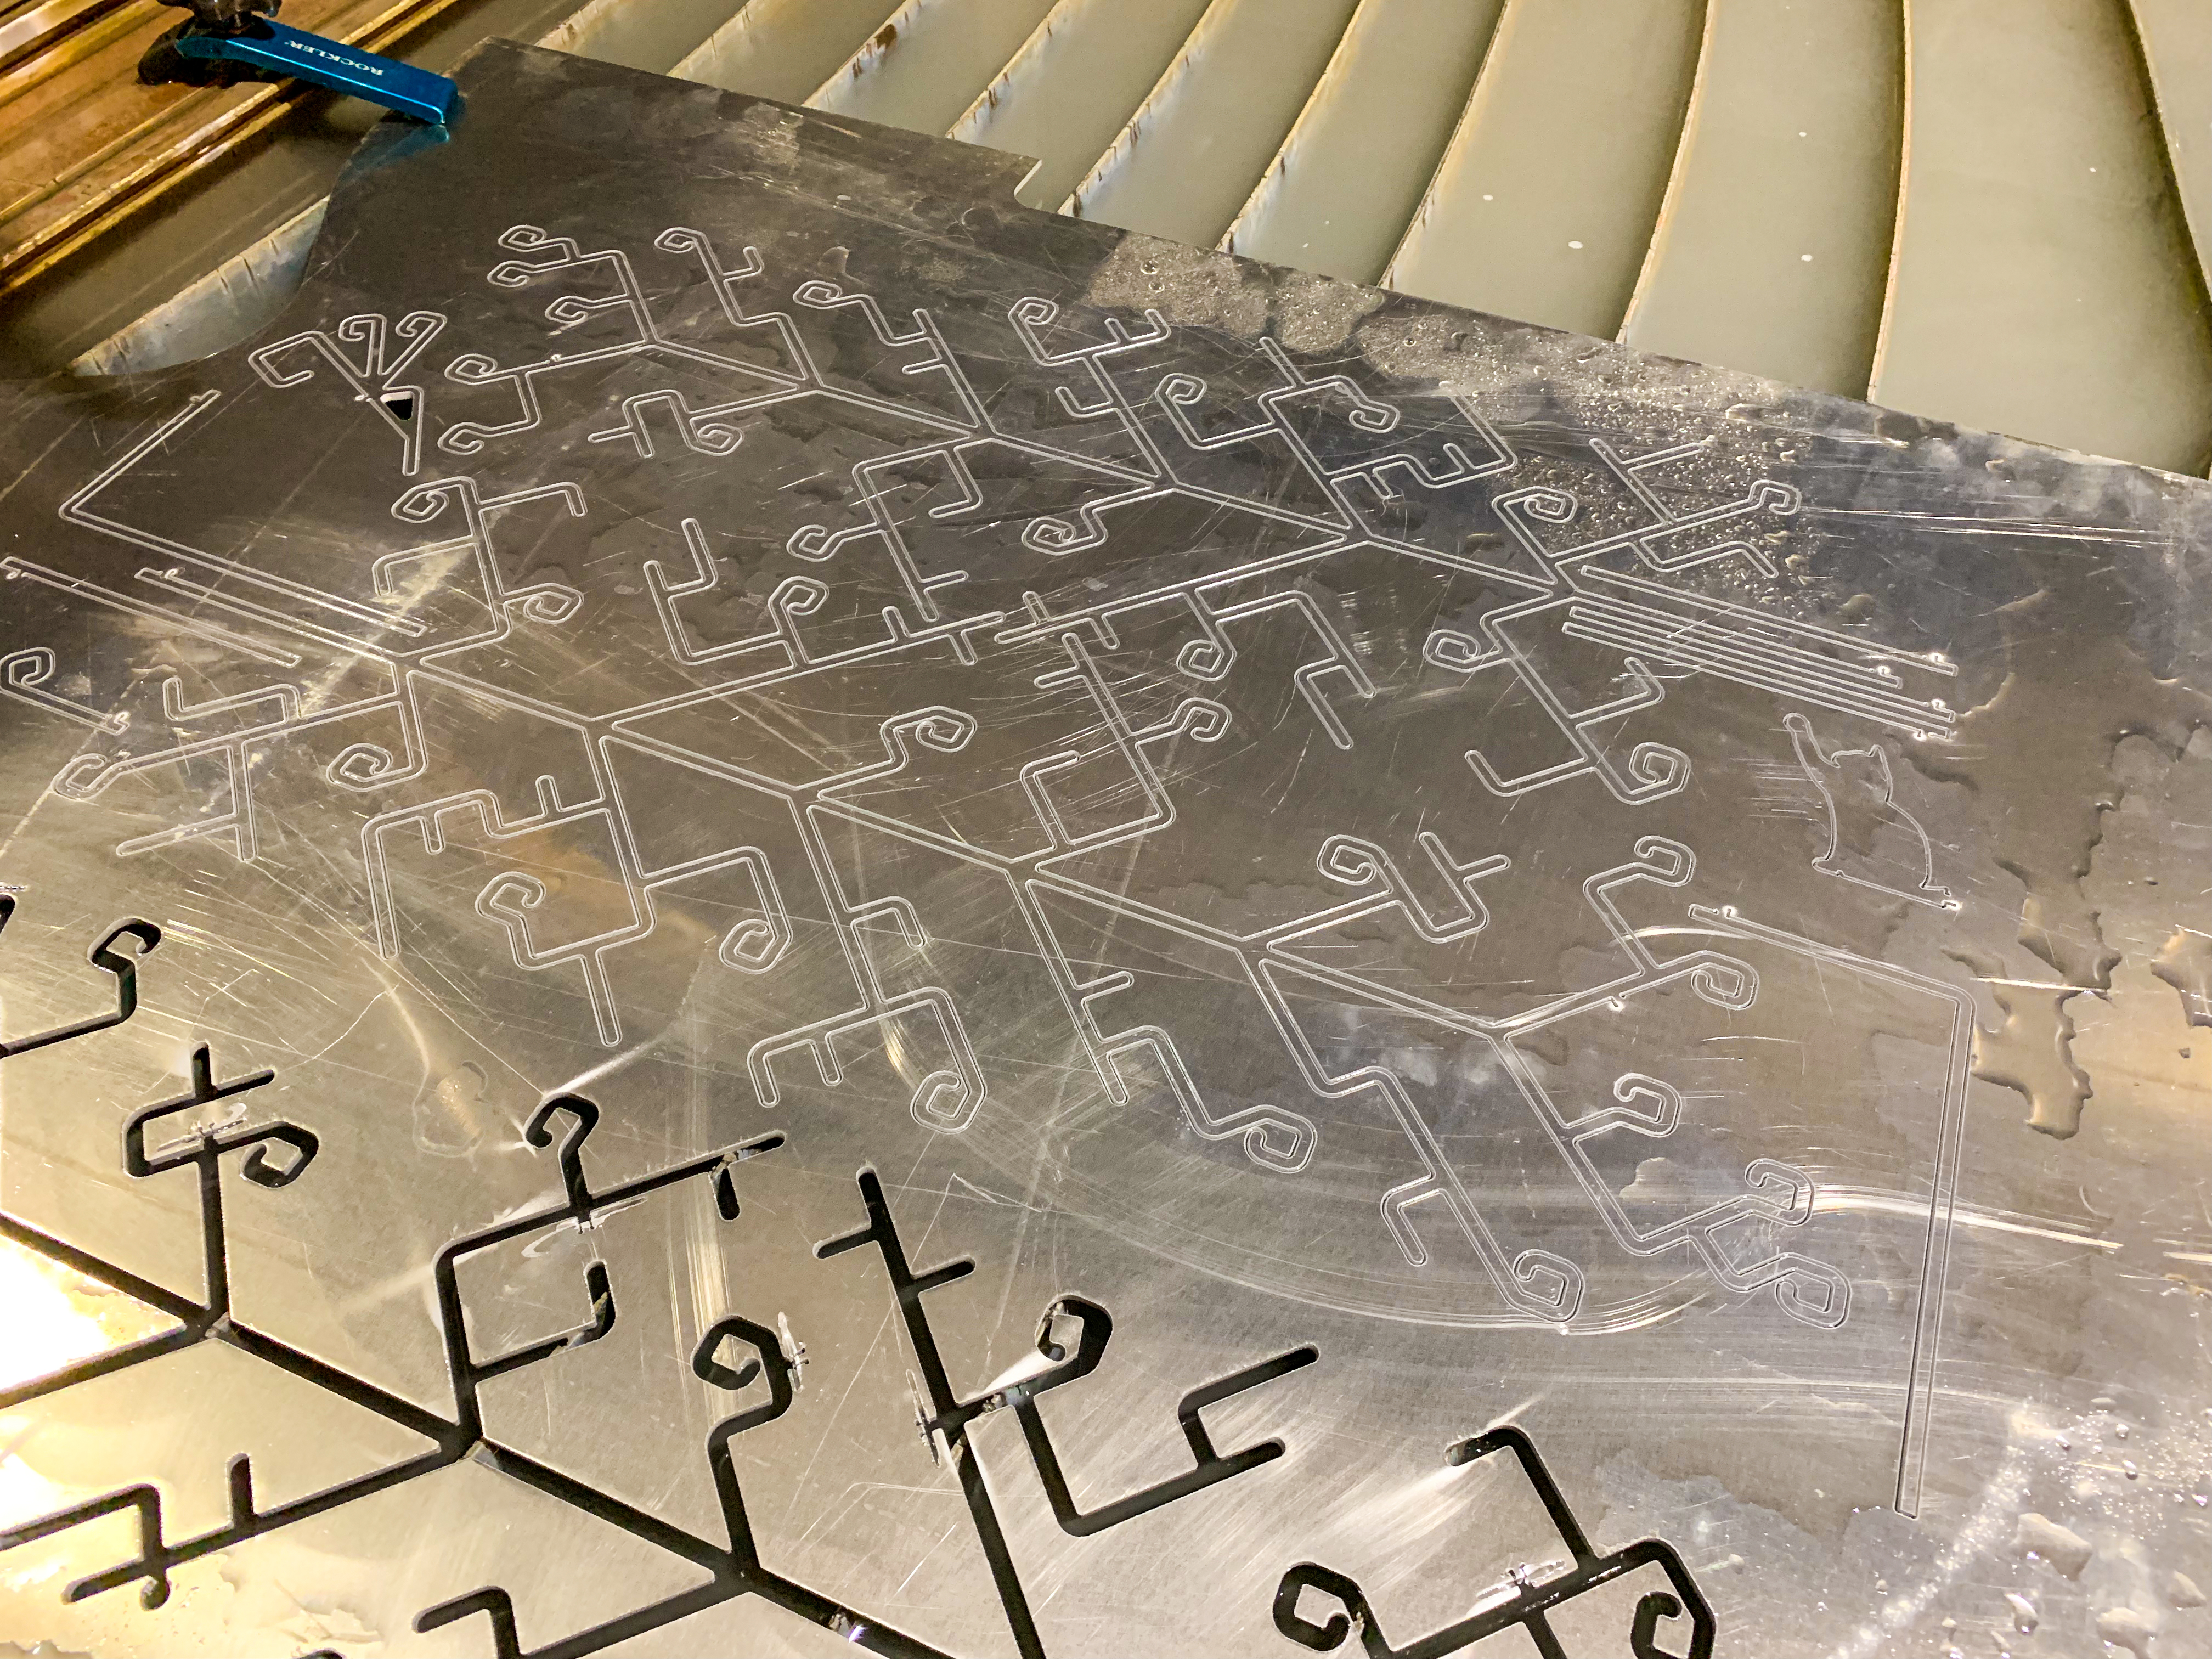
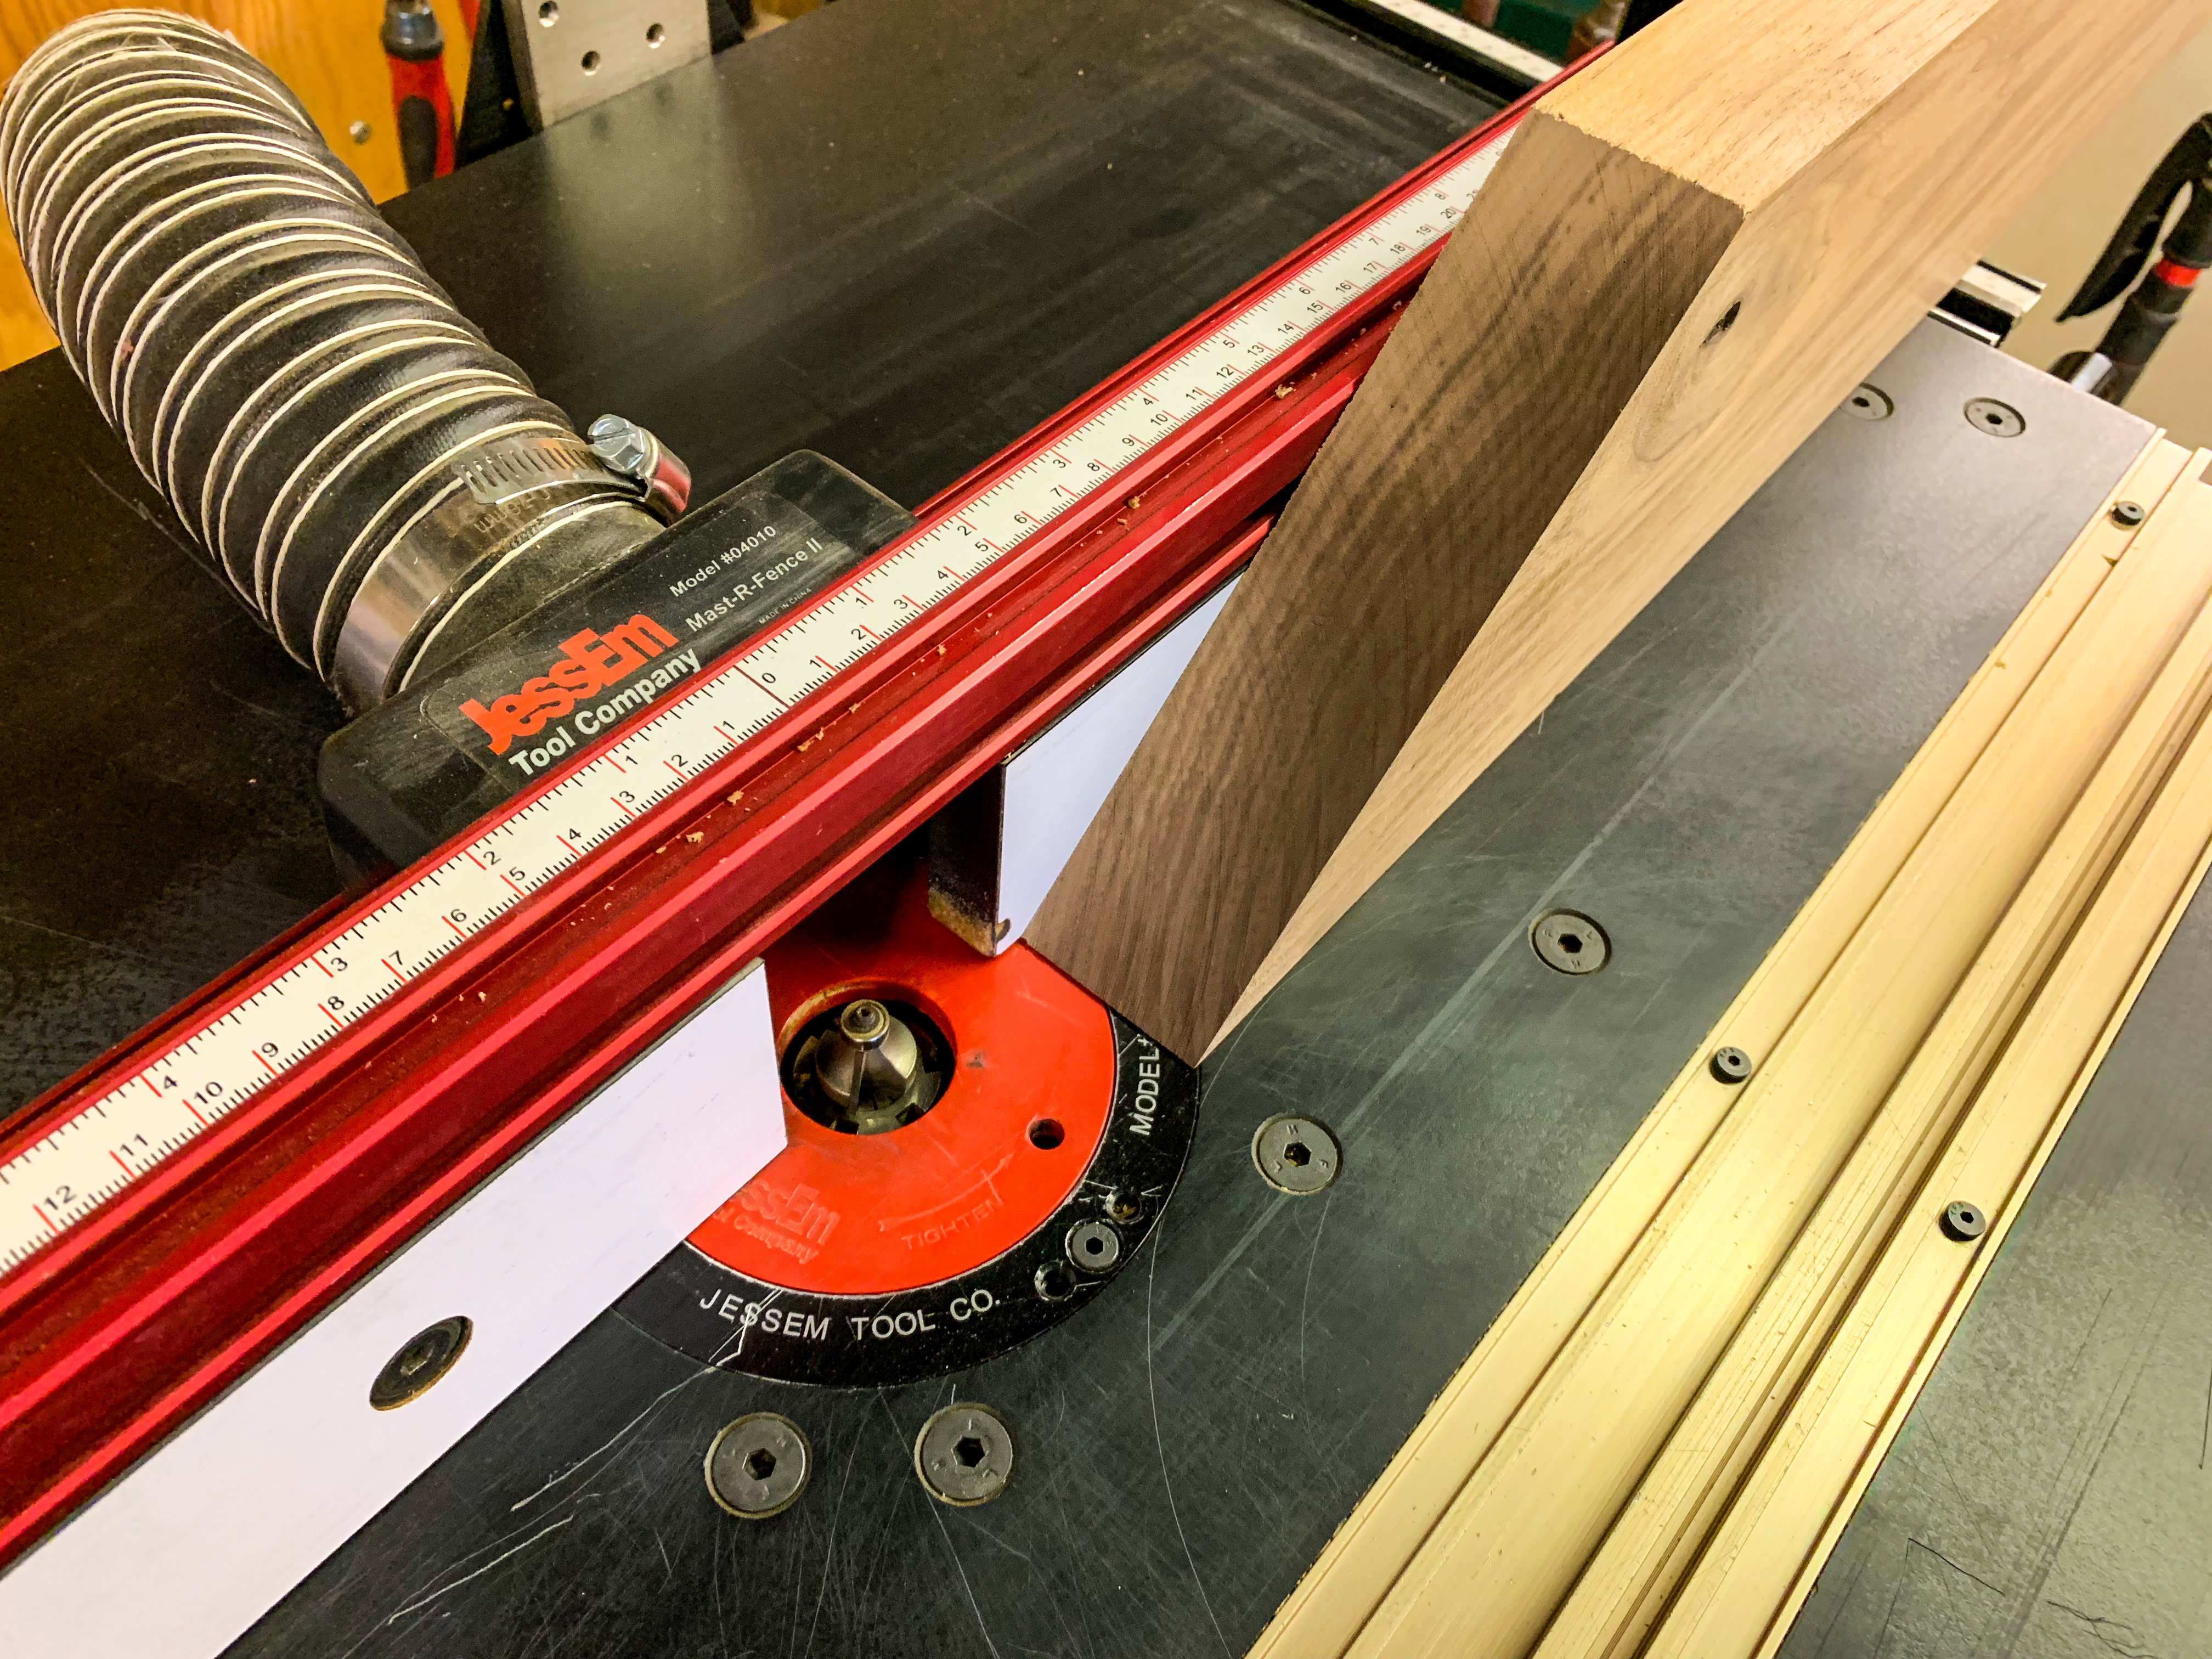
I cut the aluminum inlay on an Omax waterjet. The waterjet’s cut is slightly tapered: it’s wider where it enters the workpiece and gets a little narrower as it cuts through, giving the finished work a trapezoidal profile in cross-section. This is great for making inlay; I cut the aluminum upside-down so that it tapers outward slightly toward the face that shows.
The dimensions above are in inches; the inlay paths are 1/8” wide and 1/8” deep, and the aluminum tapers from just under 1/8” to just over 1/8” so that it can be tapped into the walnut with a mallet.
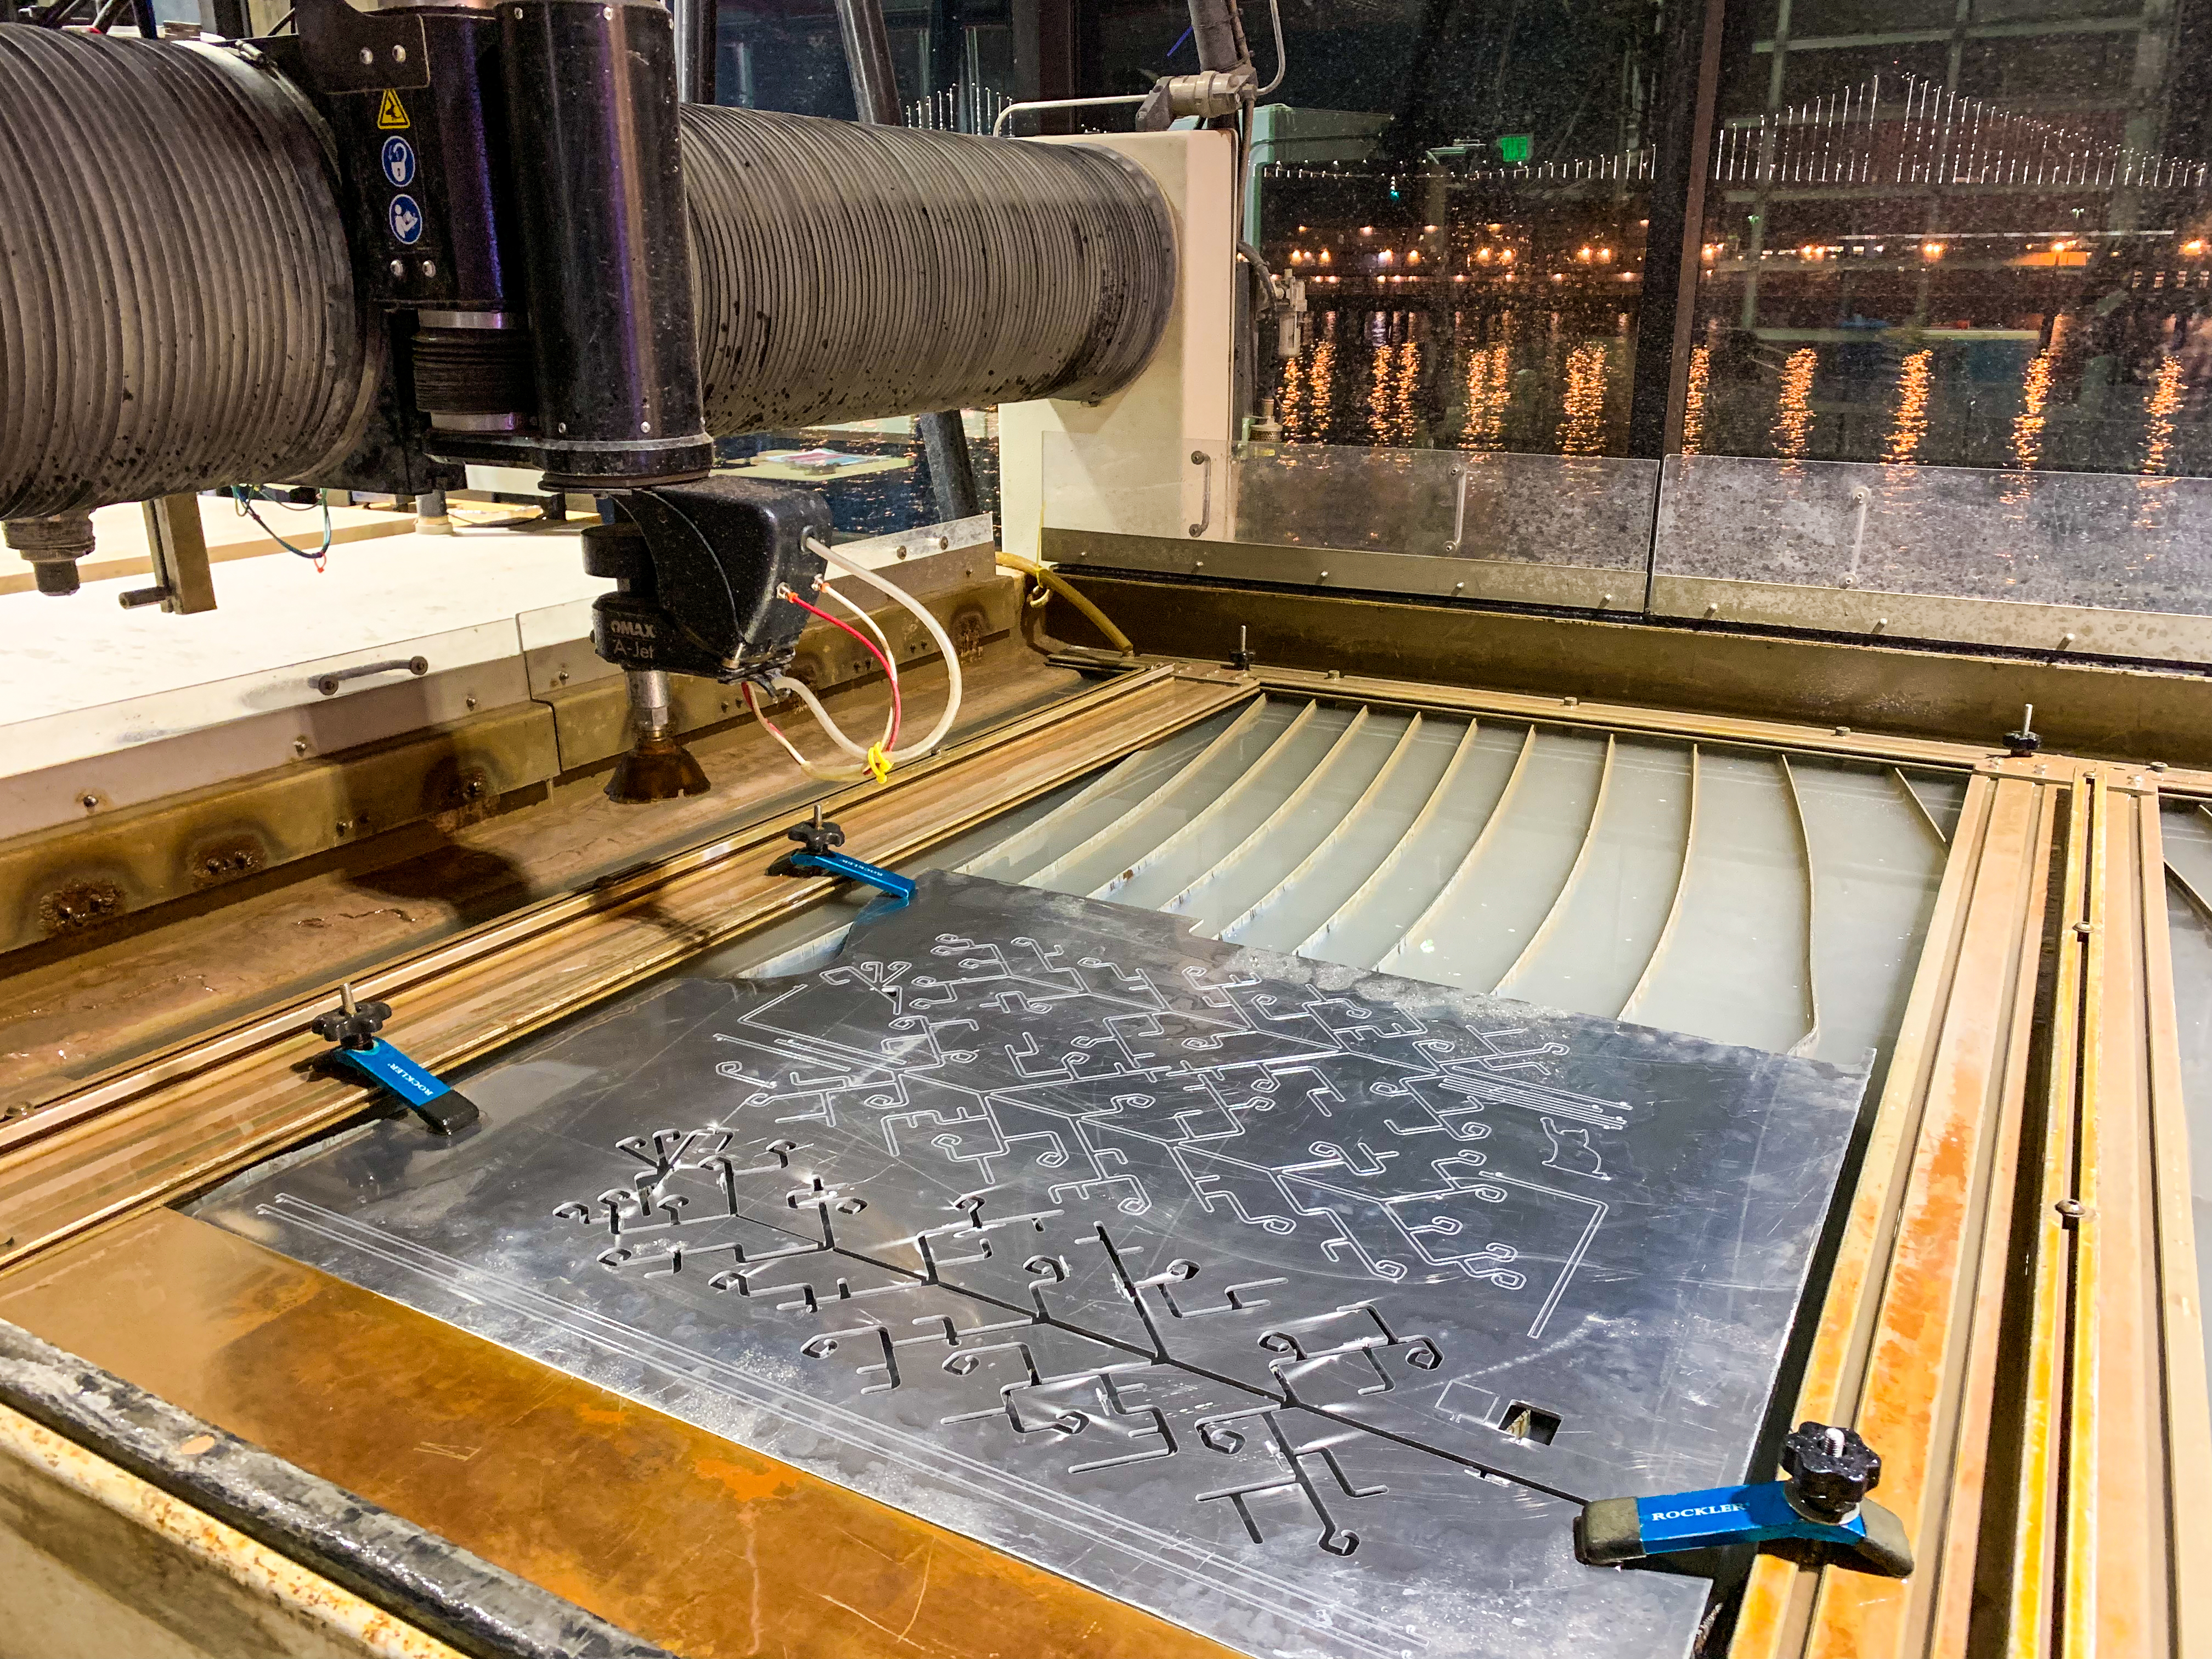
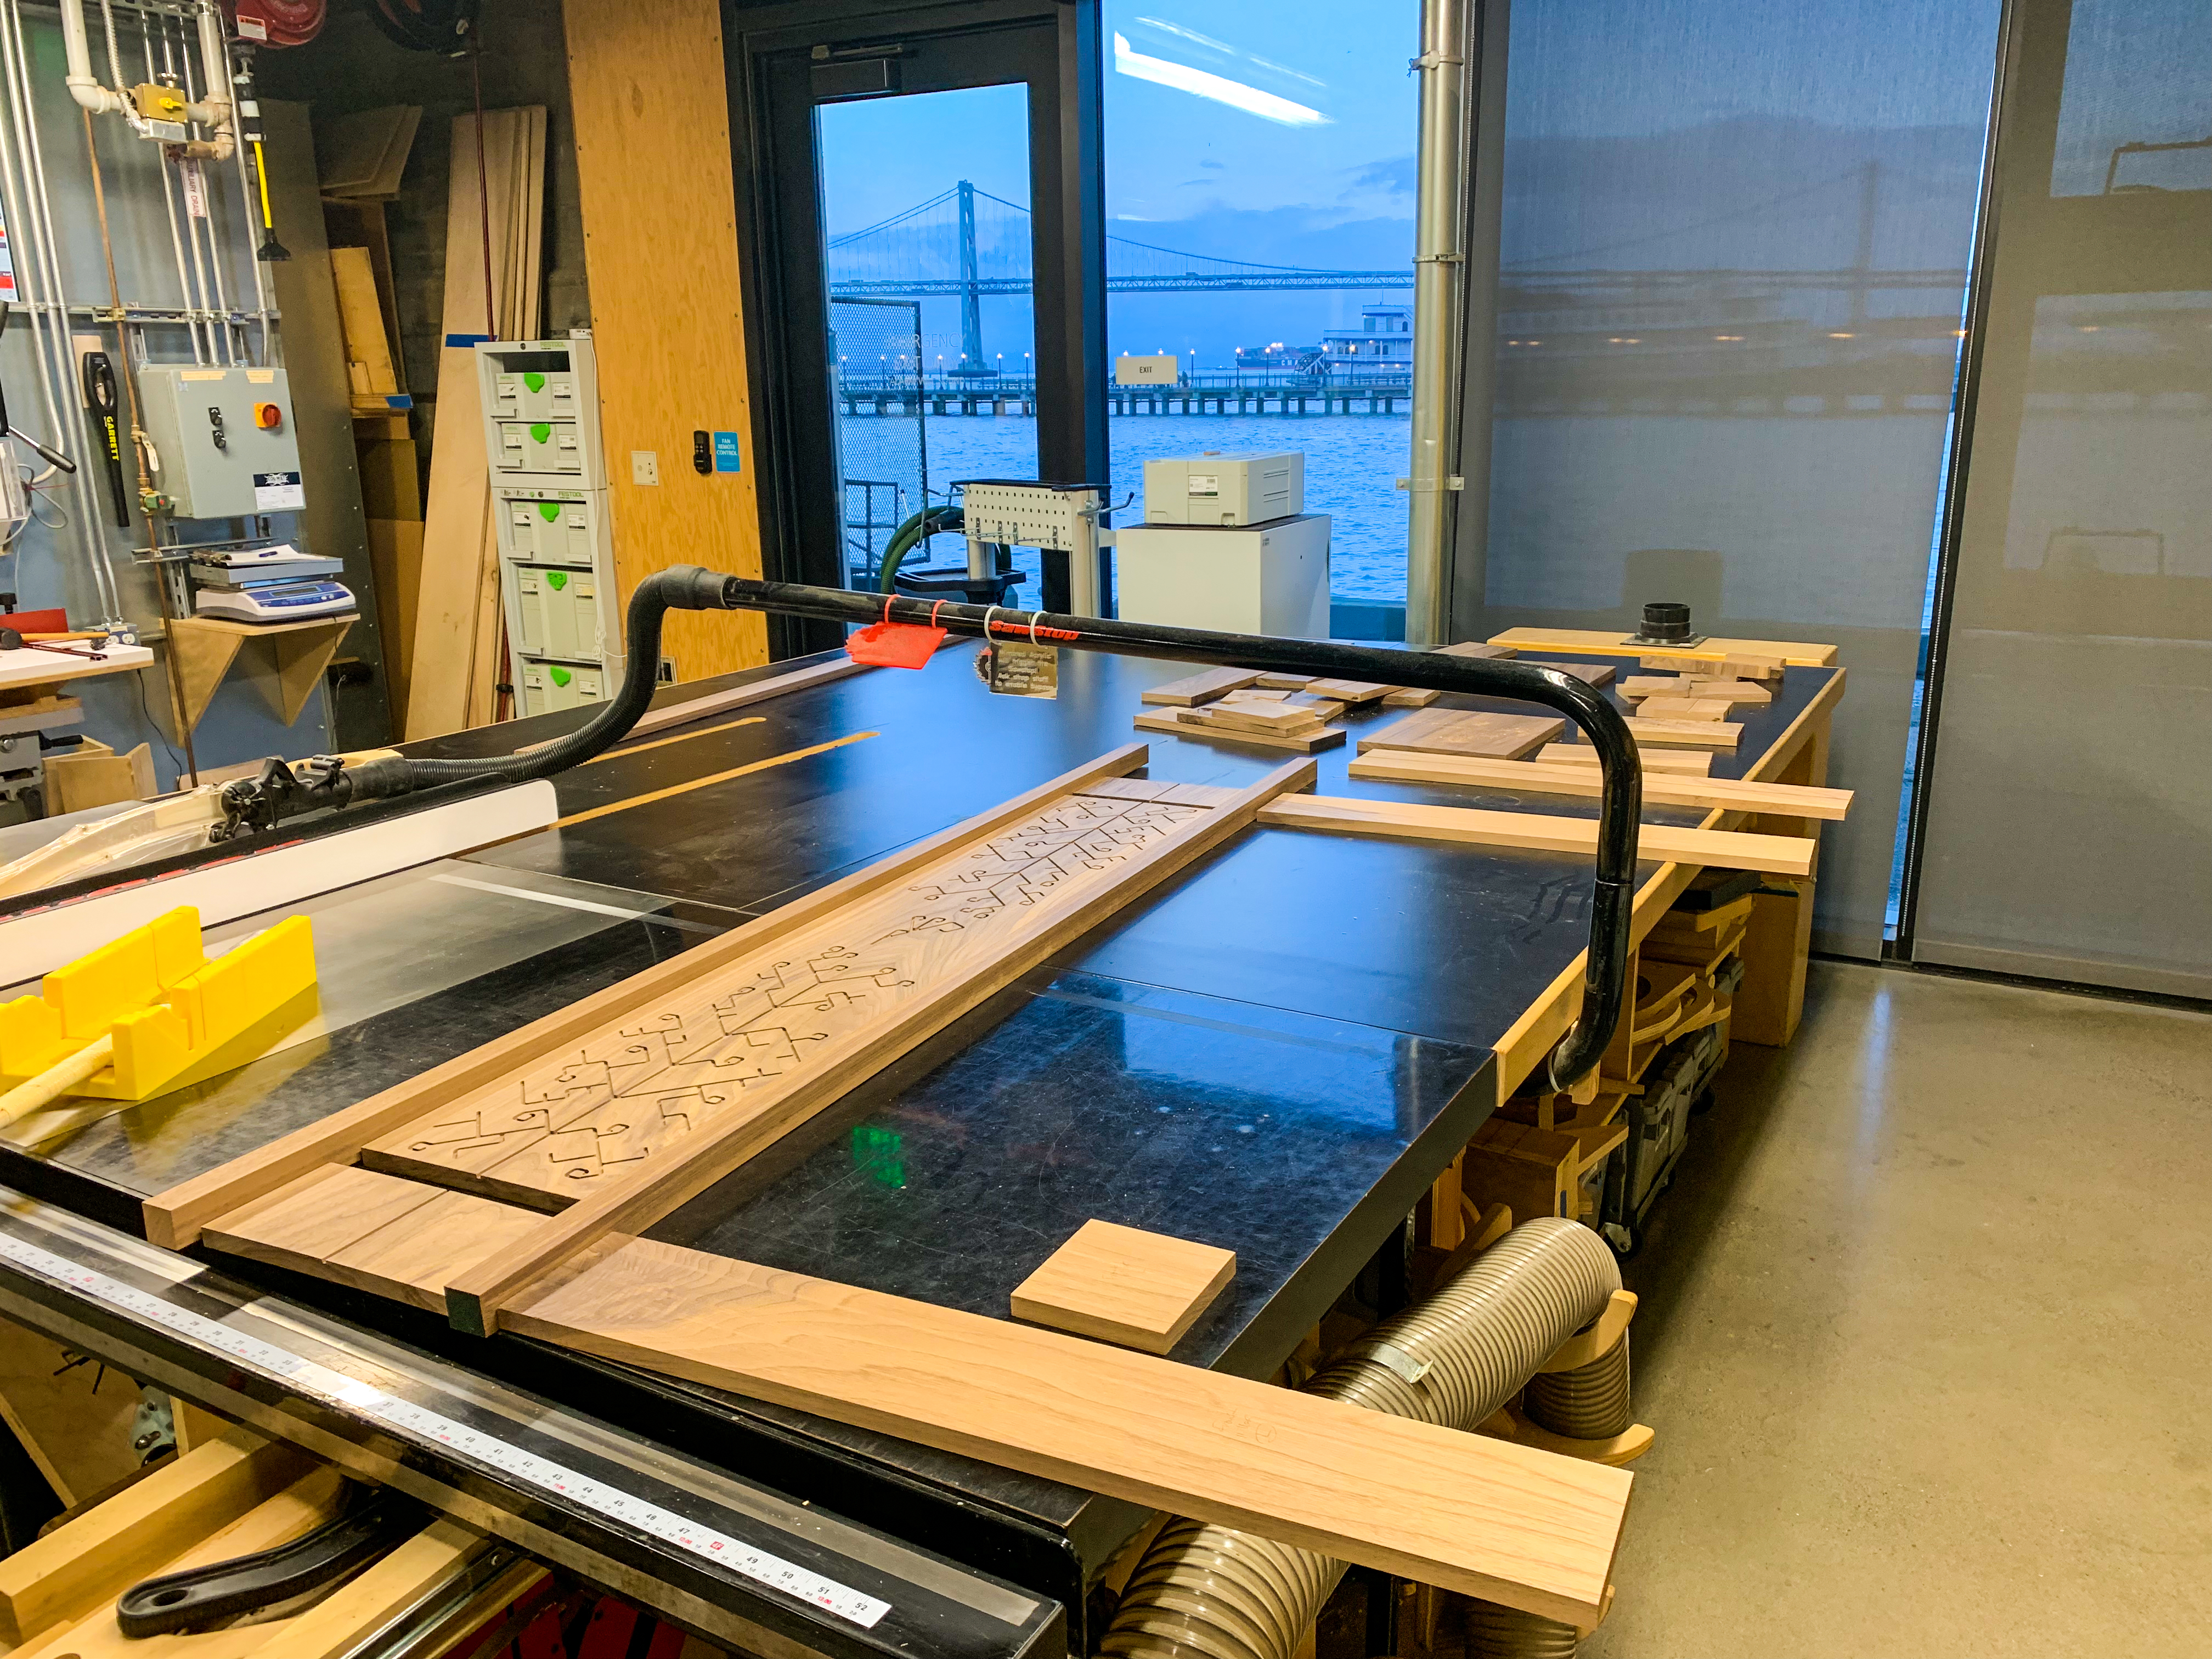
Here’s the waterjet at Pier 9—it’s got the best backdrop.
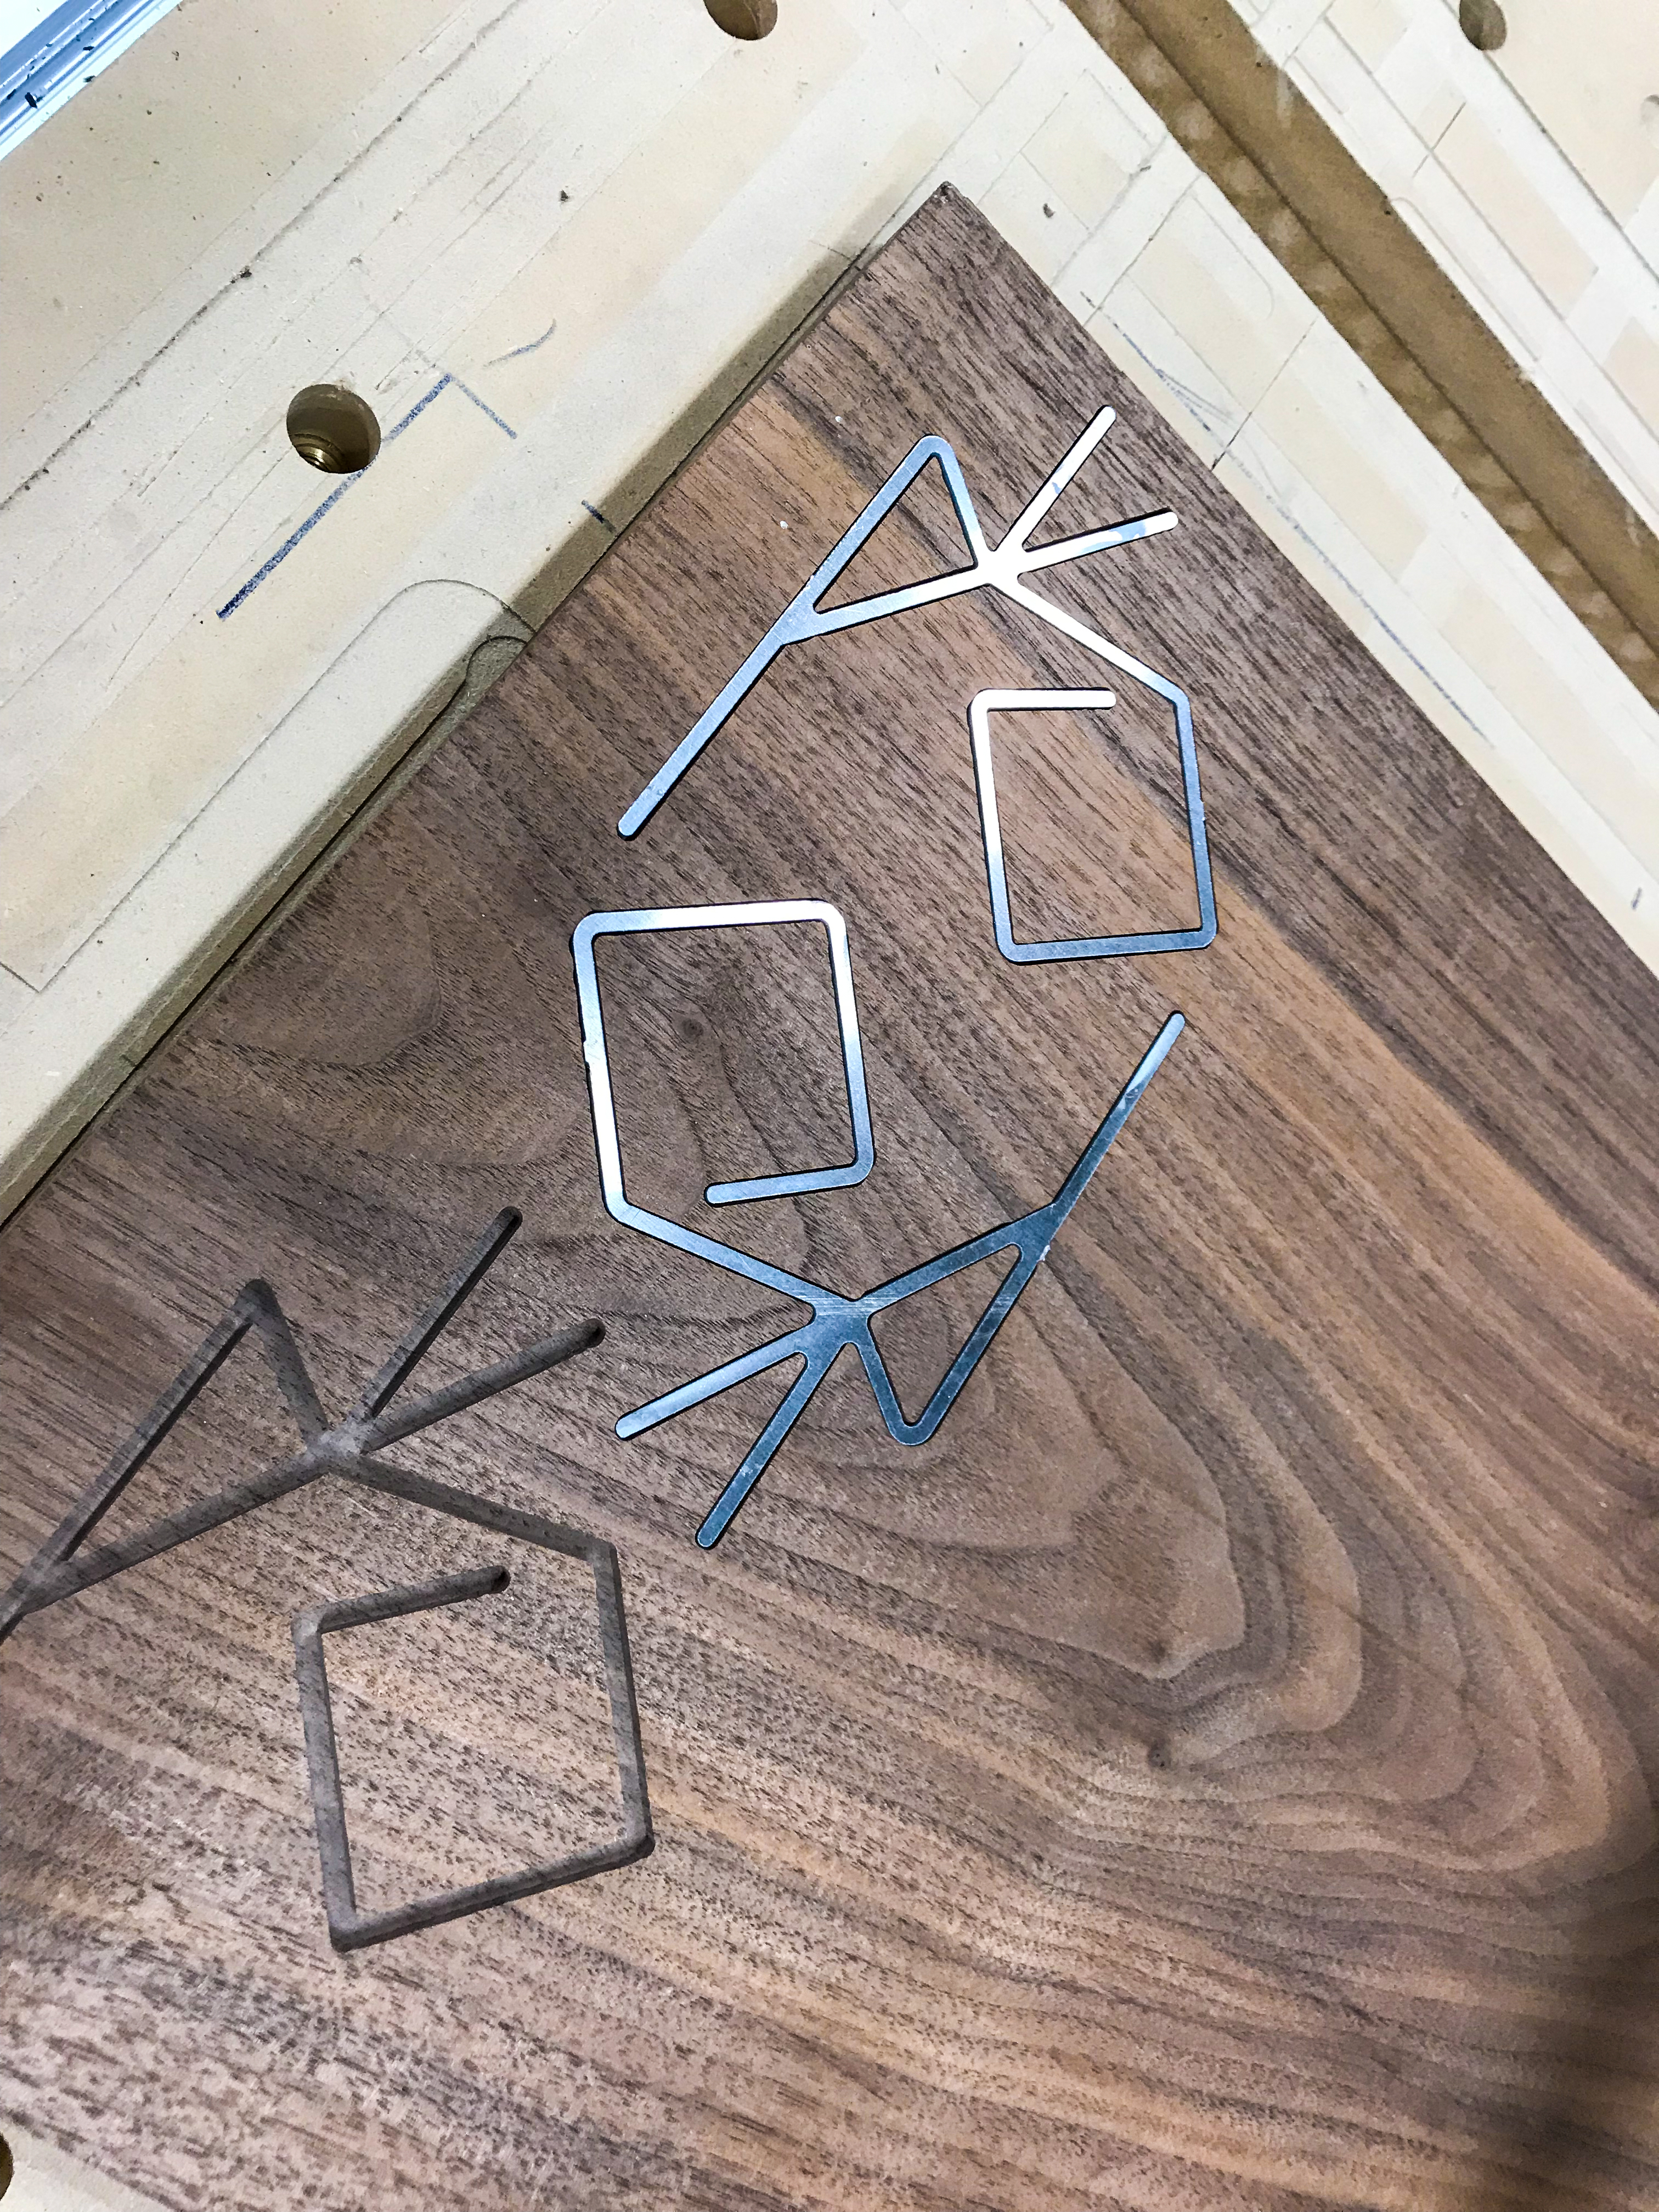
Here’s a closeup of the hummingbird being cut.
After cutting: two leaf patterns for the final mantel, plus one toward the bottom that went into the test panel earlier.
After rinsing the waterjet abrasive away
Toward the right you can see the cat figure for the Easter egg.
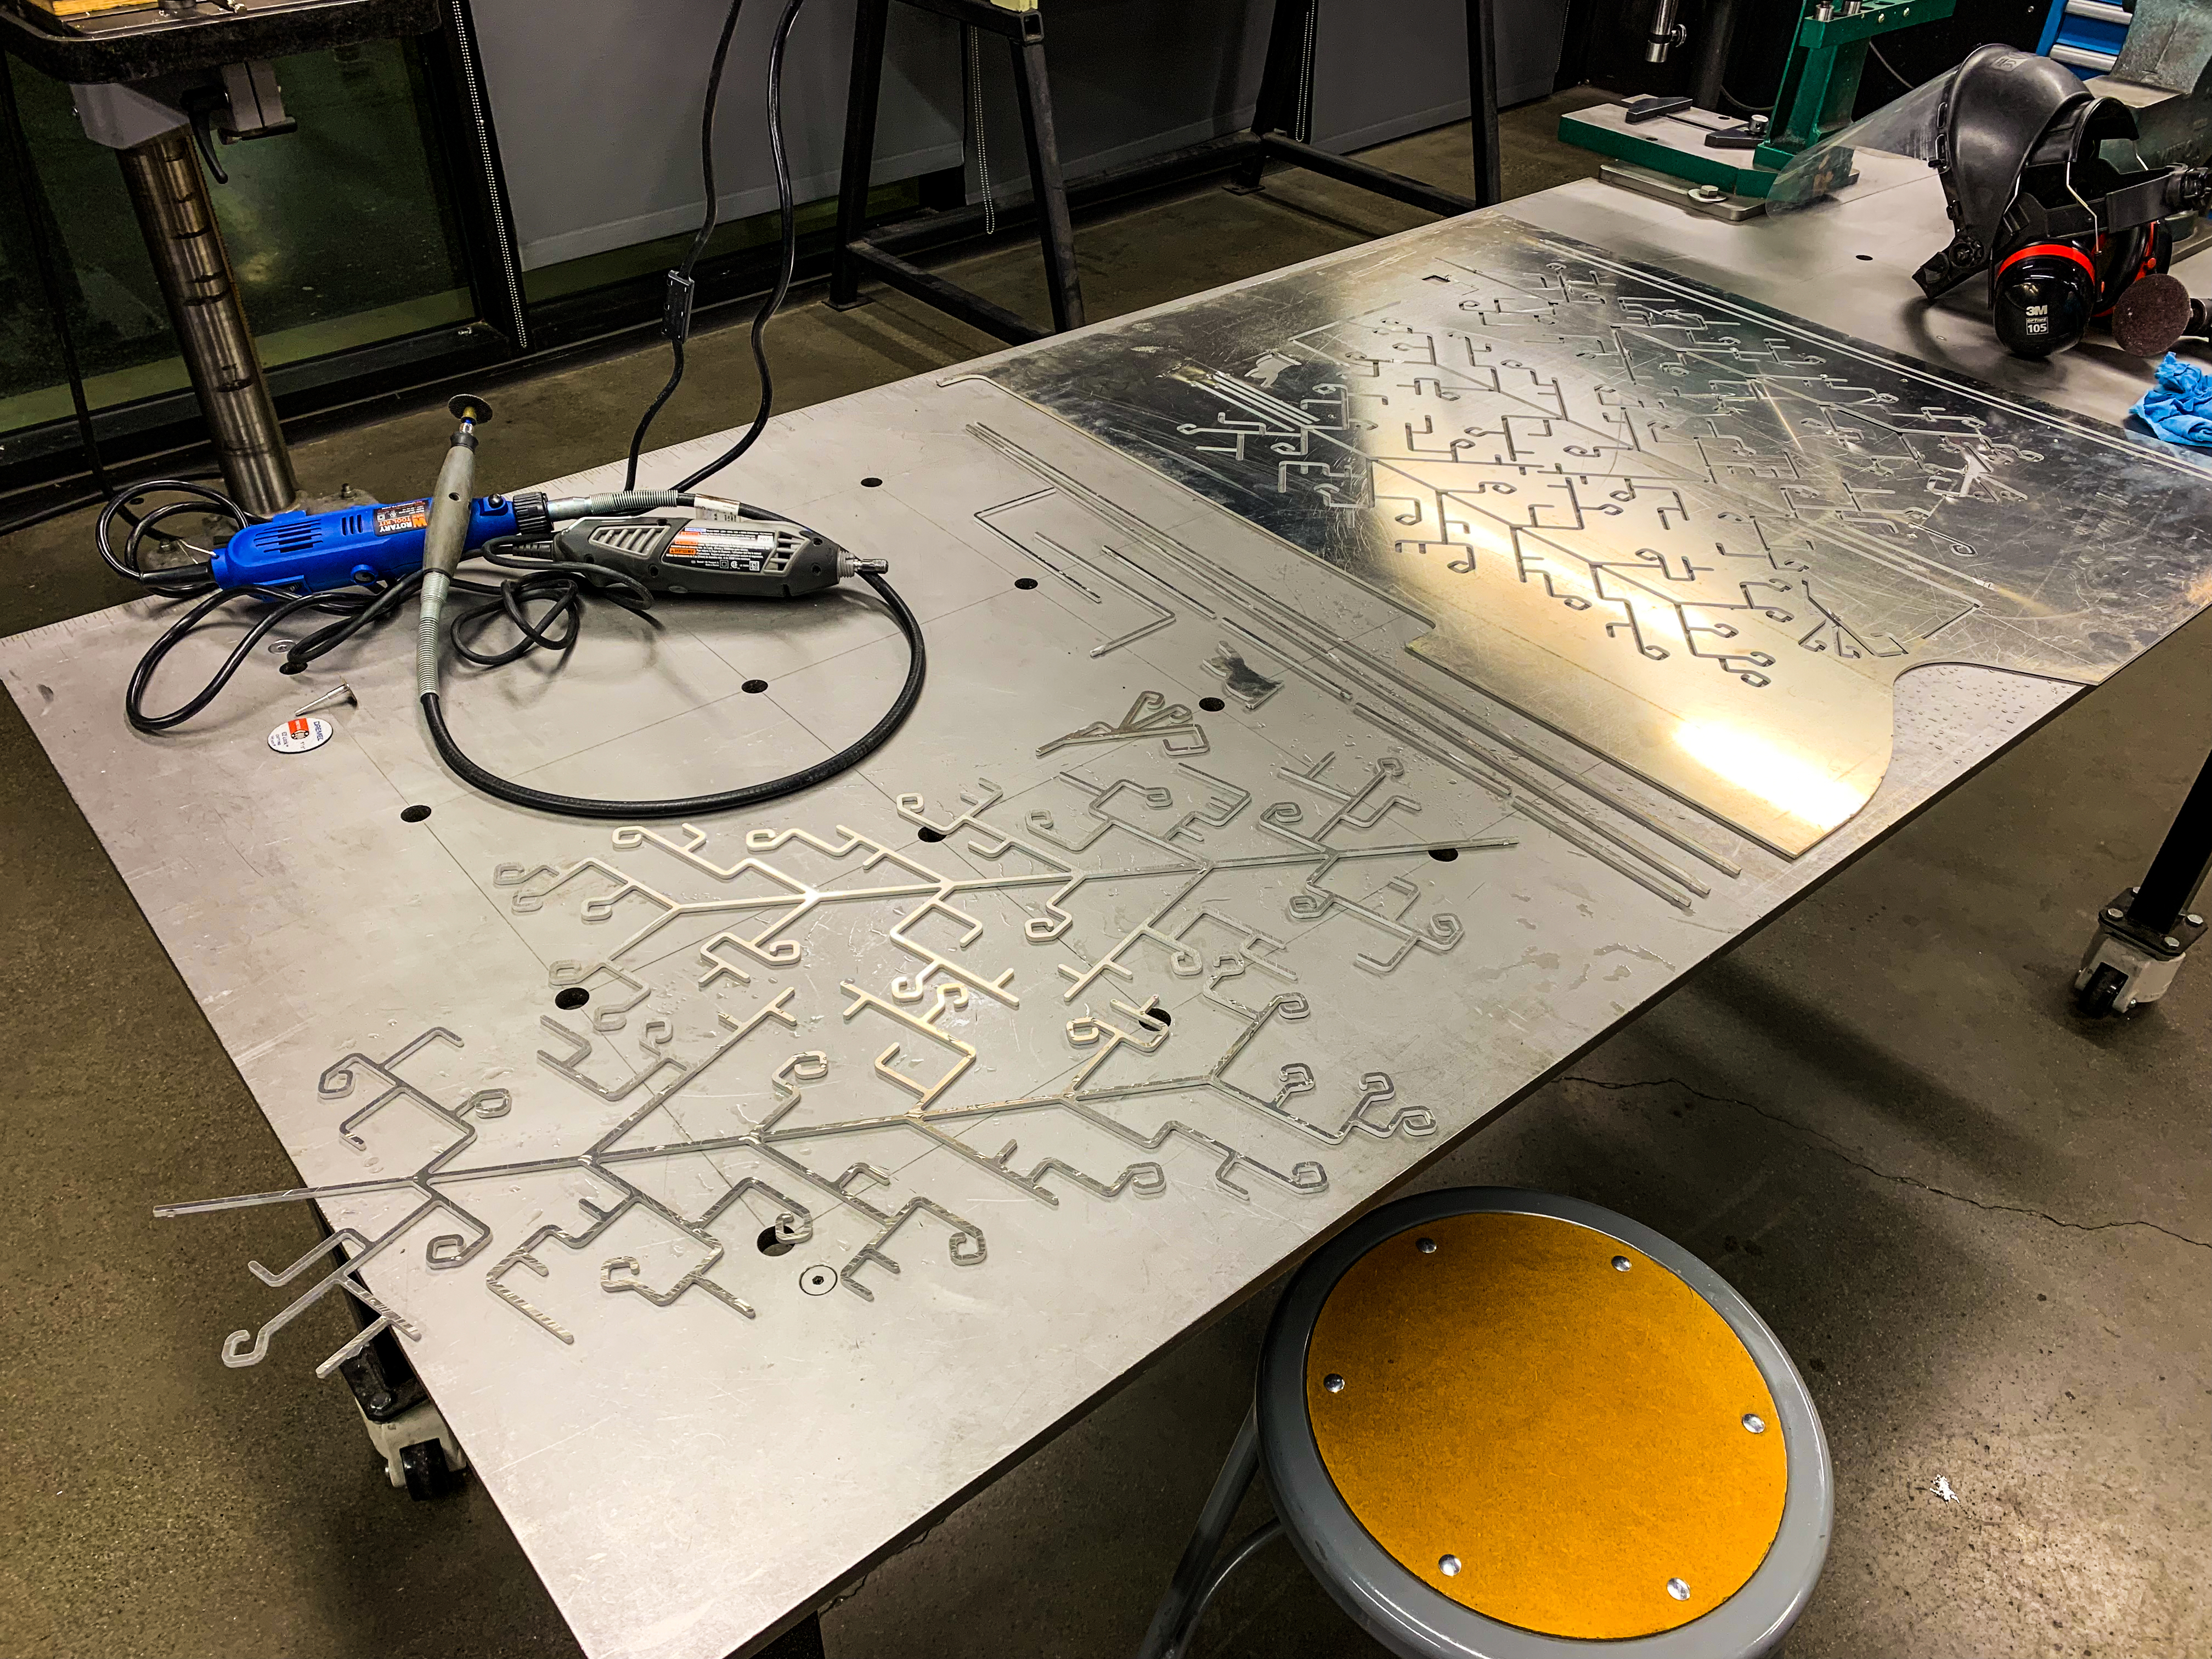
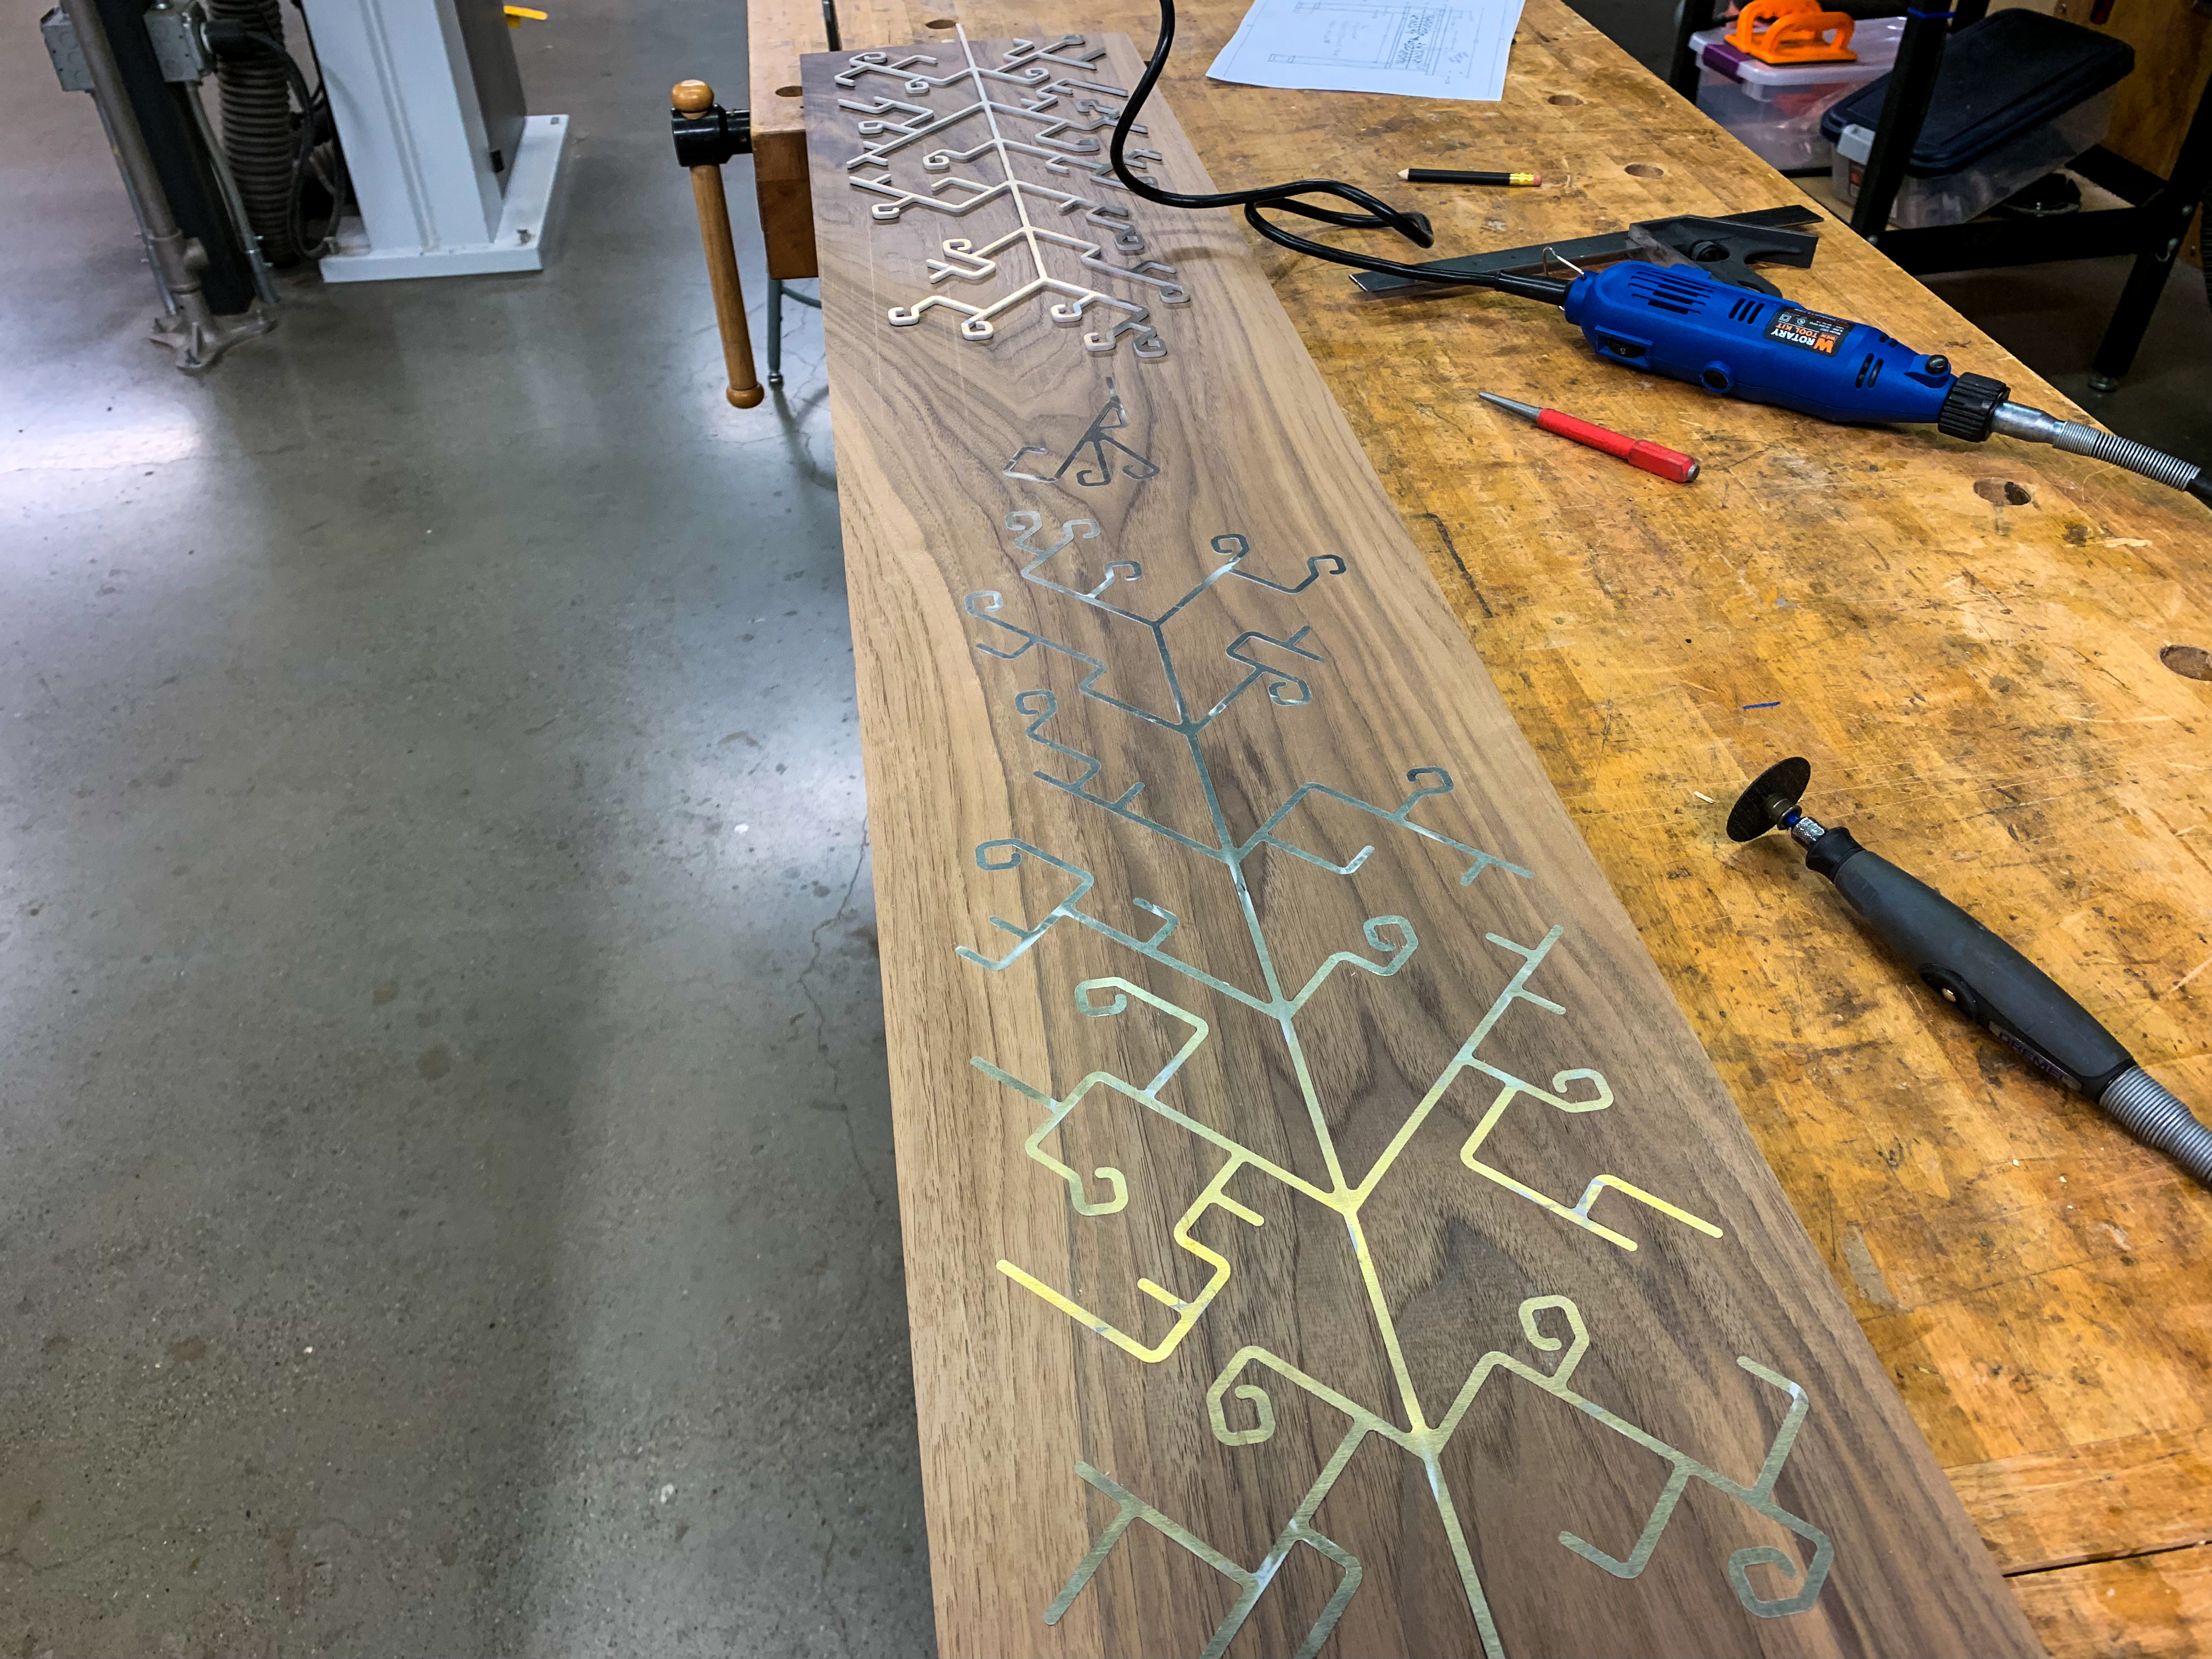
After removing the inlay patterns from the aluminum sheet using a Dremel to cut the tabs that were left by the waterjet
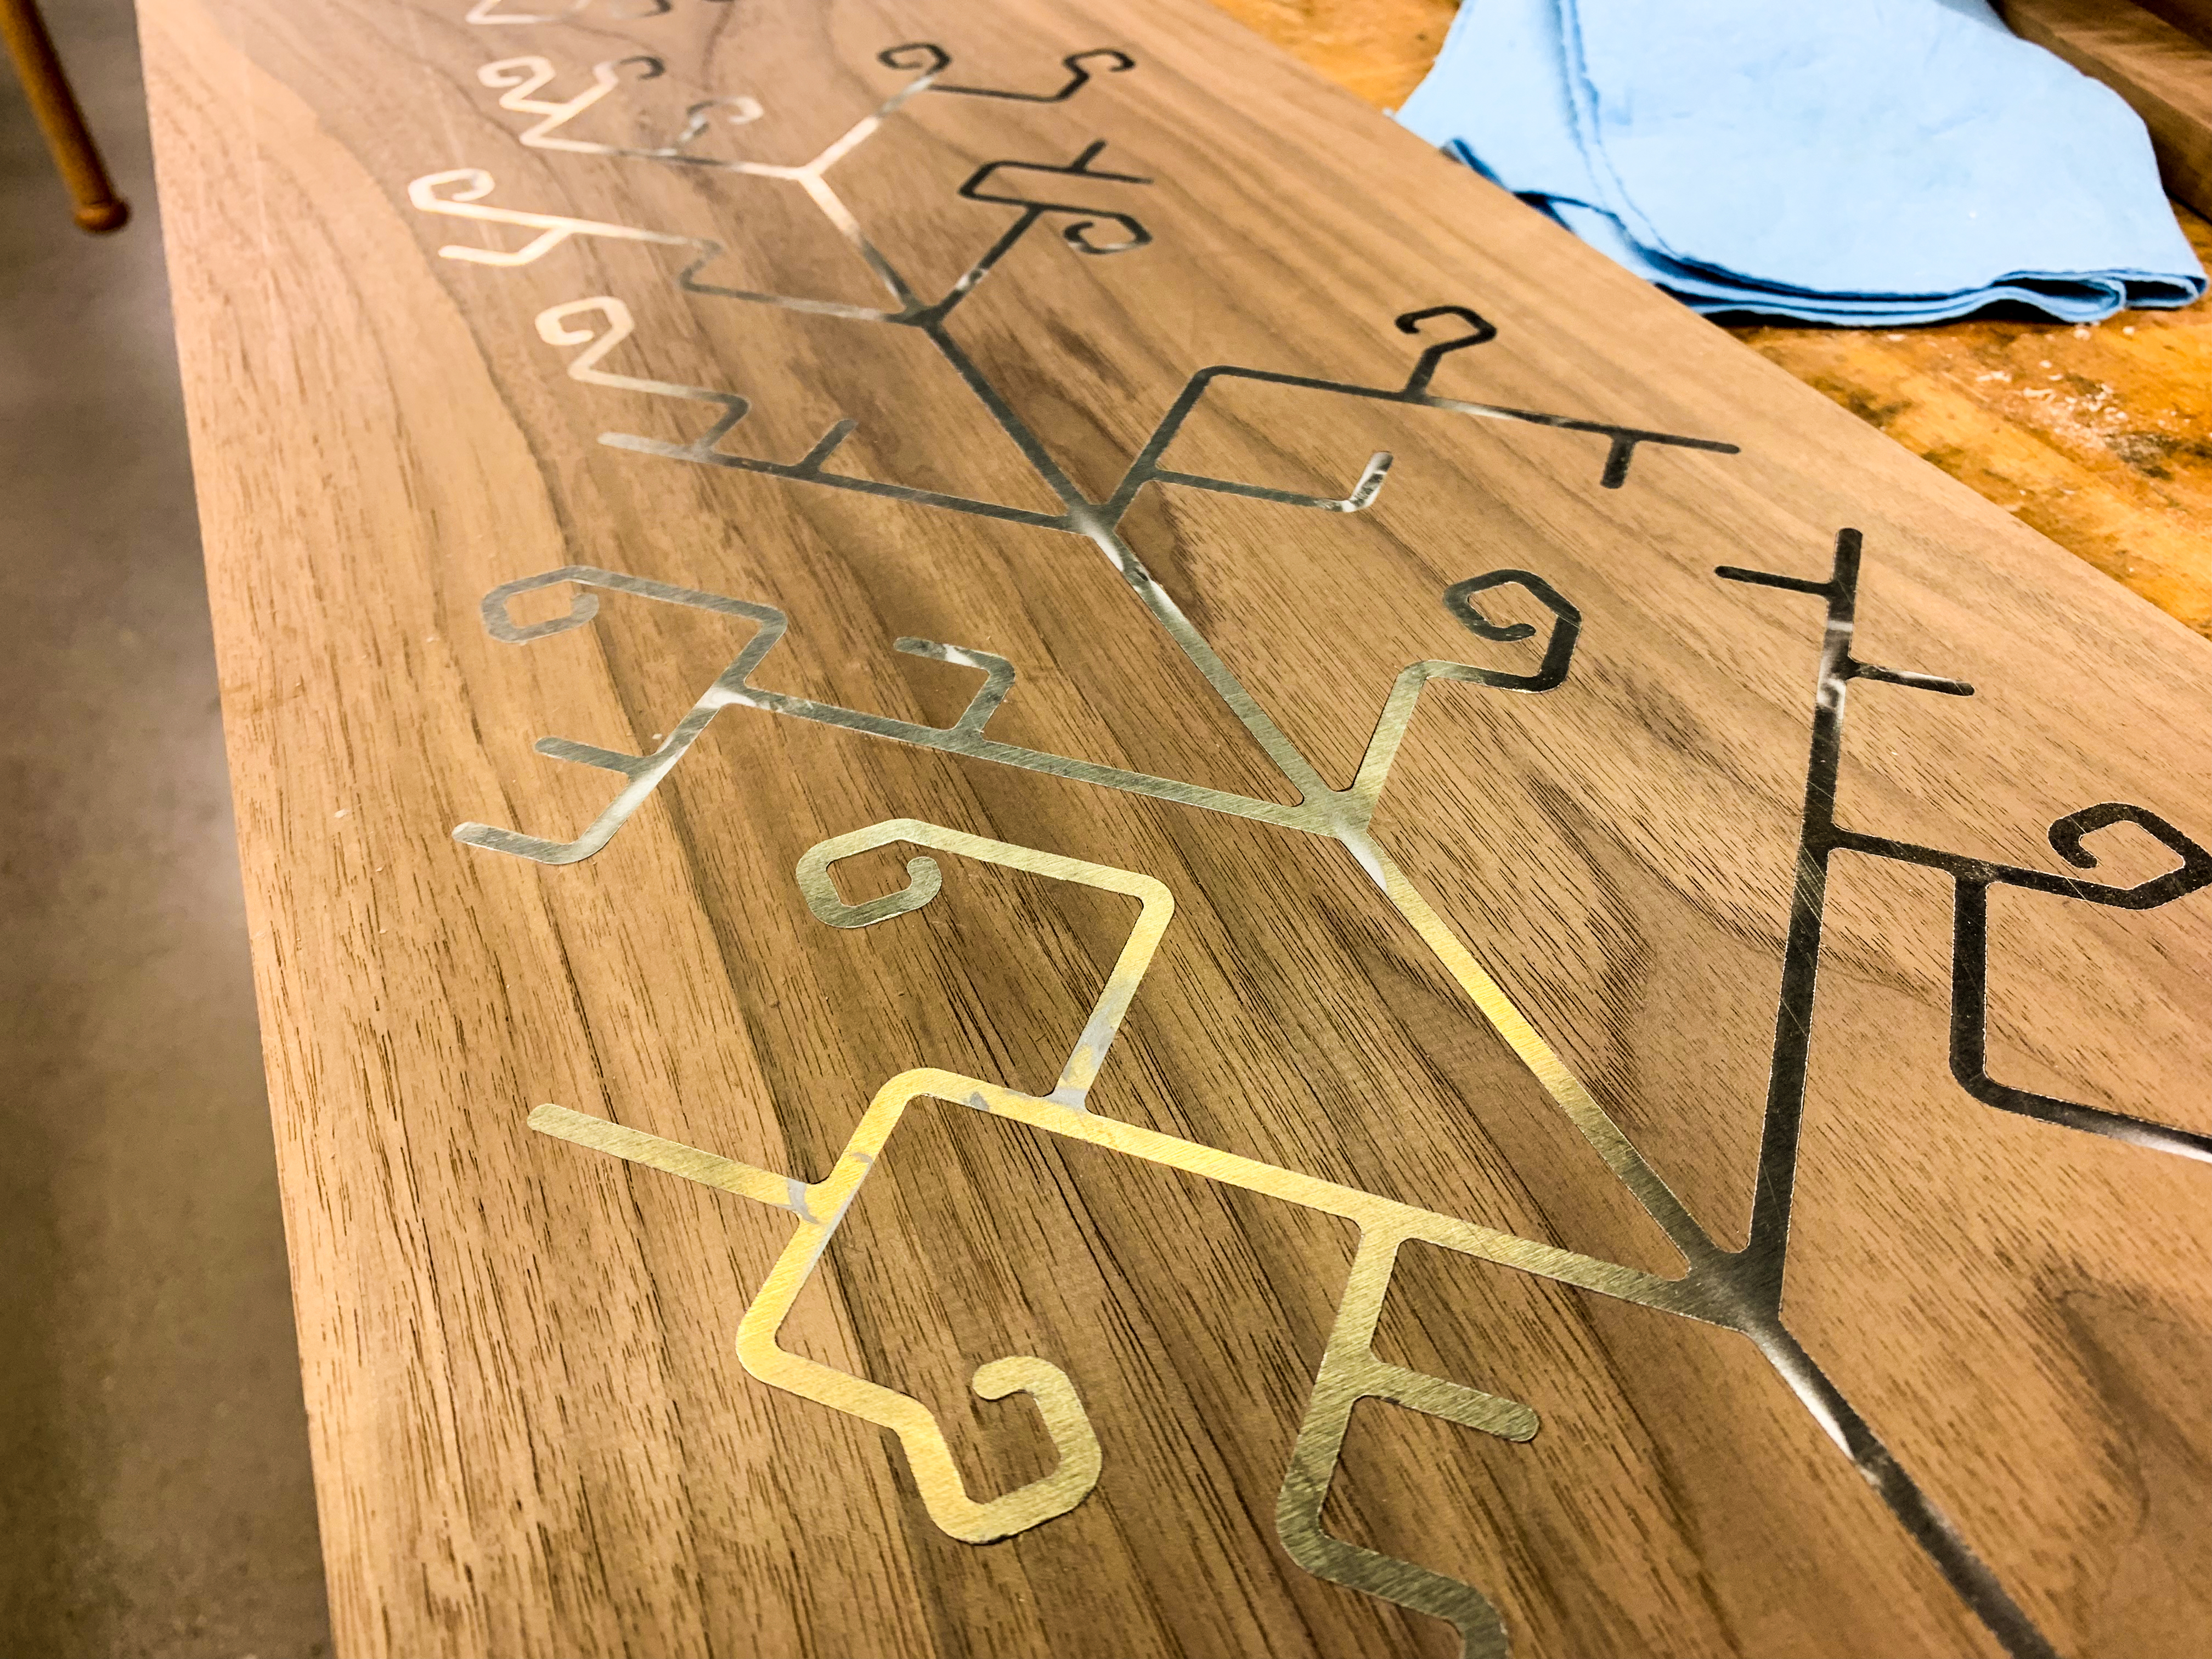
The first of many surprising successes comes when the aluminum inlay lines up with the channels in the wood!
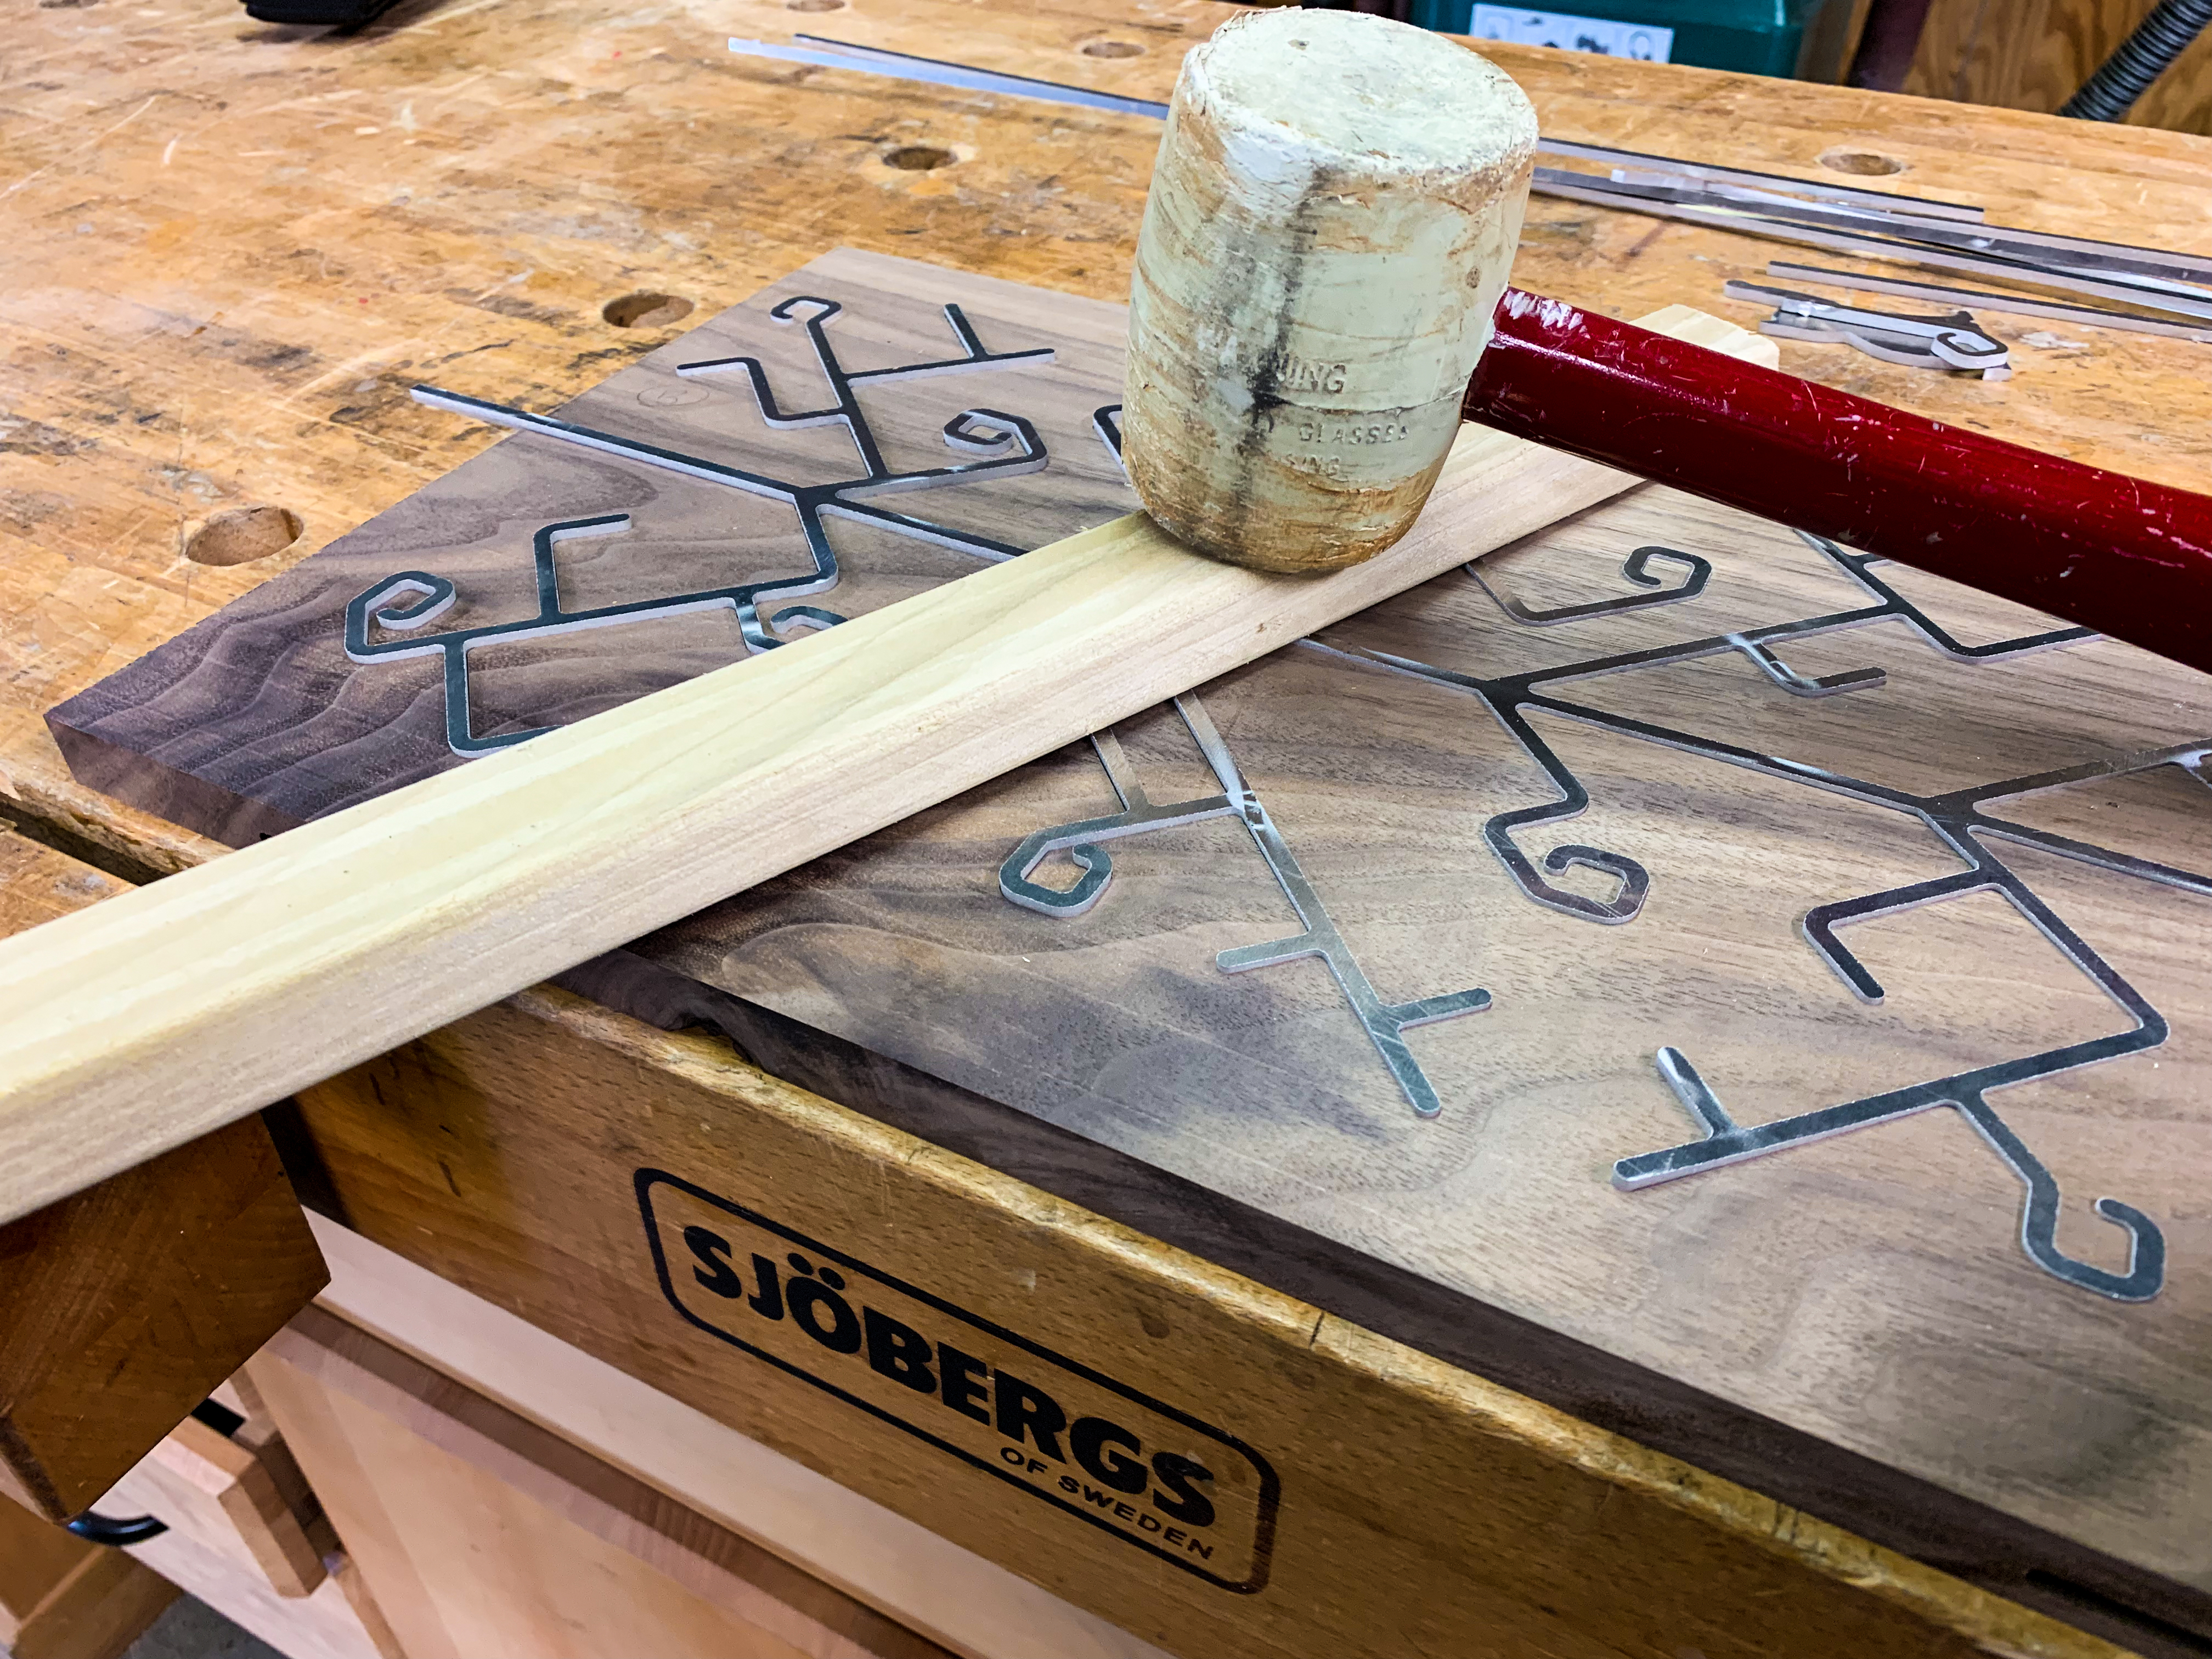
Getting ready to press the inlay into the walnut
And they just tap right in with a mallet! In a few cases—mostly around tight curves—I had to work the inlay in a little bit, but for the most part it went in smoothly. Straight pieces, like on the sides of the mantel, require a little bit of glue to stay in (I used JB Weld). Curved pieces like this stay in on their own, so there’s no glue at all in most of the center panel of the mantel.
After half the pattern has been pressed in
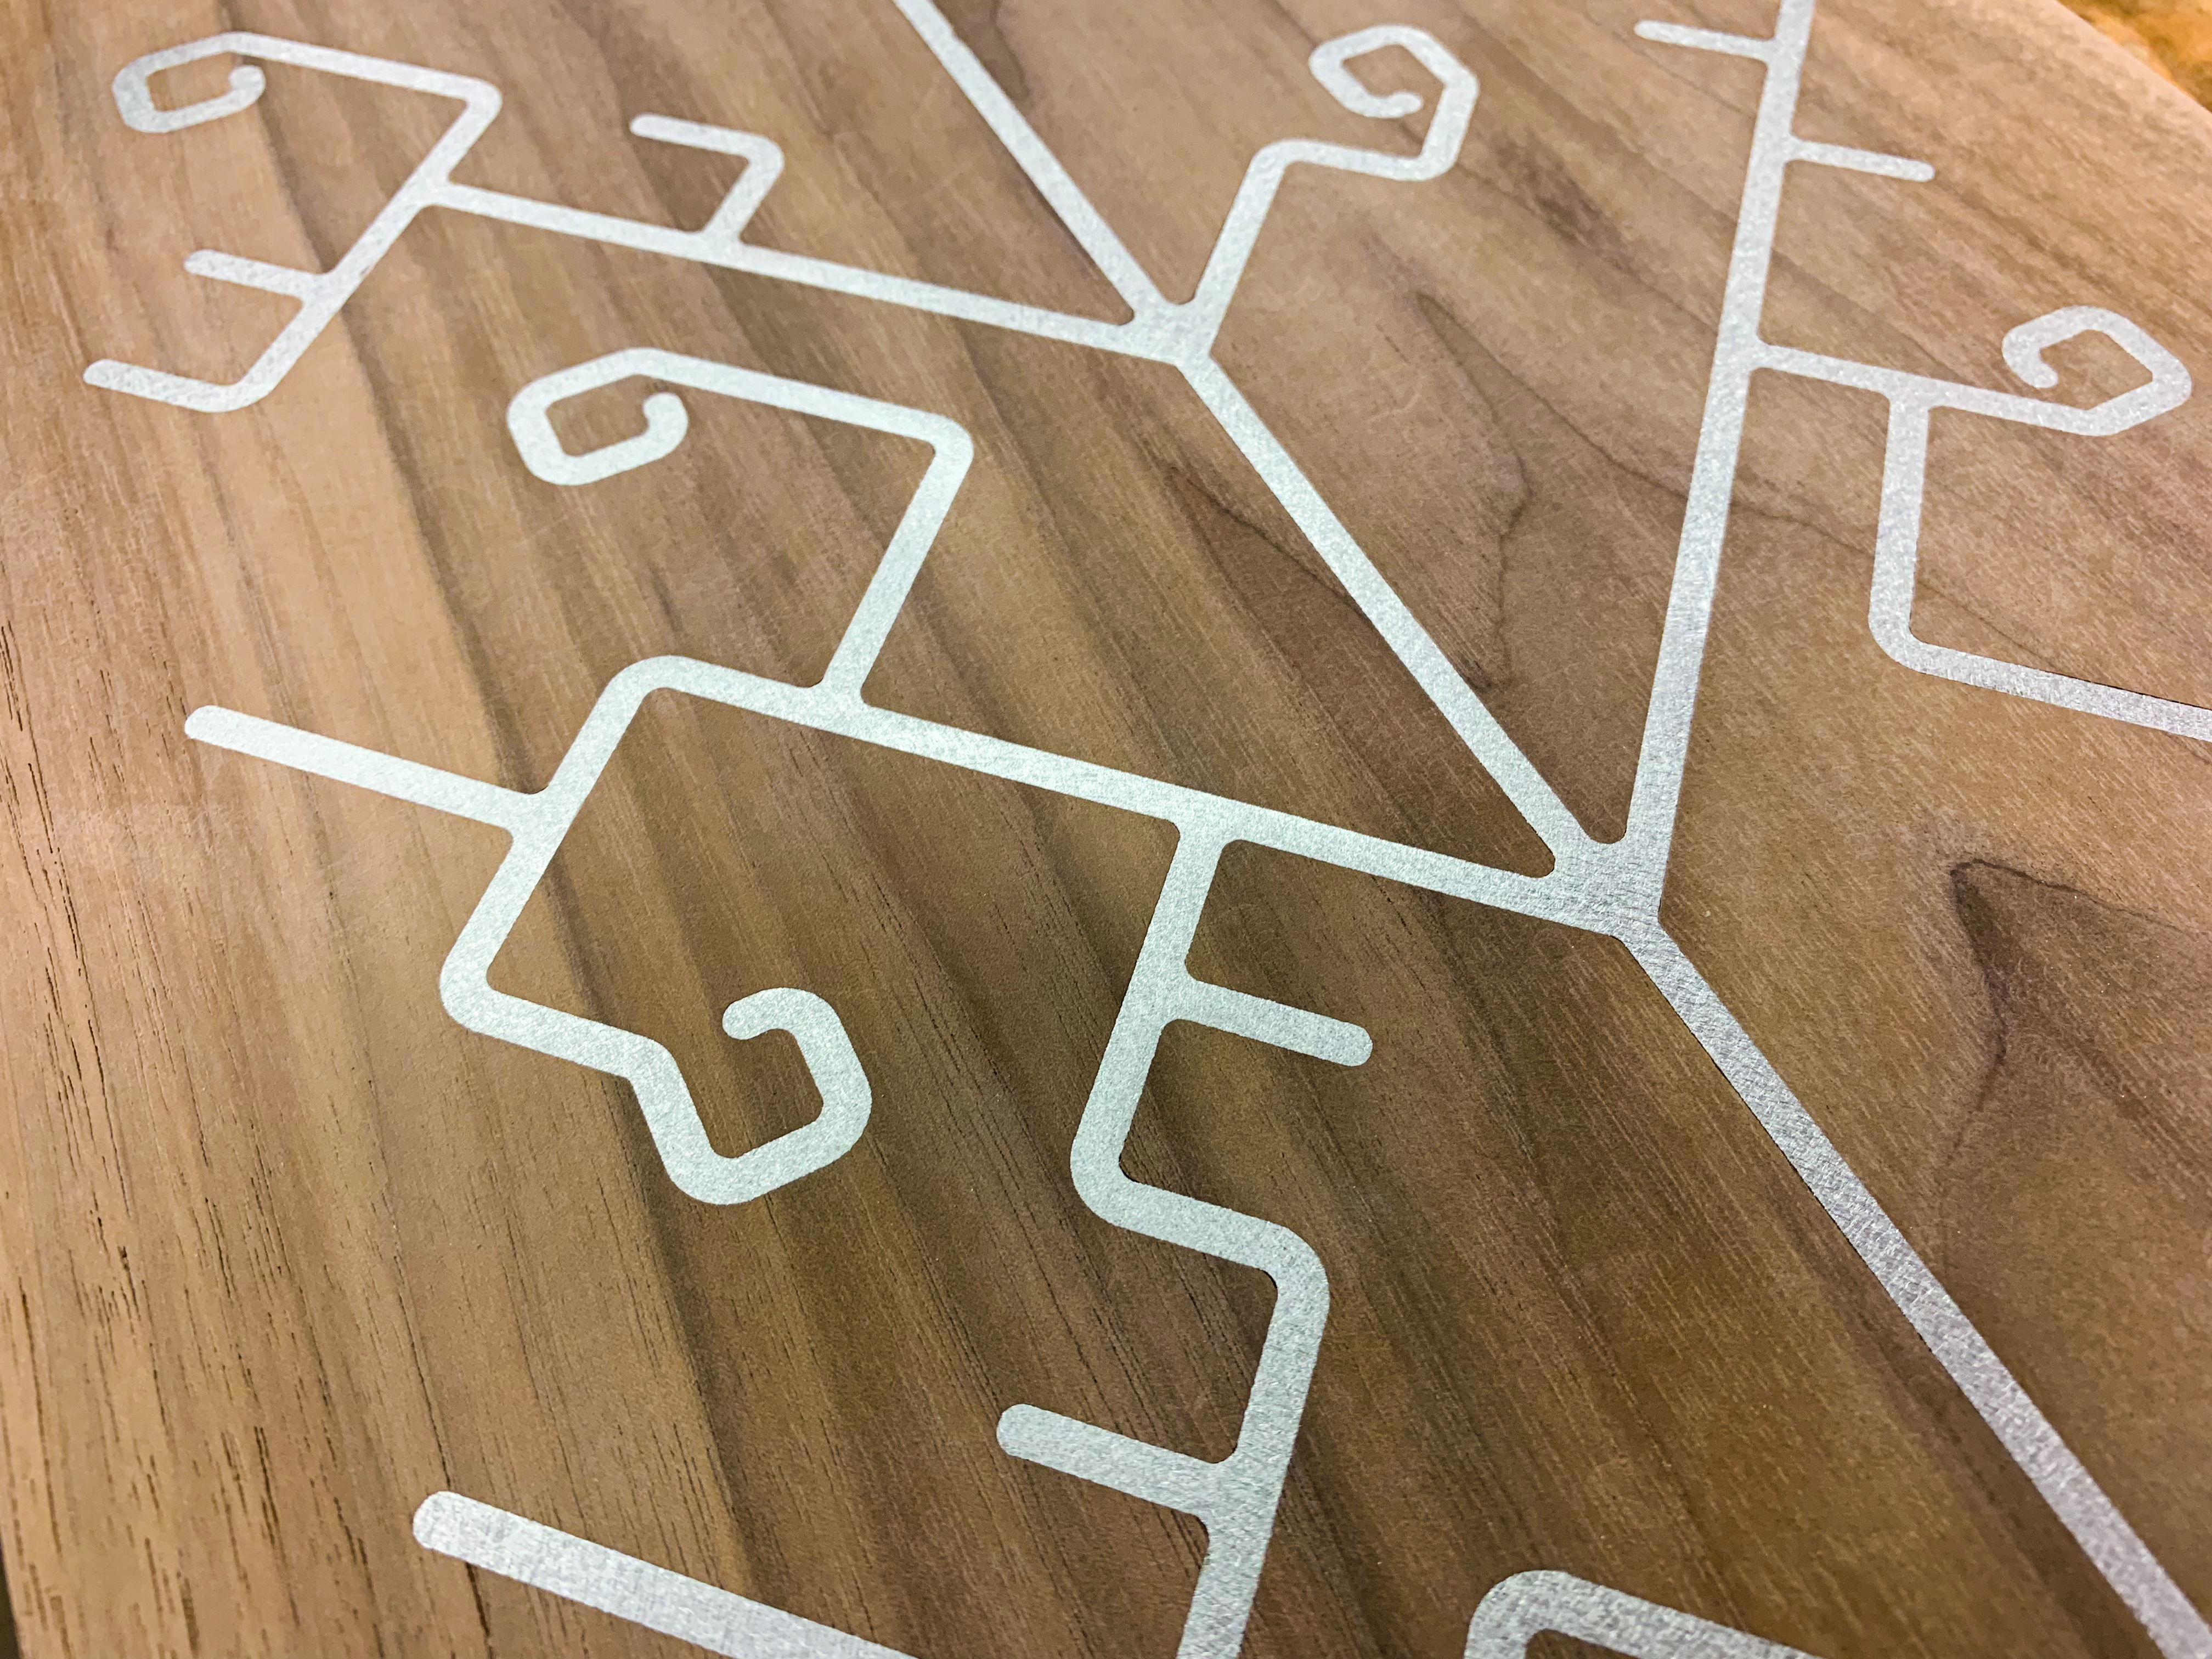
The aluminum is slightly proud of the walnut; the next step is to sand until smooth with a palm sander.
After sanding at 120 grit the aluminum takes on a really nice flat brightness and sits flush with the surface of the wood.
Outside of the Shopbot and waterjet, the rest of this project was all conventional woodworking (albeit with the really nice tools I got to use at Pier 9). Here’s all of the panel wood for the project after planing, dimensioning, and routing.
I used a Festool Domino joiner extensively.
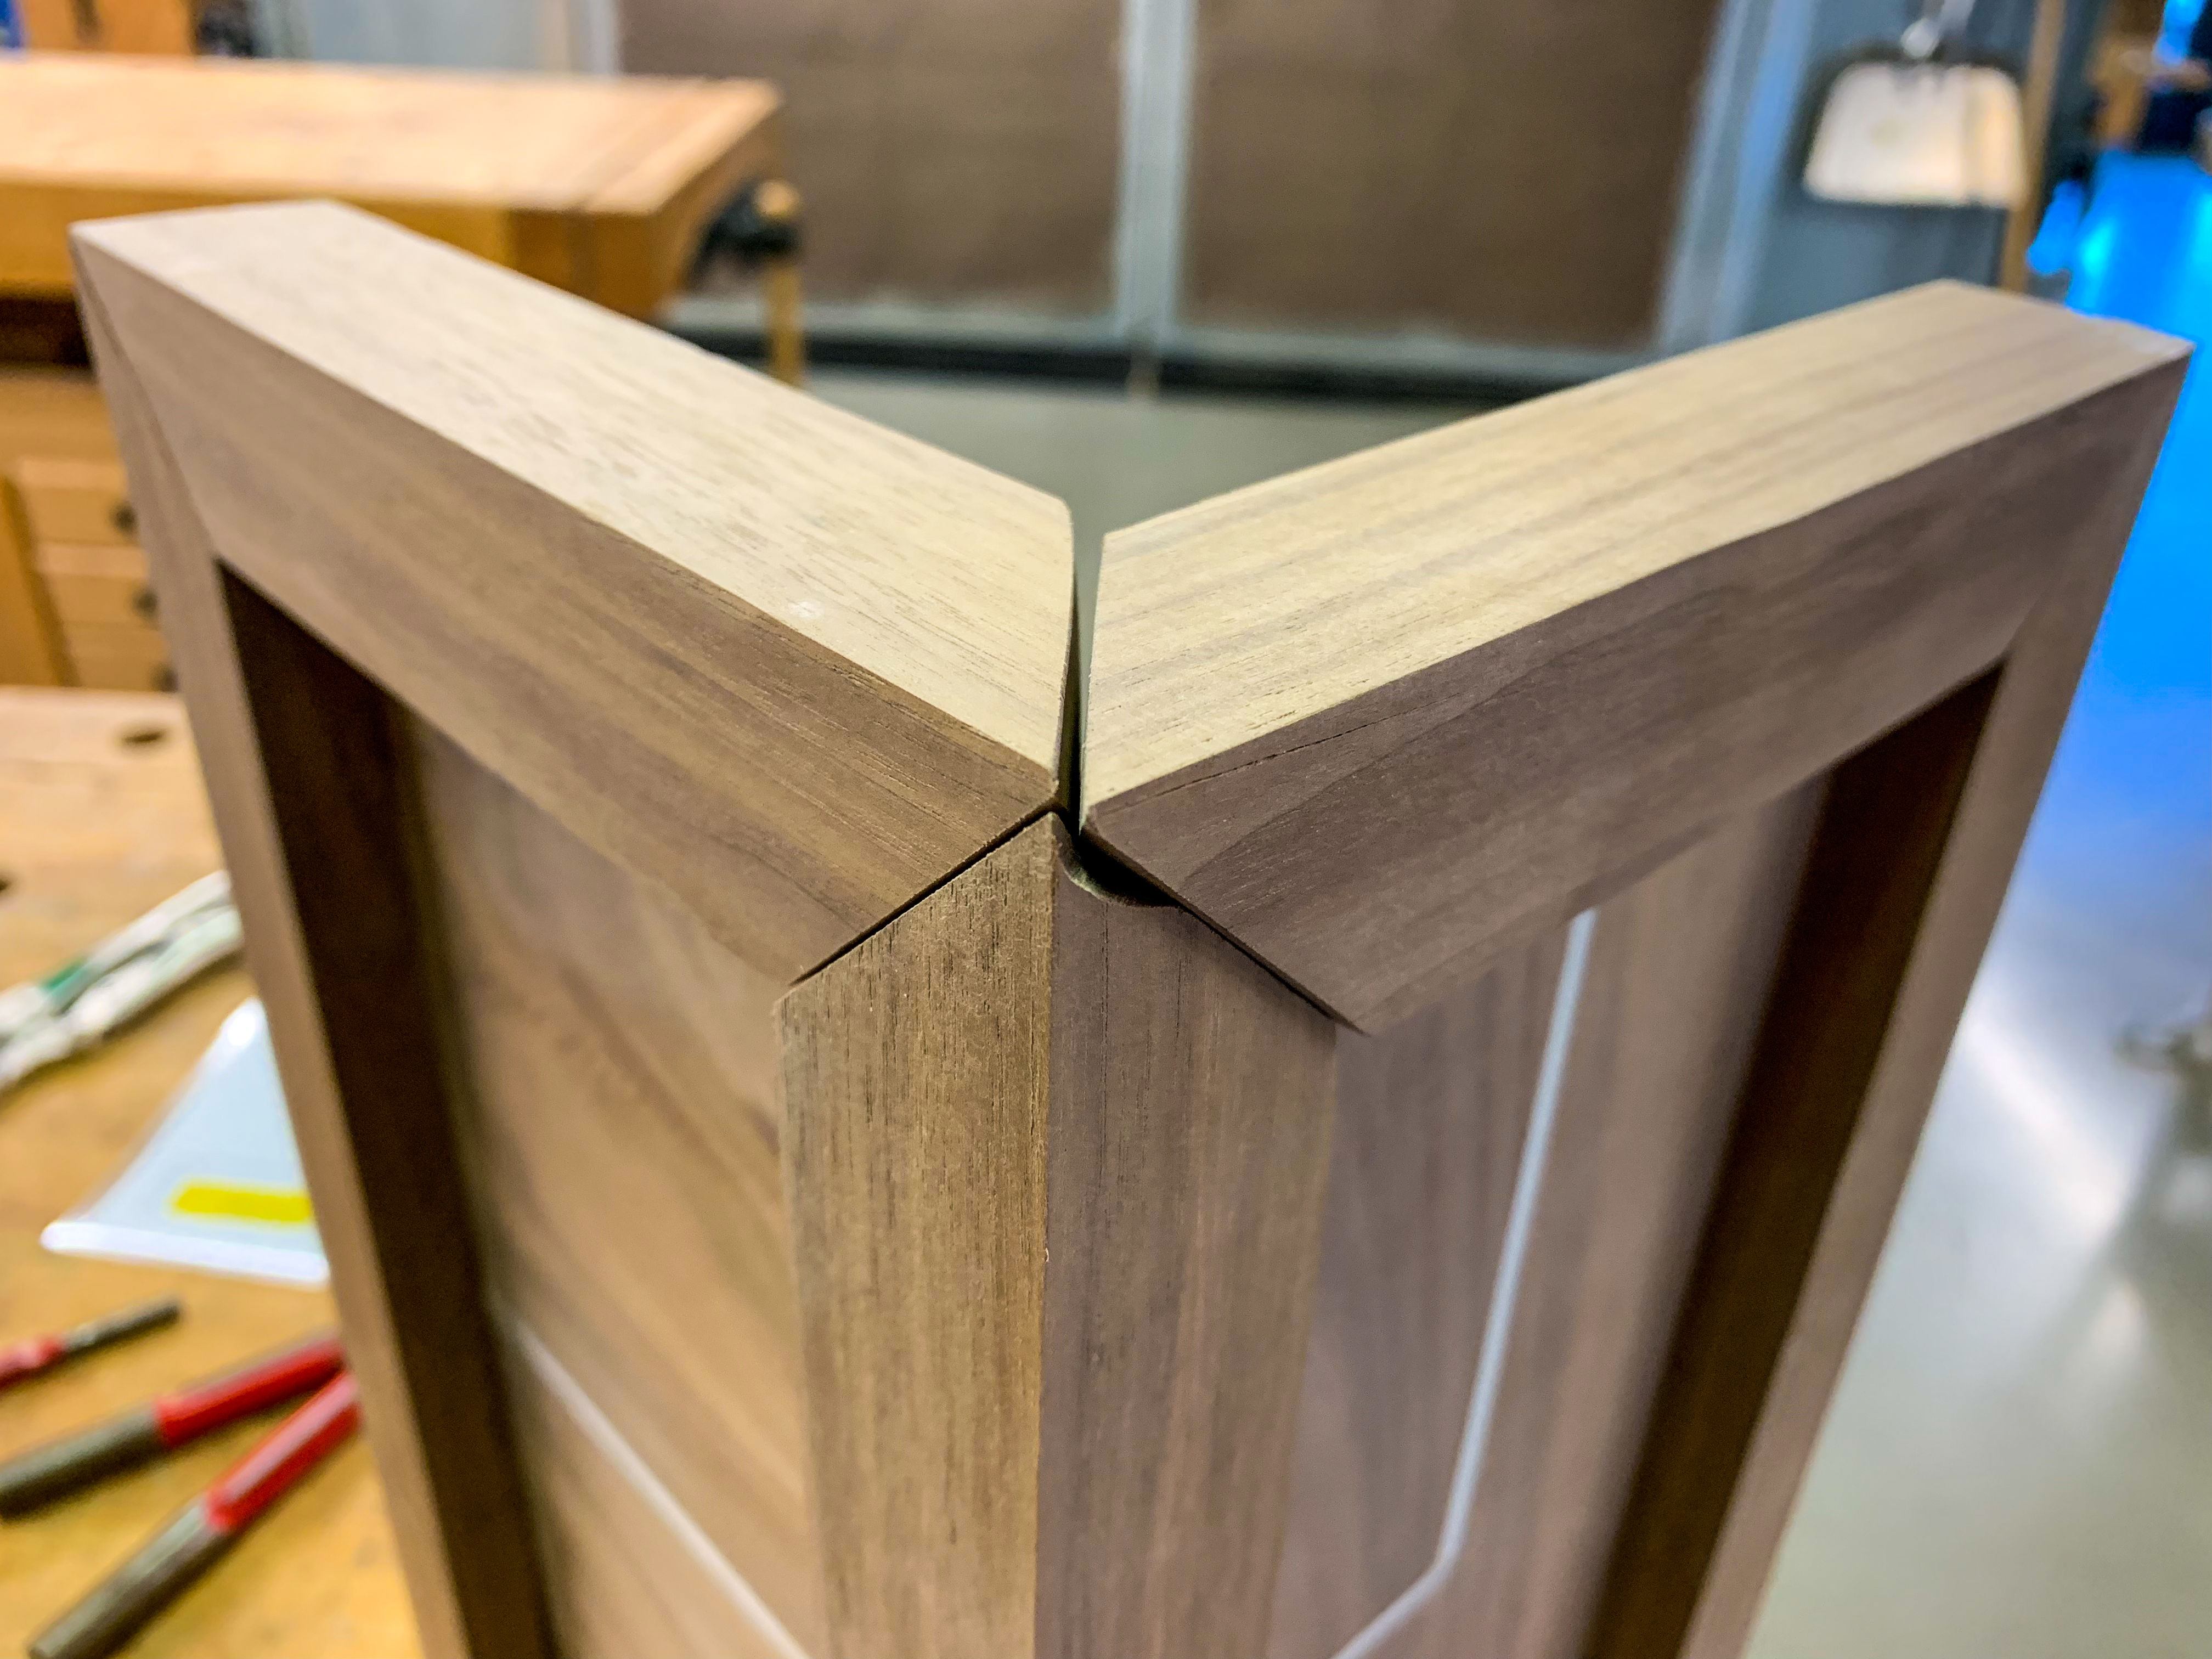
Some of my joinery went really well…
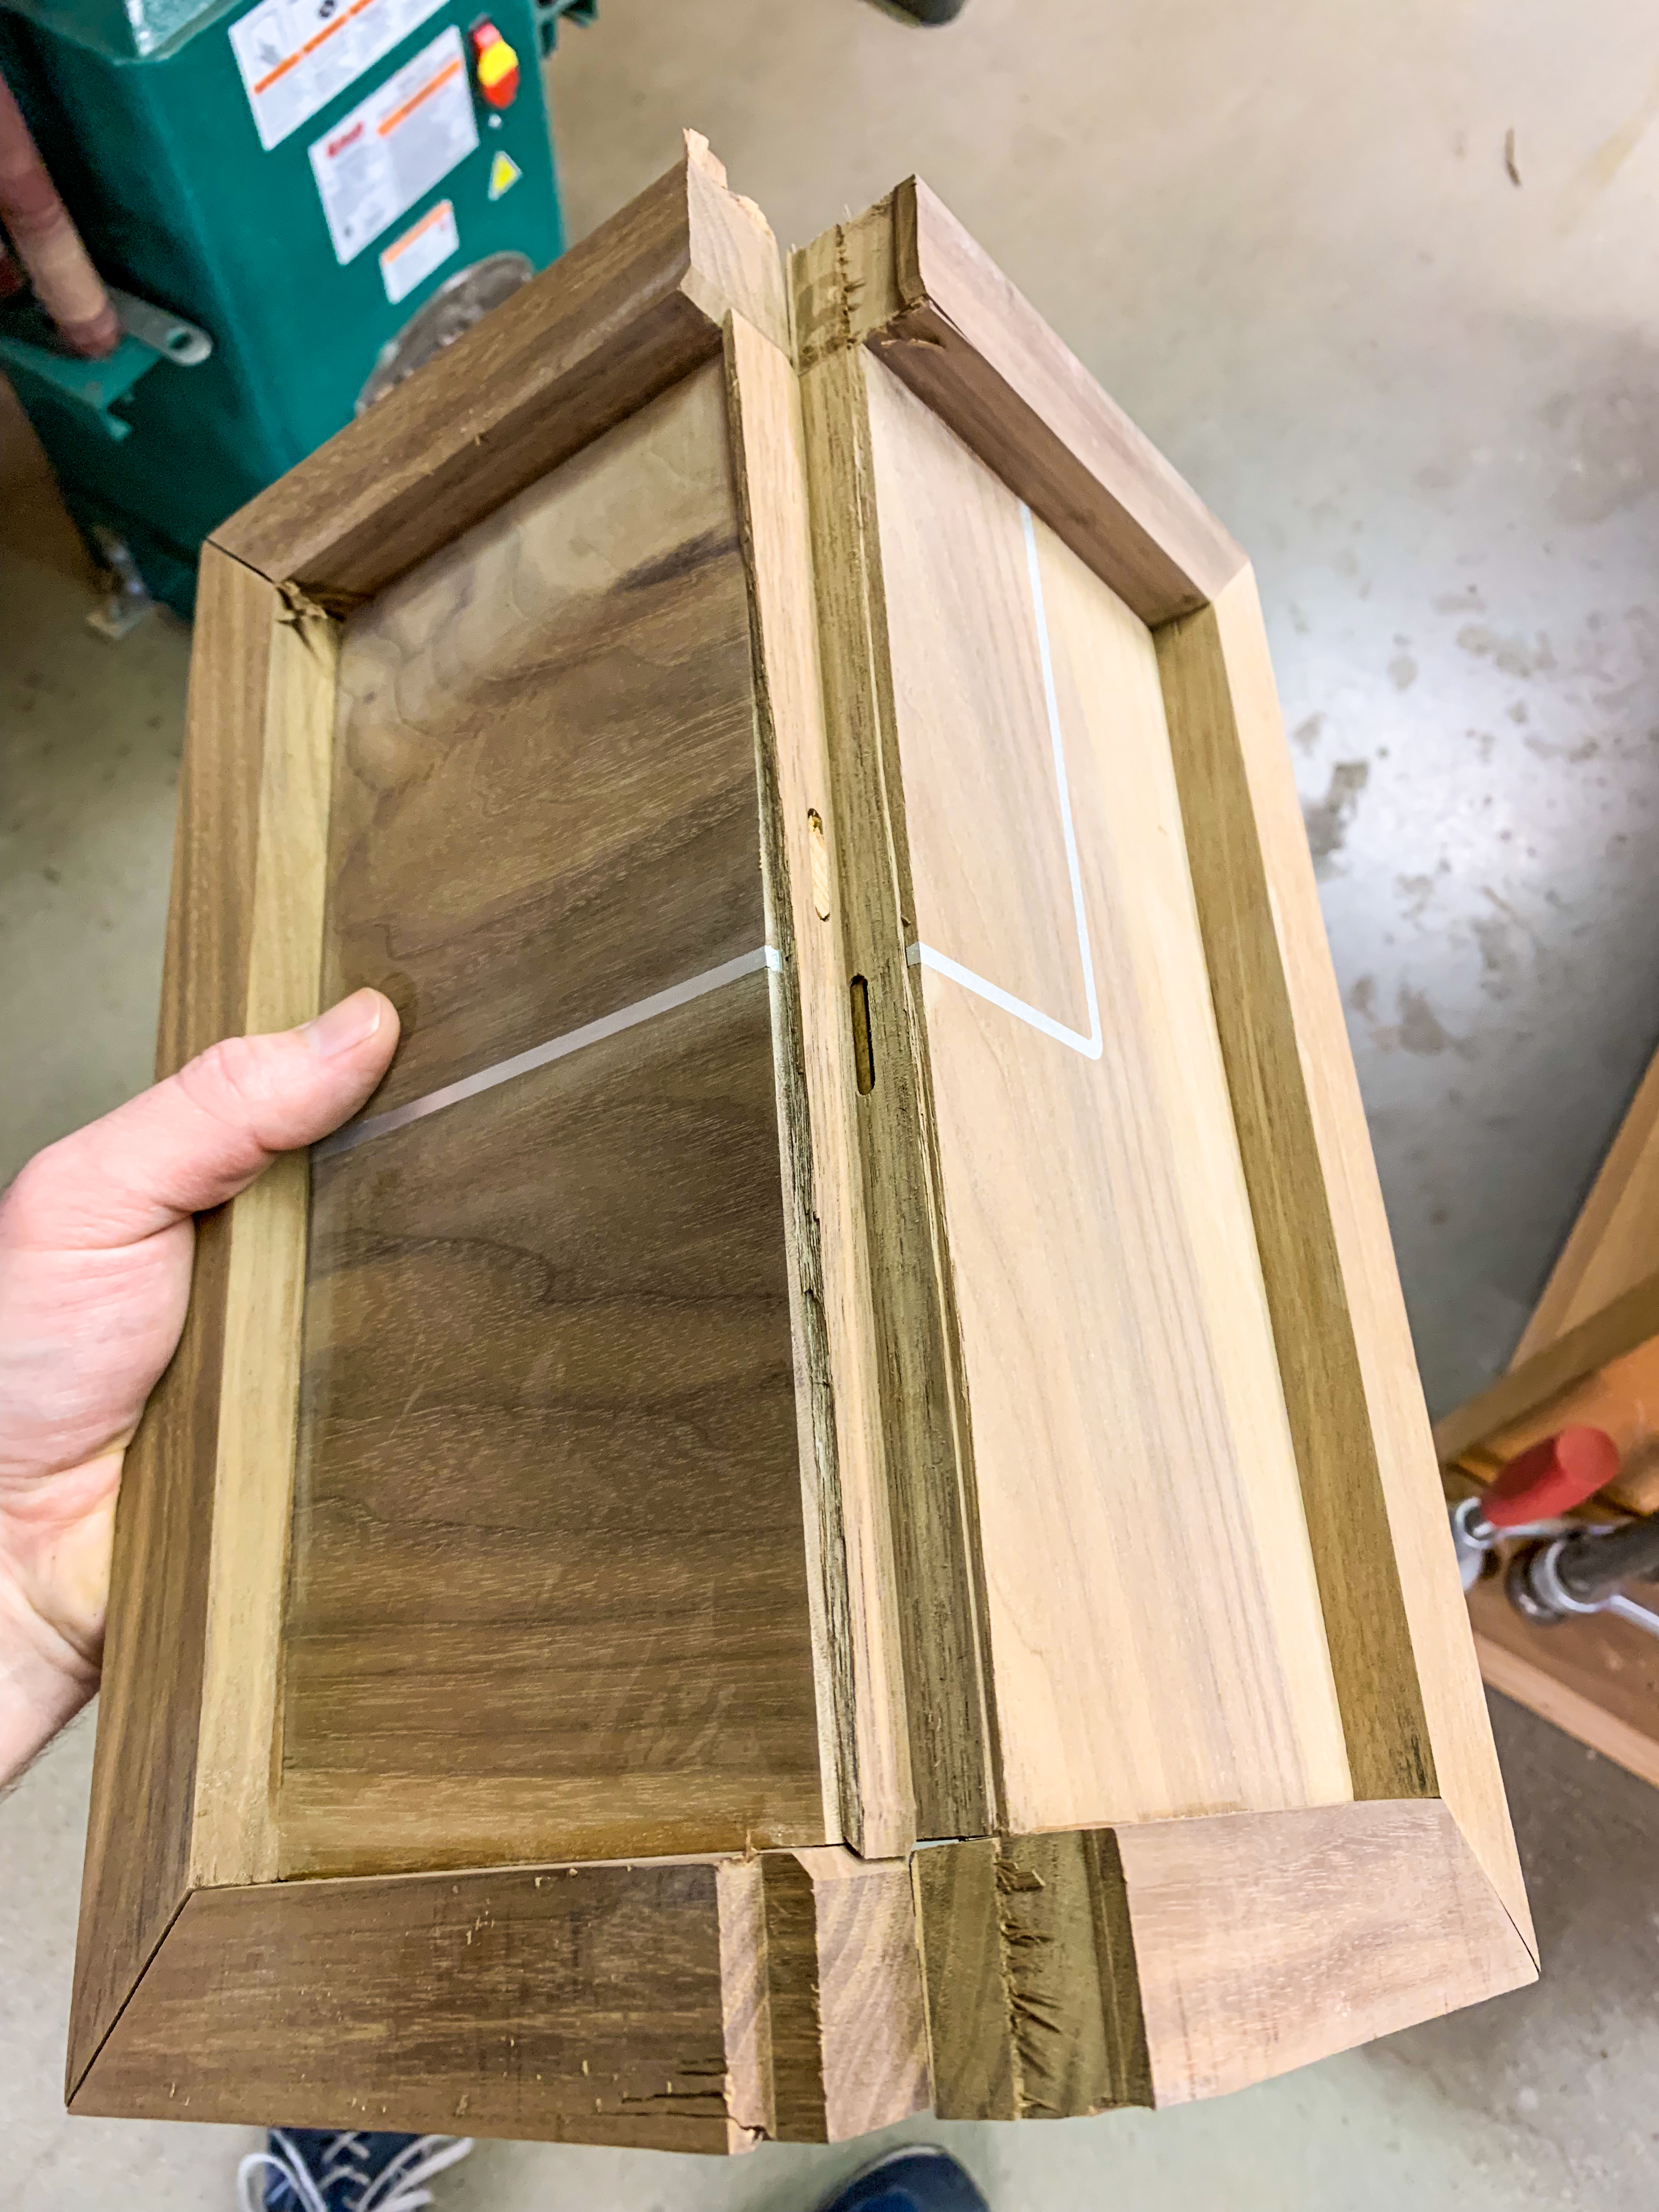
…but I also made some inexplicable novice mistakes. I don’t know why I let the glue dry on this one.
I had to remove the trim with a table router and start over.
Fortunately the inlay panels were salvageable. This was important to me because I wanted the grain to line up and look continuous where it crossed the trim, especially on the front of the mantel.
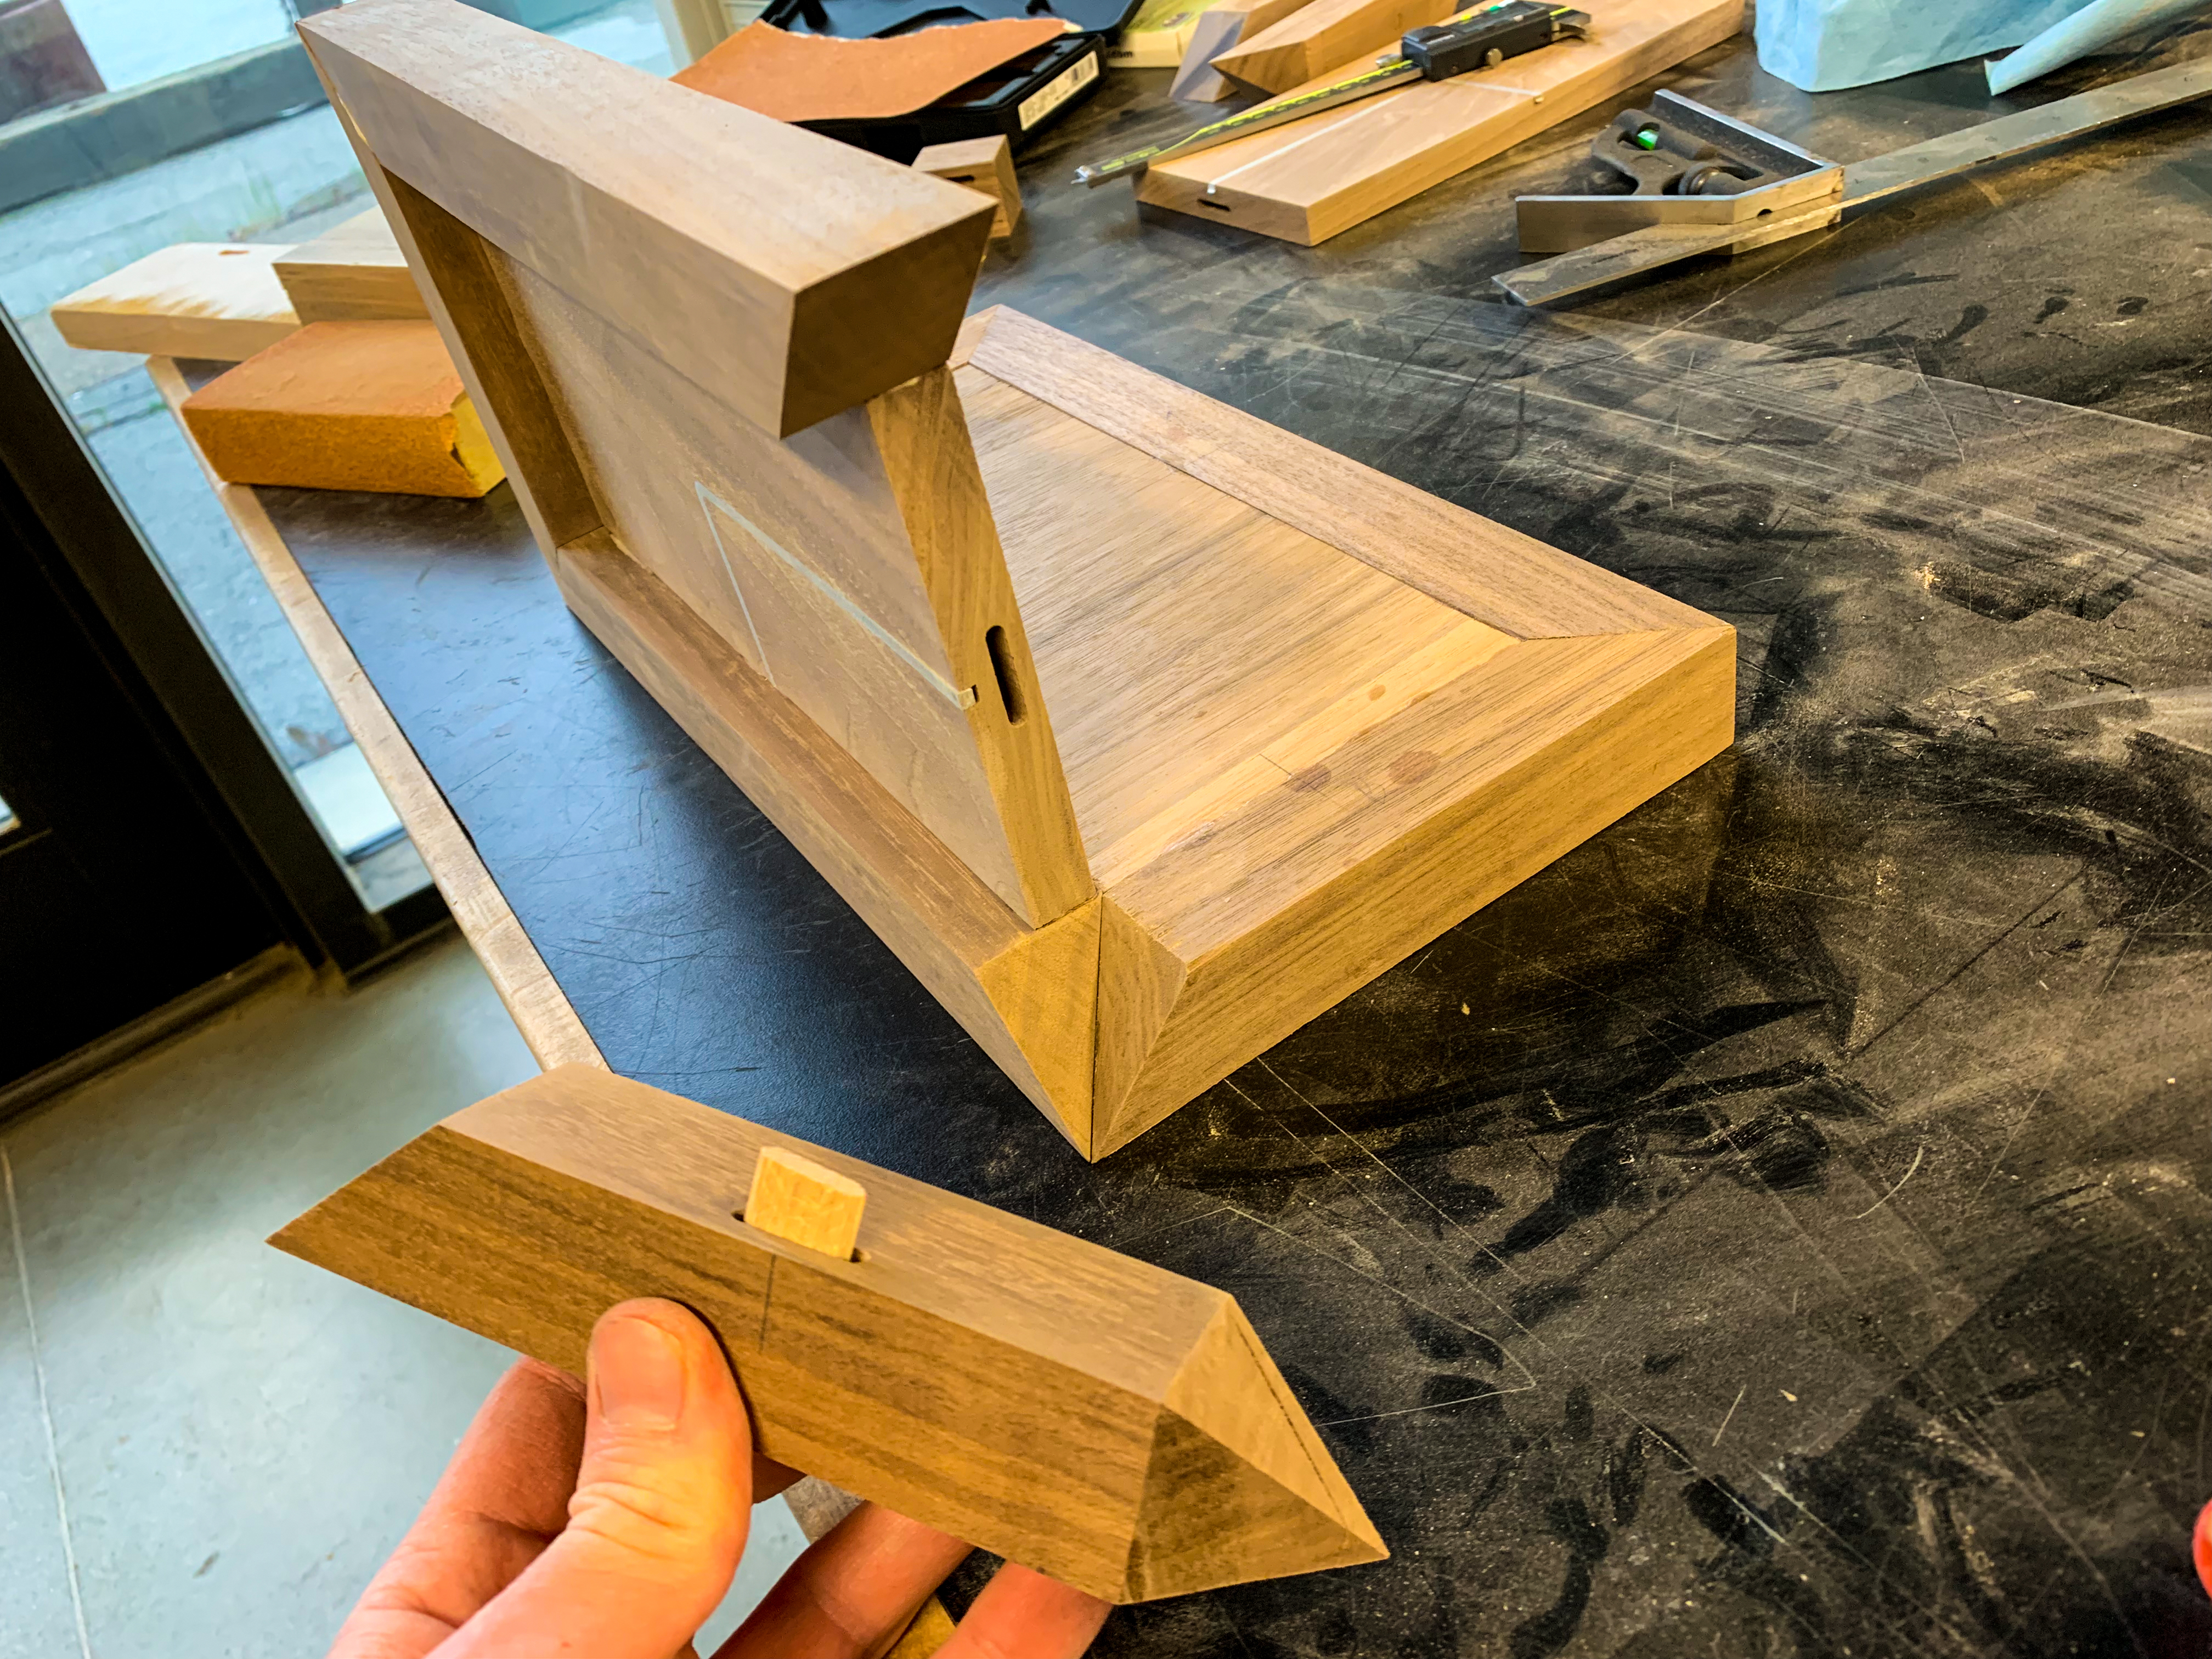
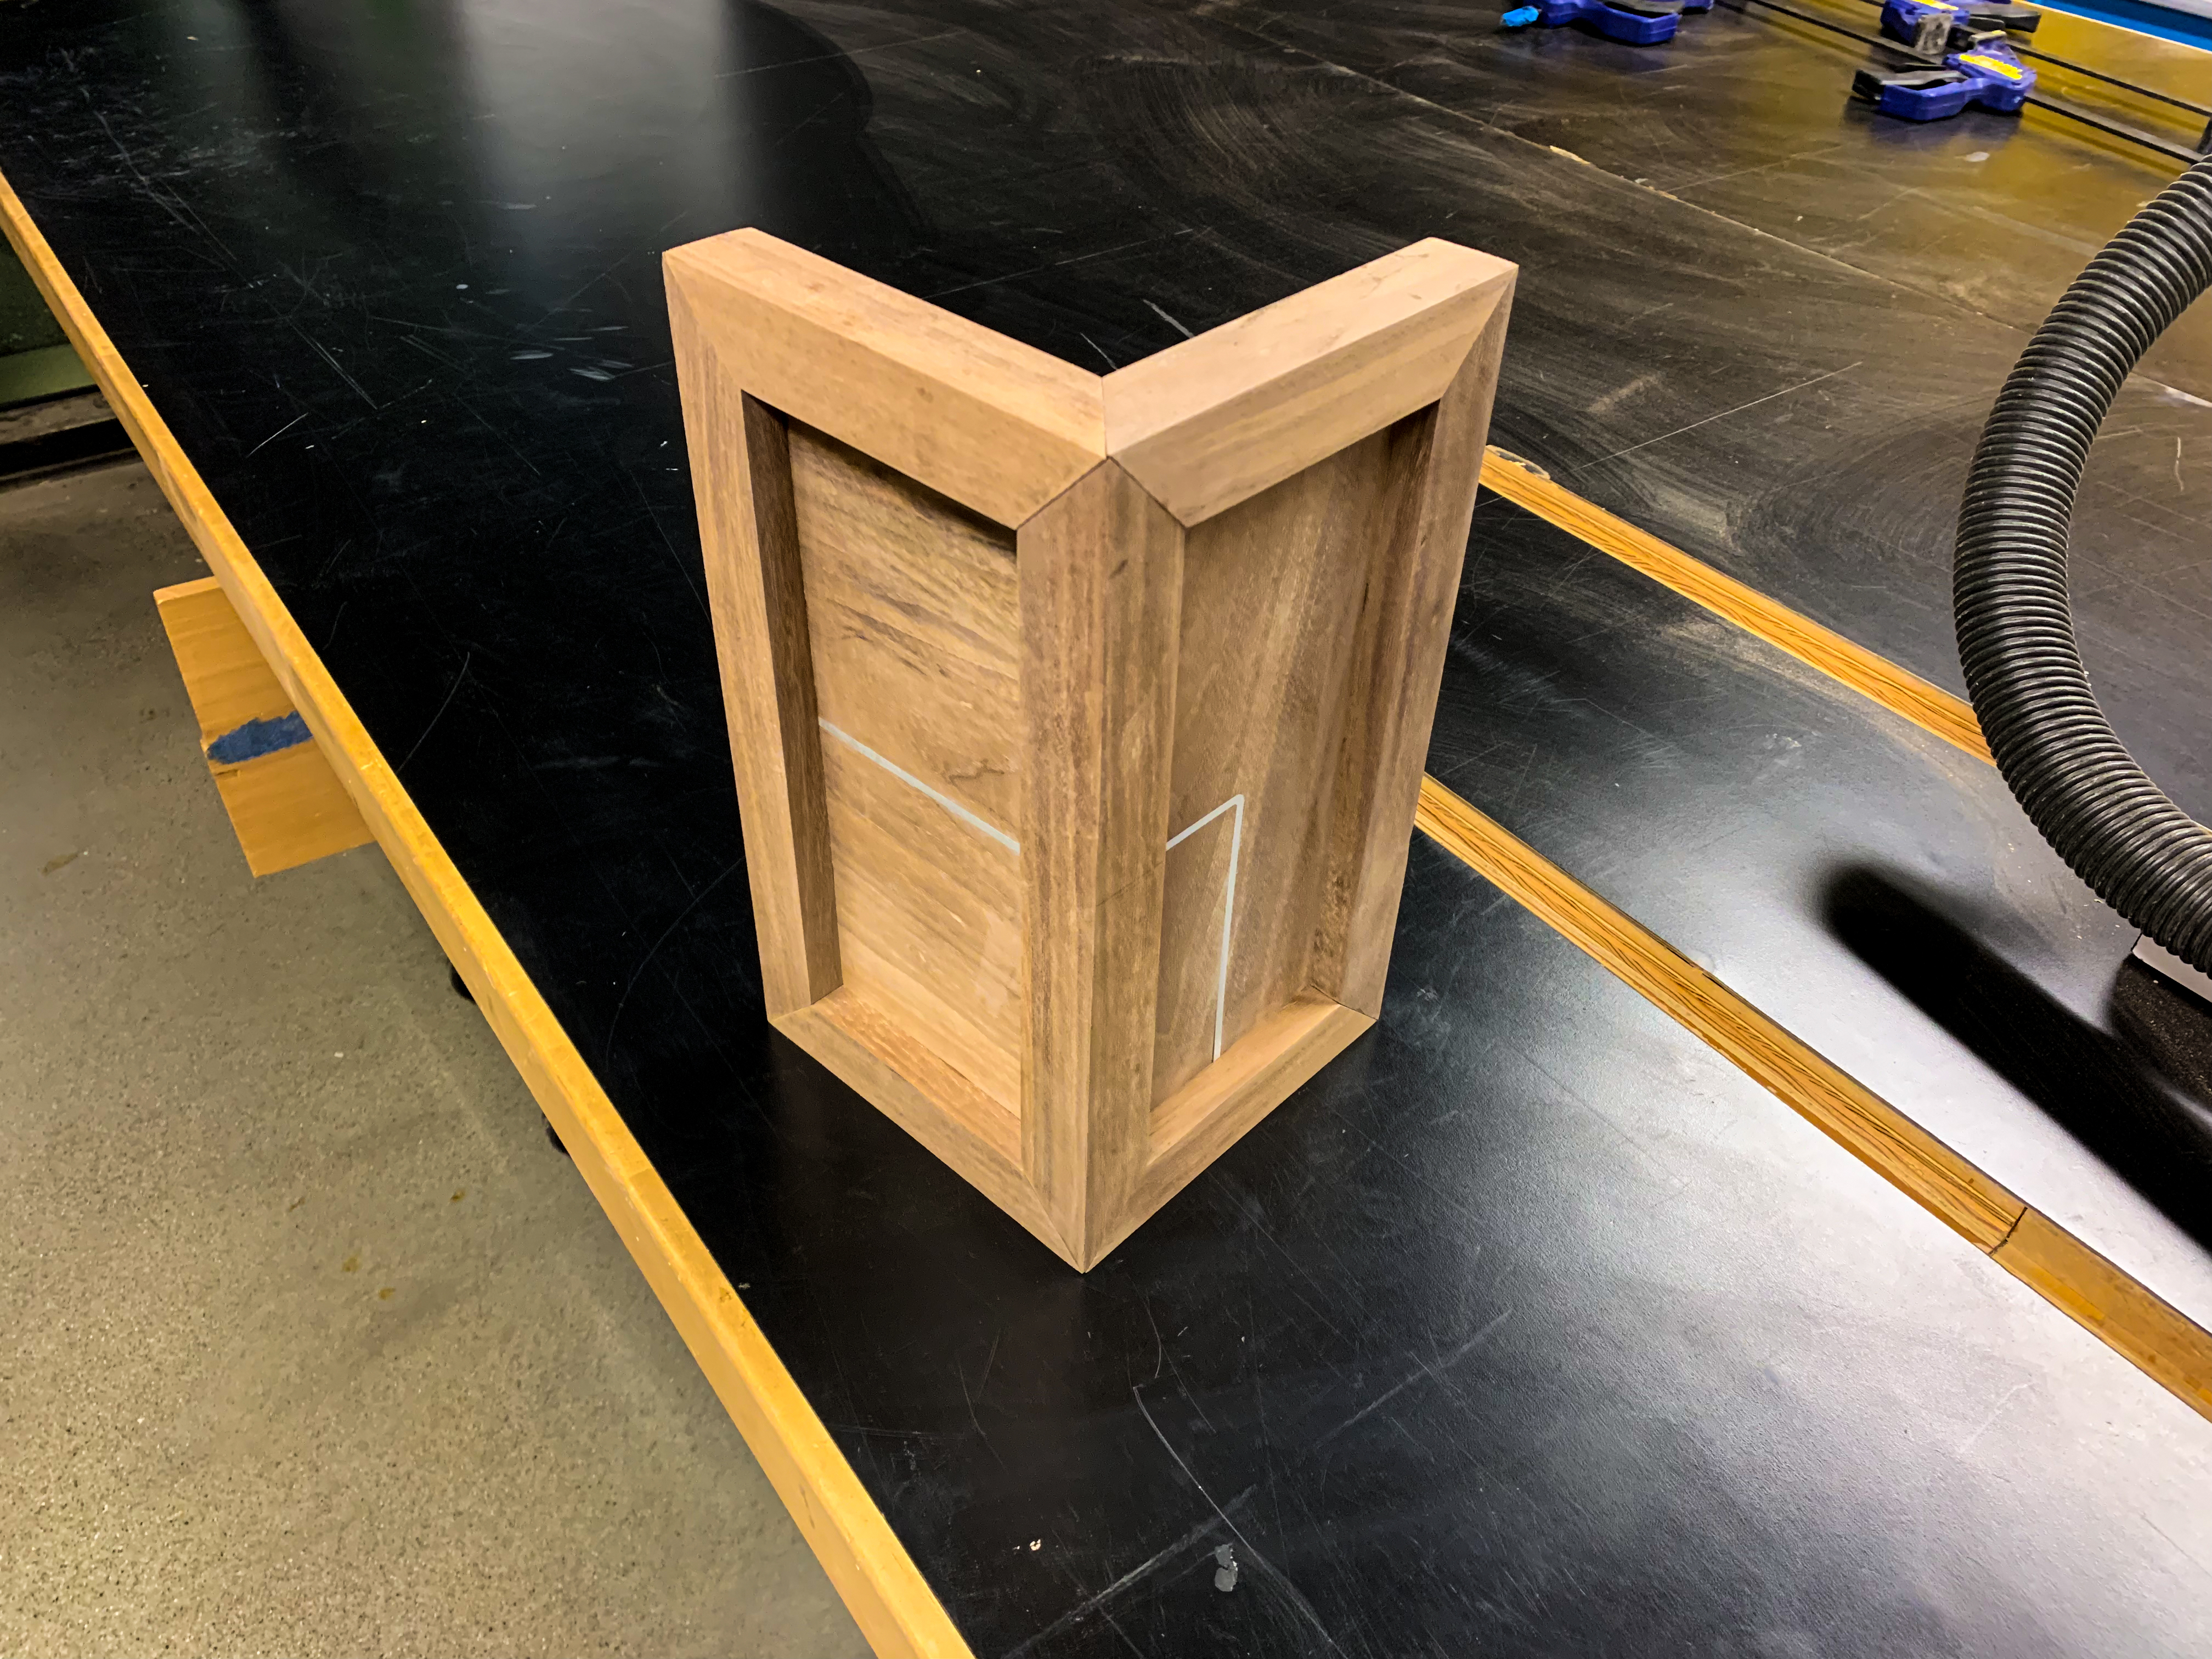
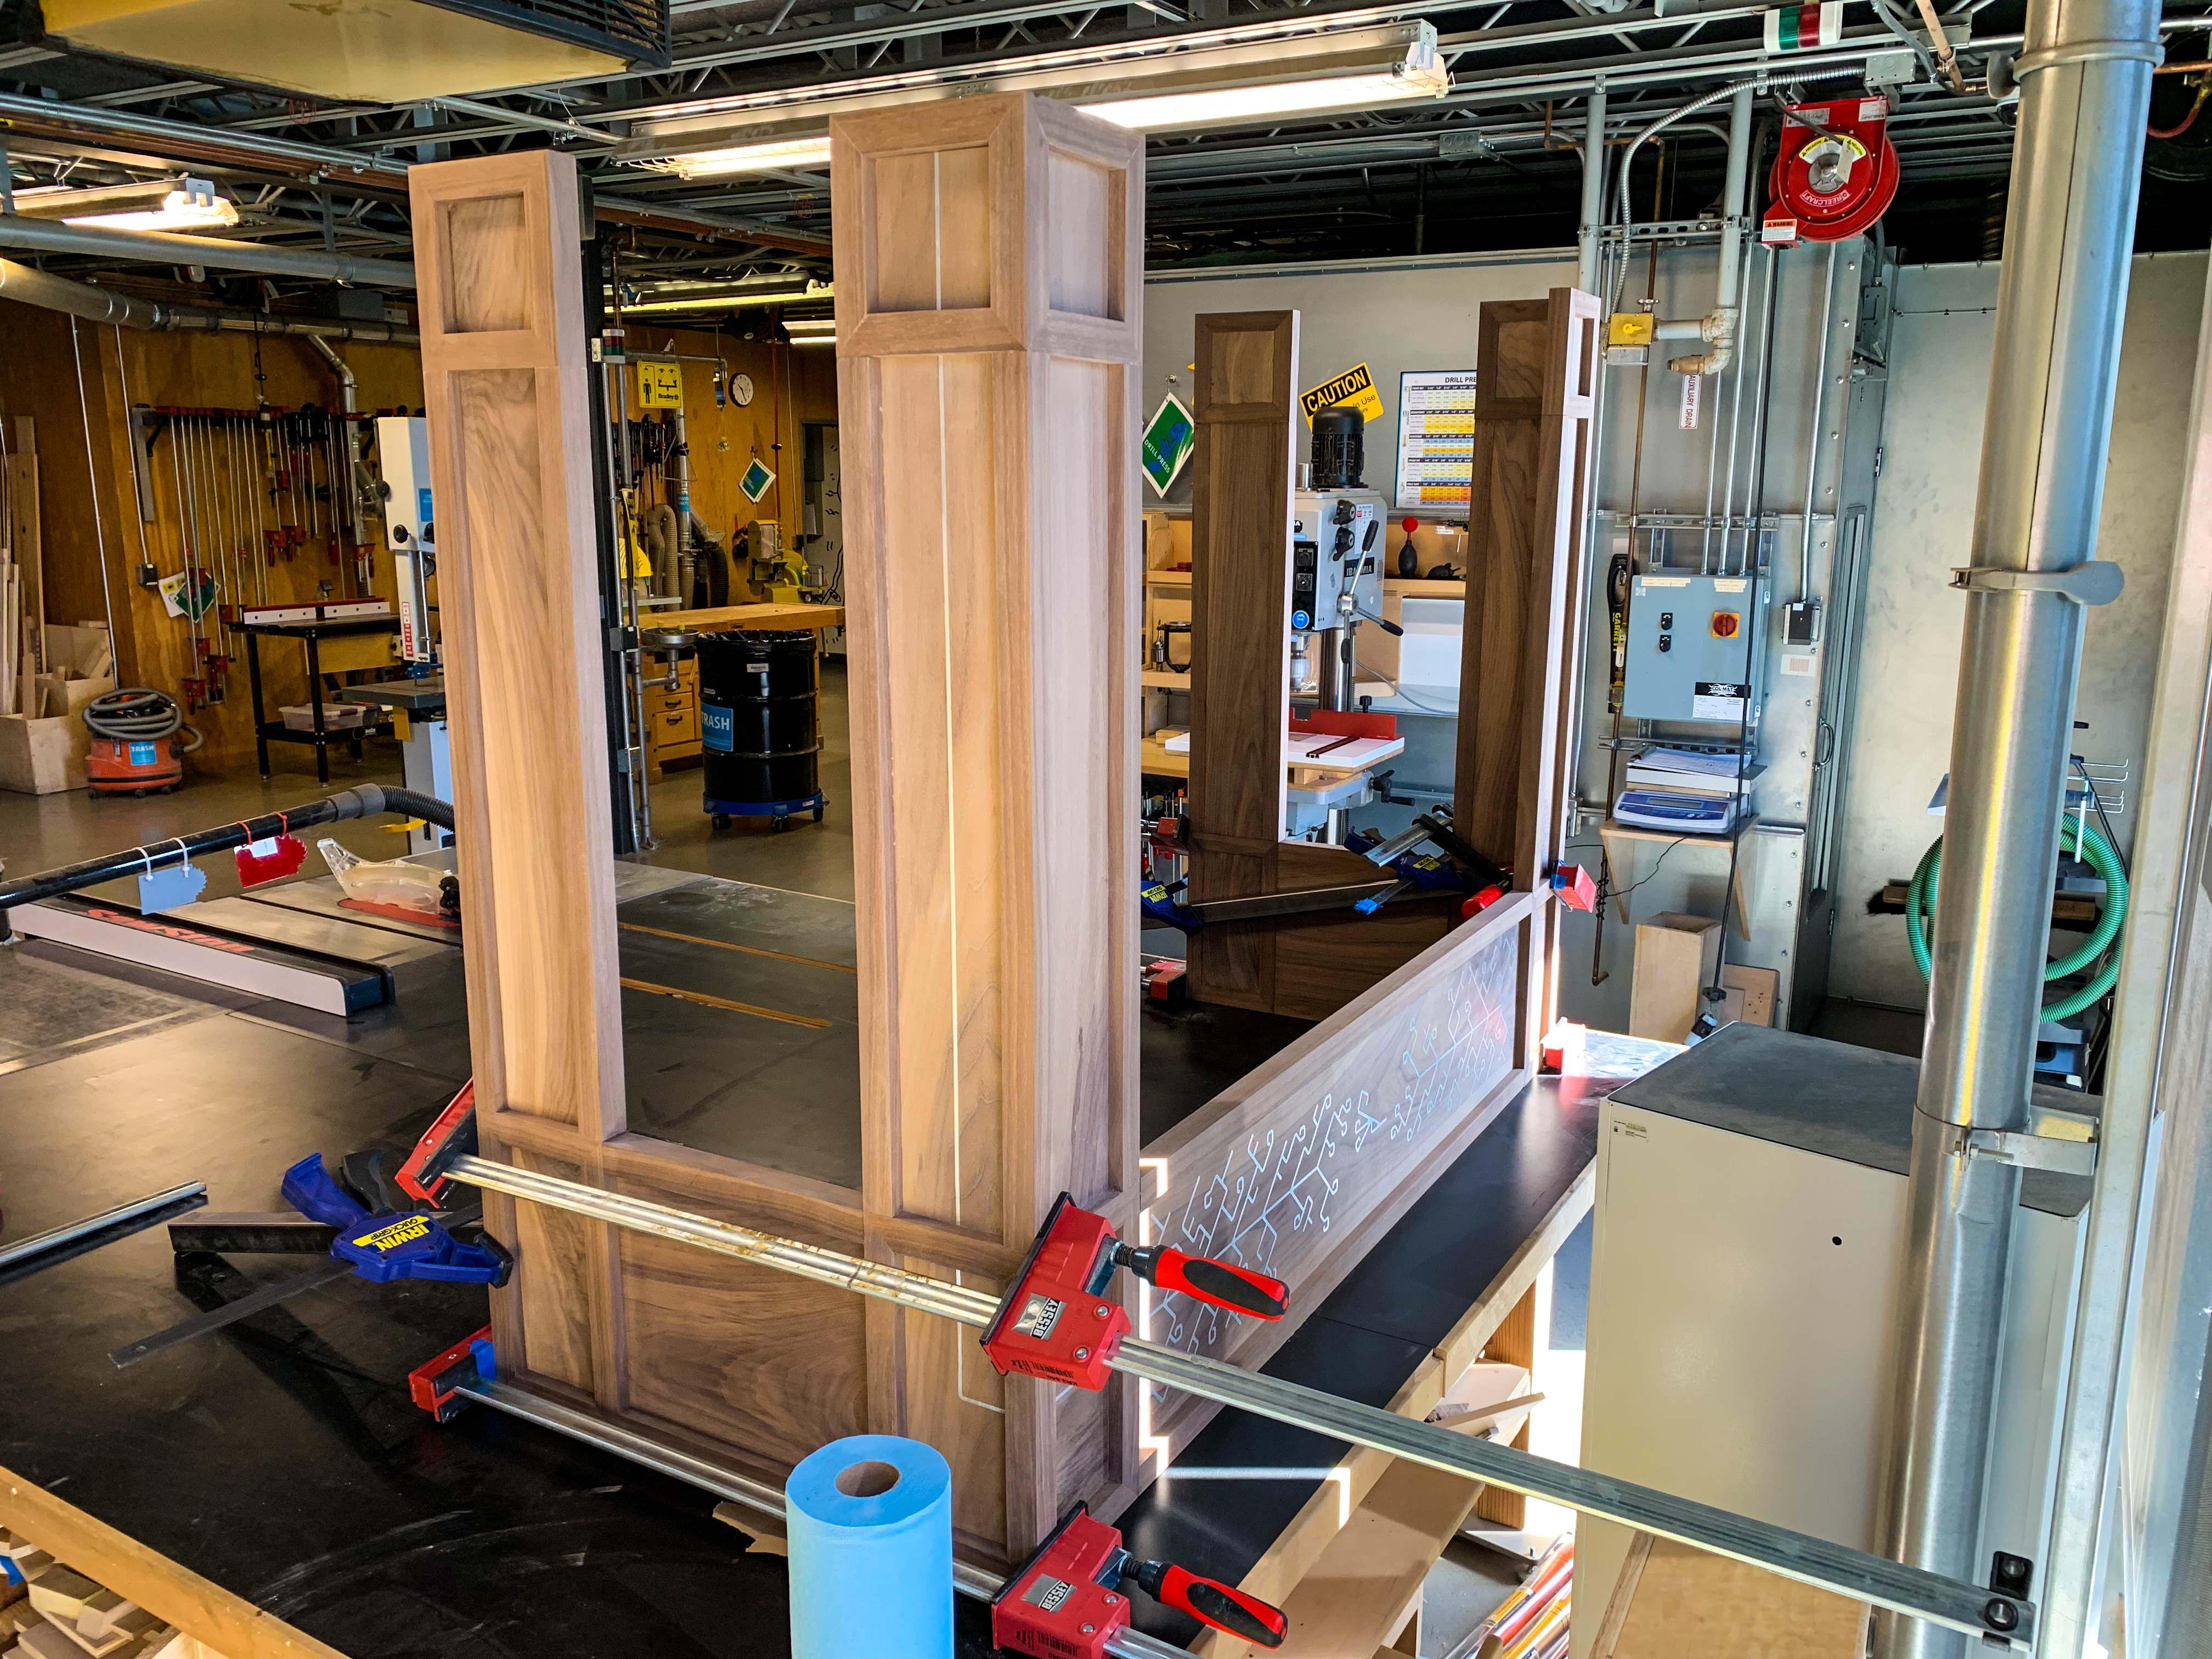
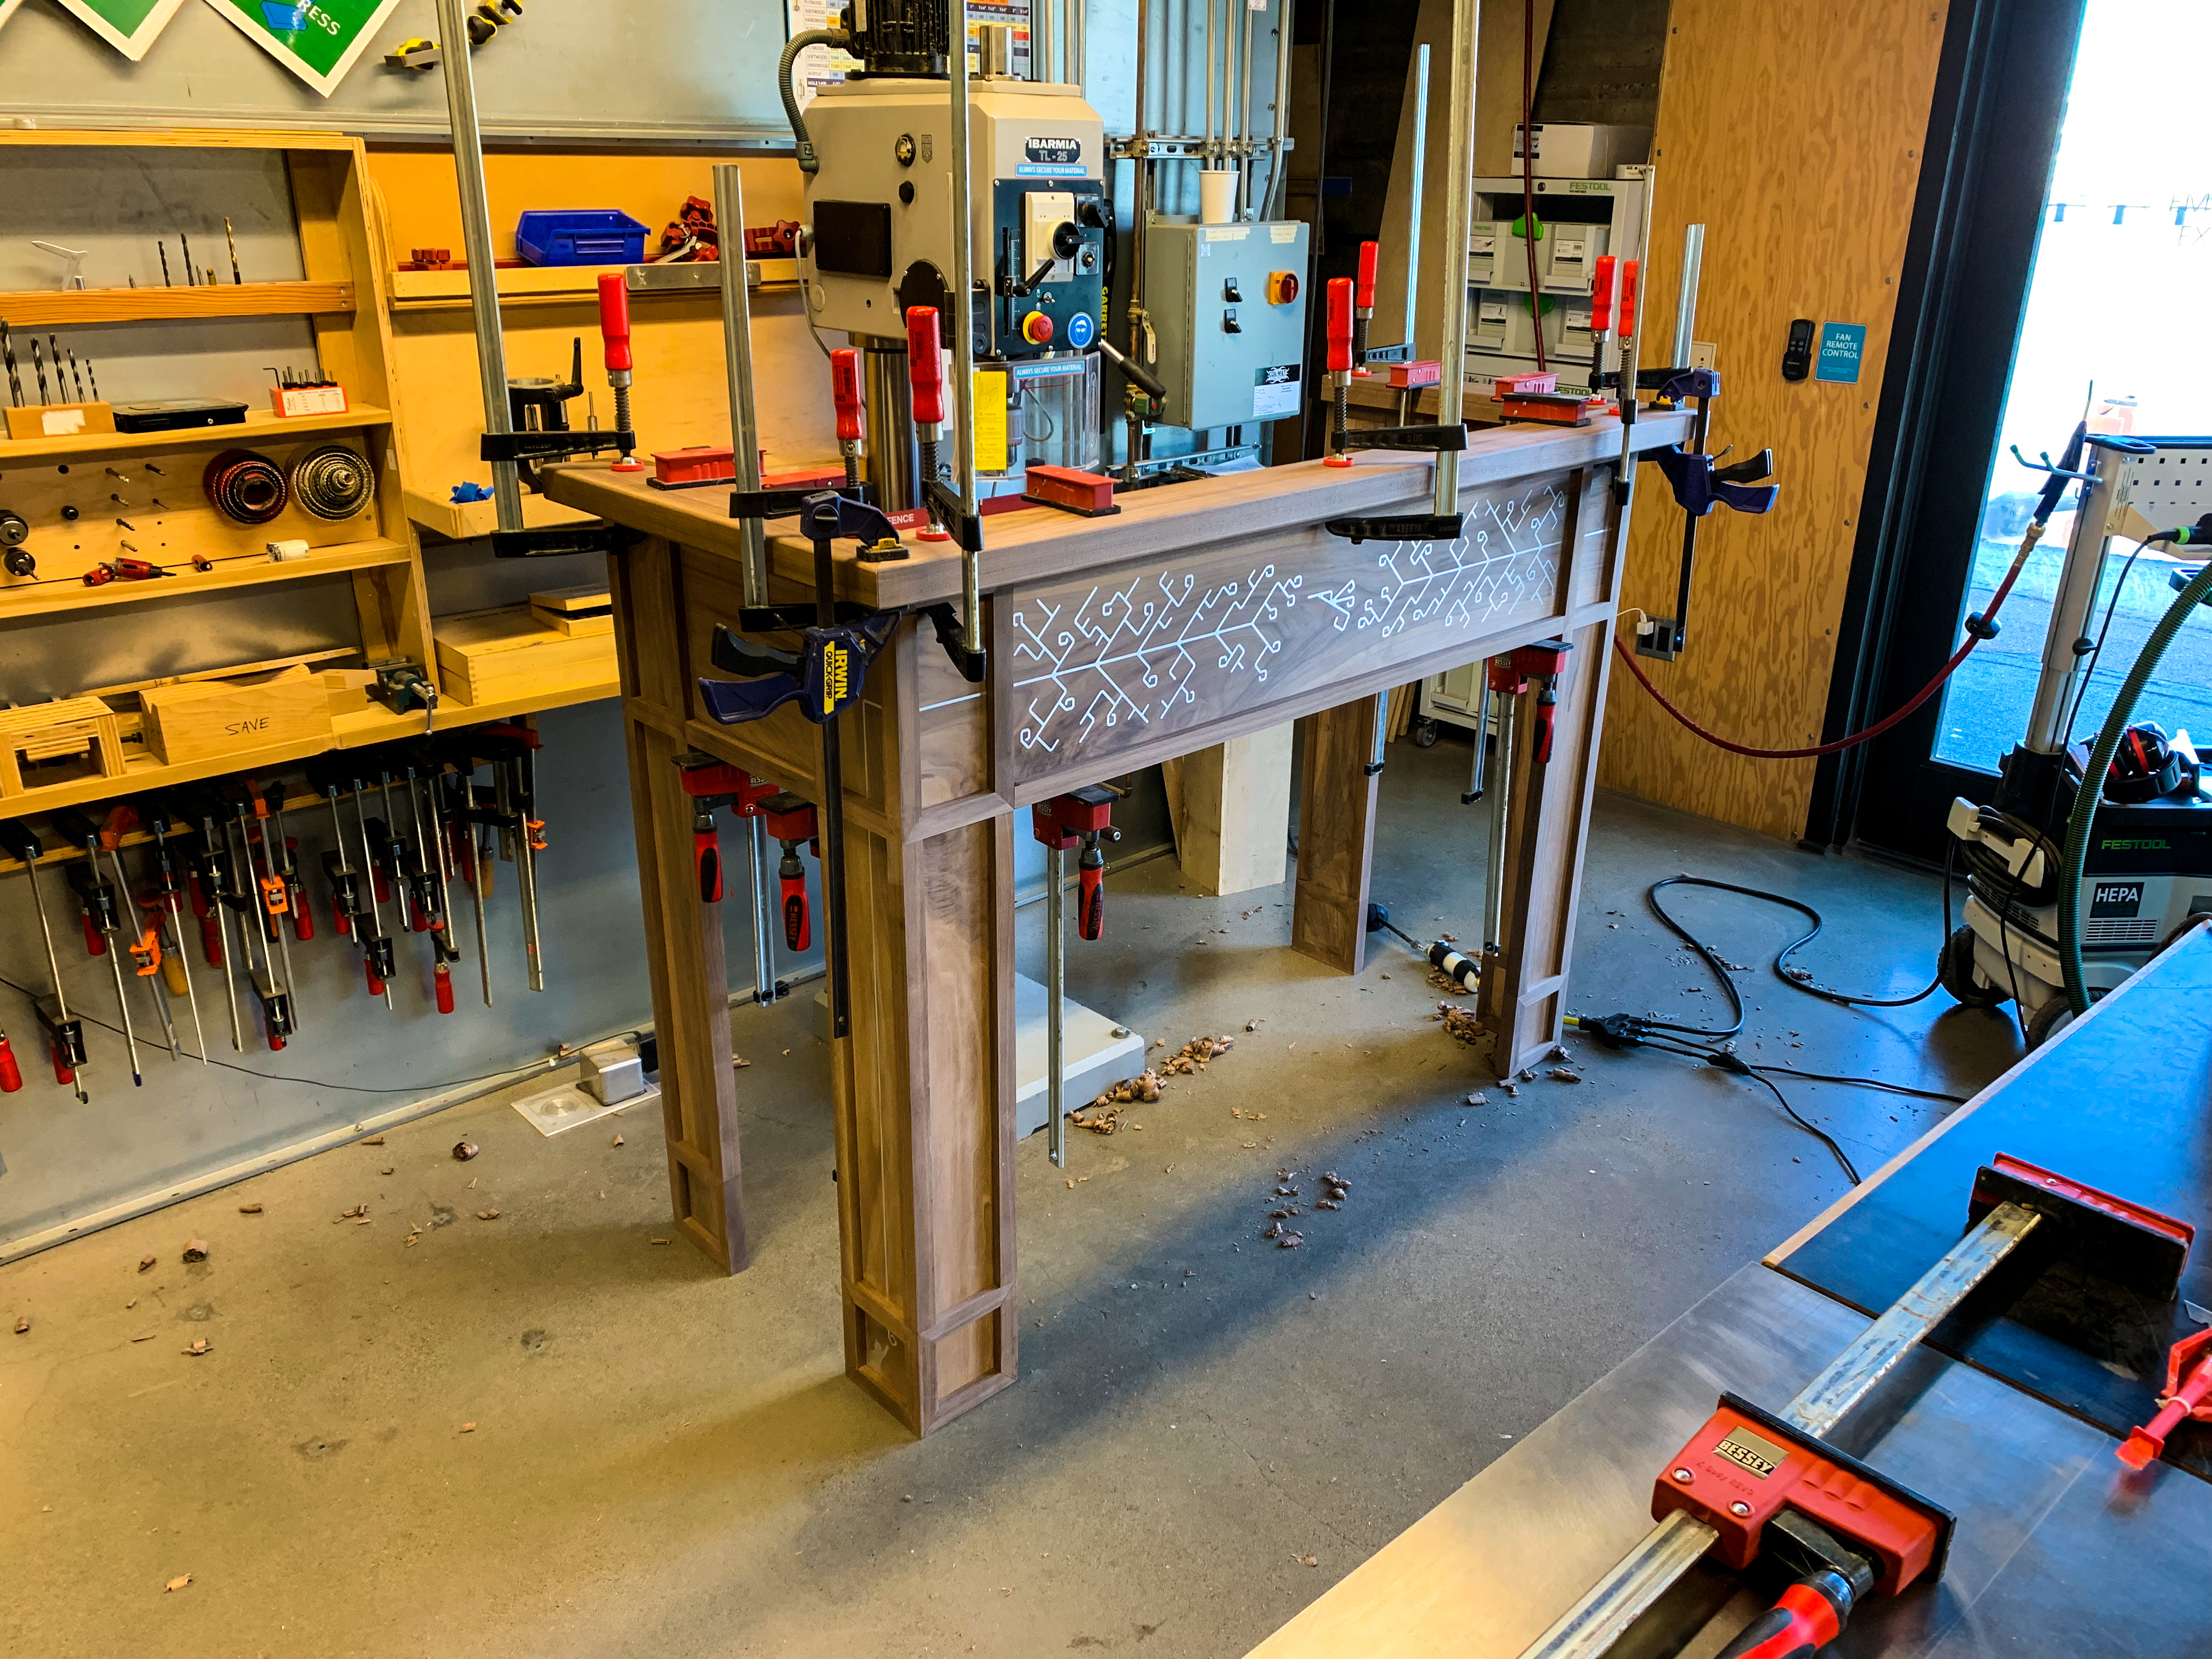
I began to test out the larger assembly using unglued Dominos.
I brought home most of the piece to test unglued against the wall. It fit! I couldn’t believe it; at this point I was so many orders of work away from the original measurements I was sure something would be off.
Back in the shop, I started to glue the assembly.
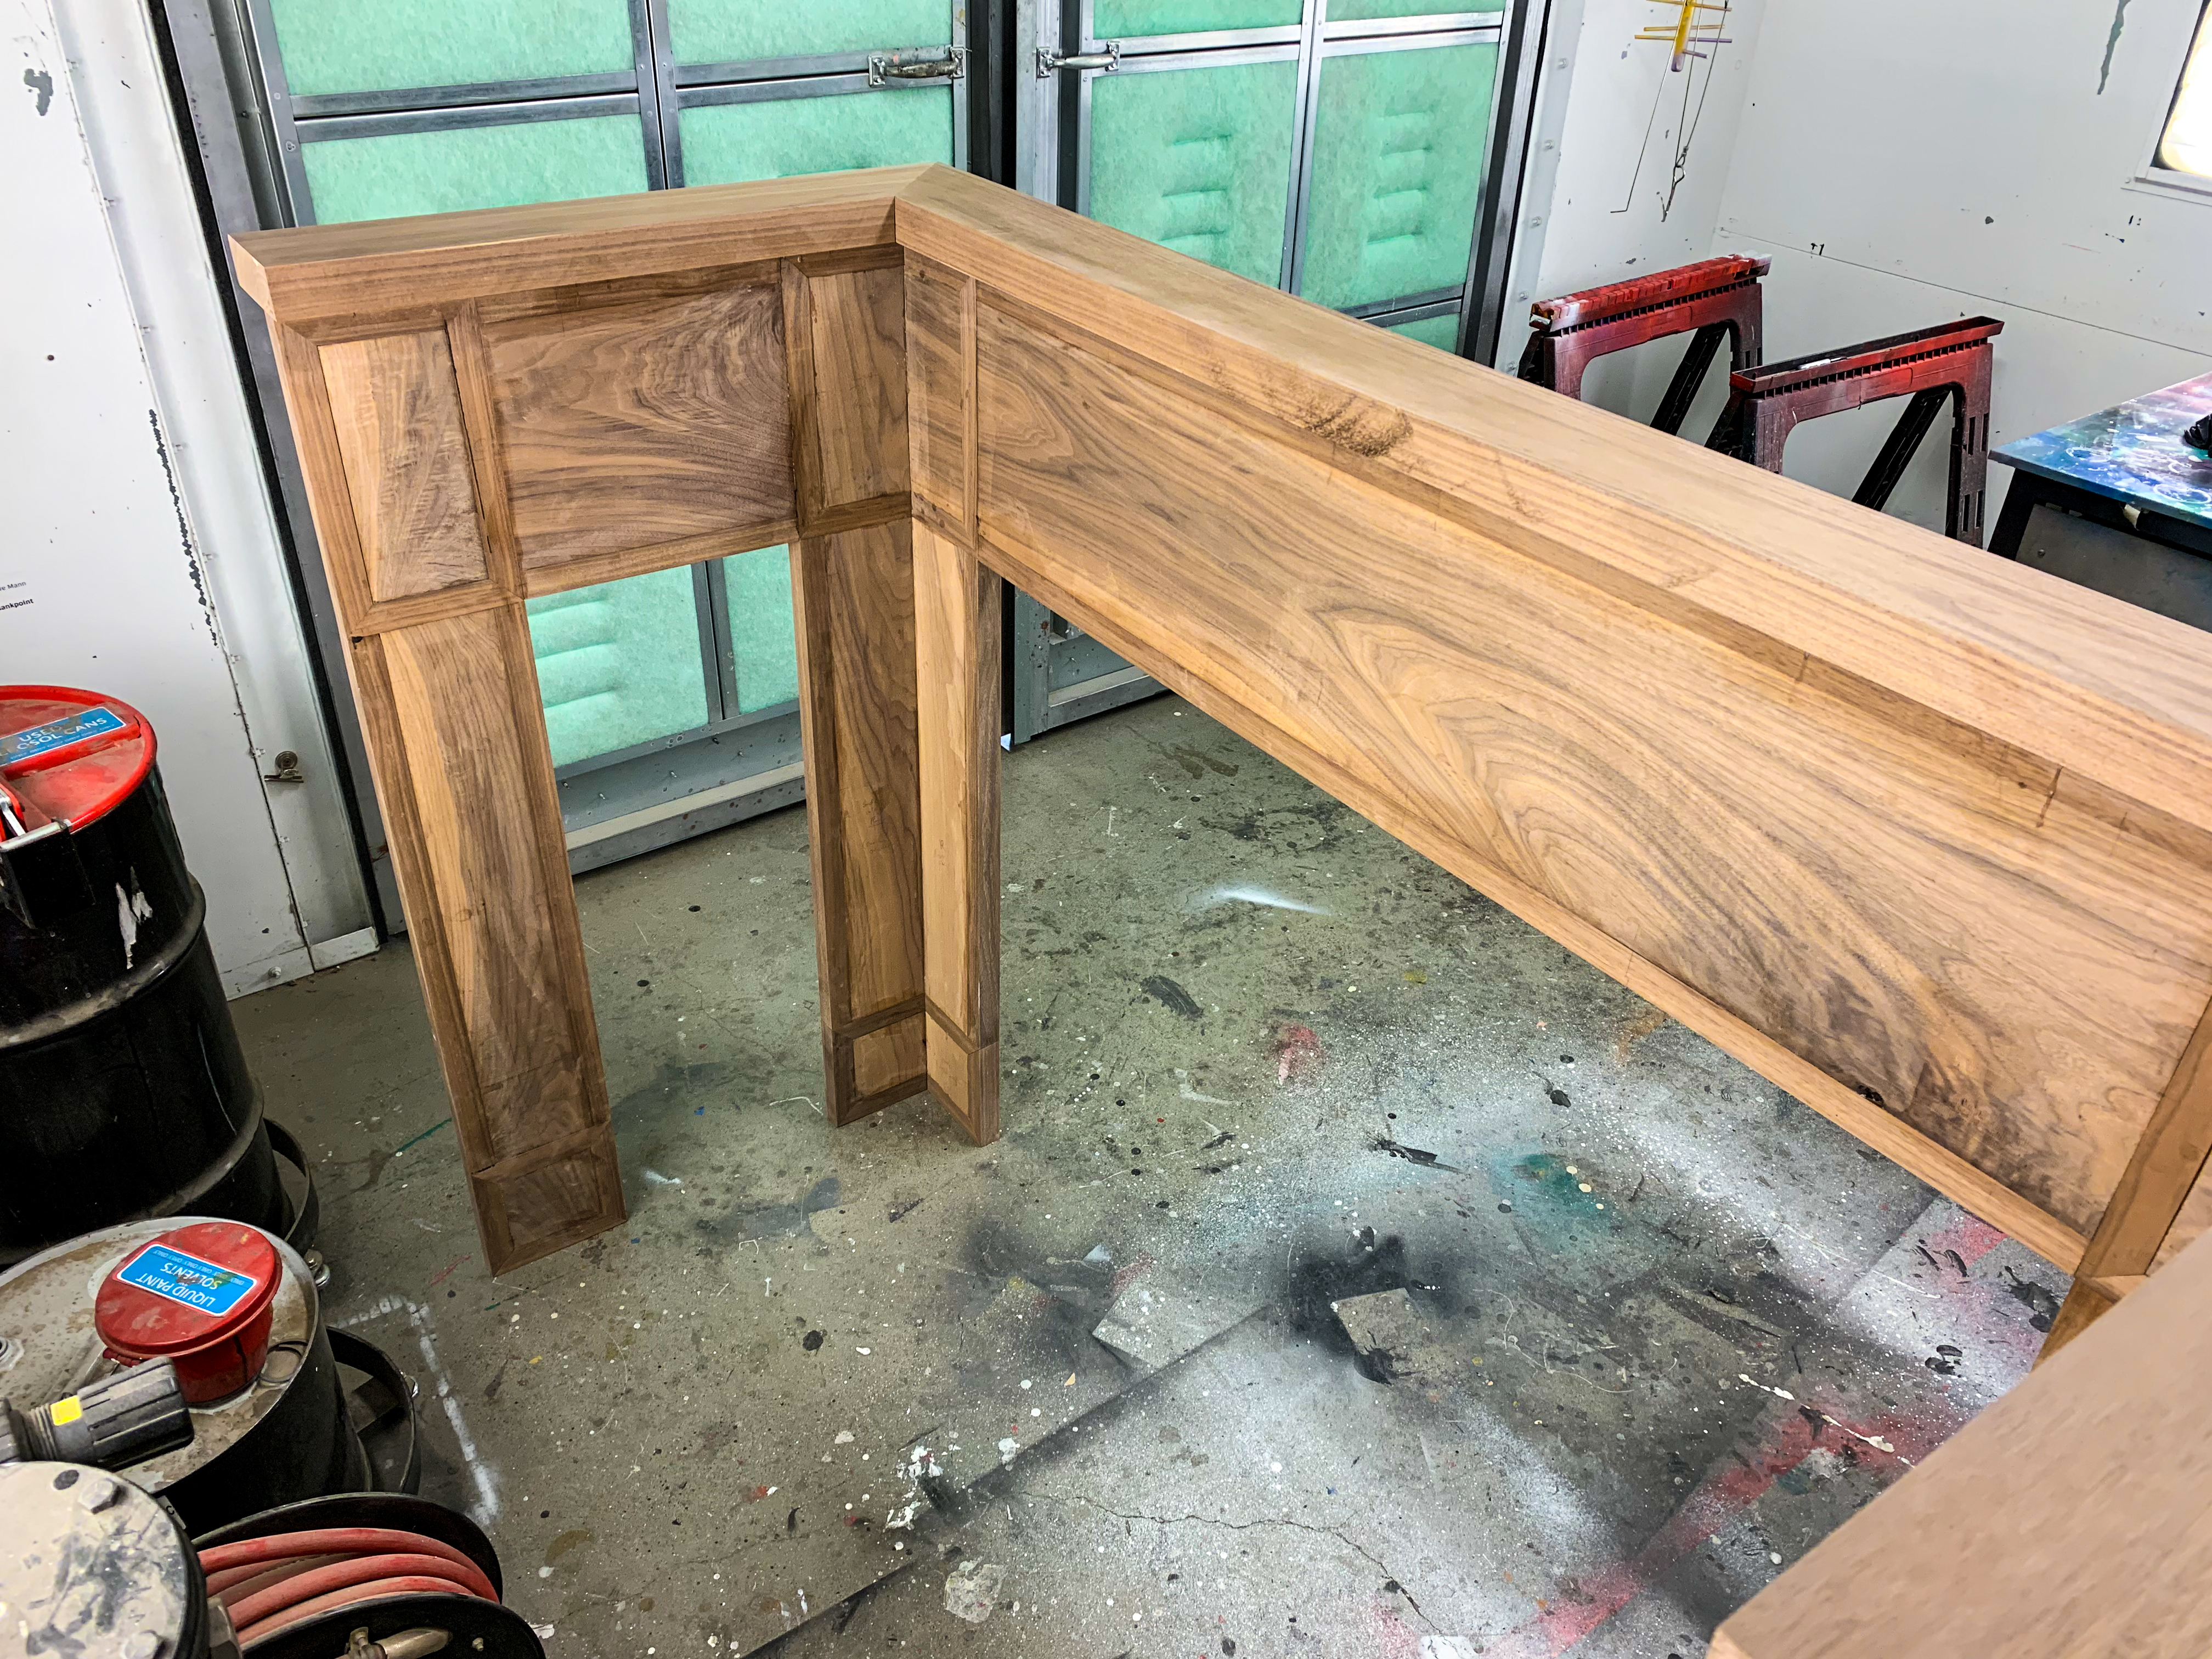
Now mostly complete; all that remains is the mantel top.
Rounding off the edges of the mantel top with a table router.
And gluing the top to the body of the mantel.
Ready for a couple days of sanding! I didn’t get any great footage of sanding, but I eventually made it up to 800 grit after finishing; the result is an incredible satin finish.
Time to finish! I used Watco Danish Oil, natural color. I started by testing the oil on the back of the mantel.
Here’s the back of the mantel after adding Danish Oil. Here’s what a difference the details make; I didn’t bother to remove excess glue or sand off tooling marks from the back, and it looks pretty bad once the finish goes on.
The moment is here! The first brush strokes of oil on the main panel. So satisfying!
After two applications of oil, before final wiping.
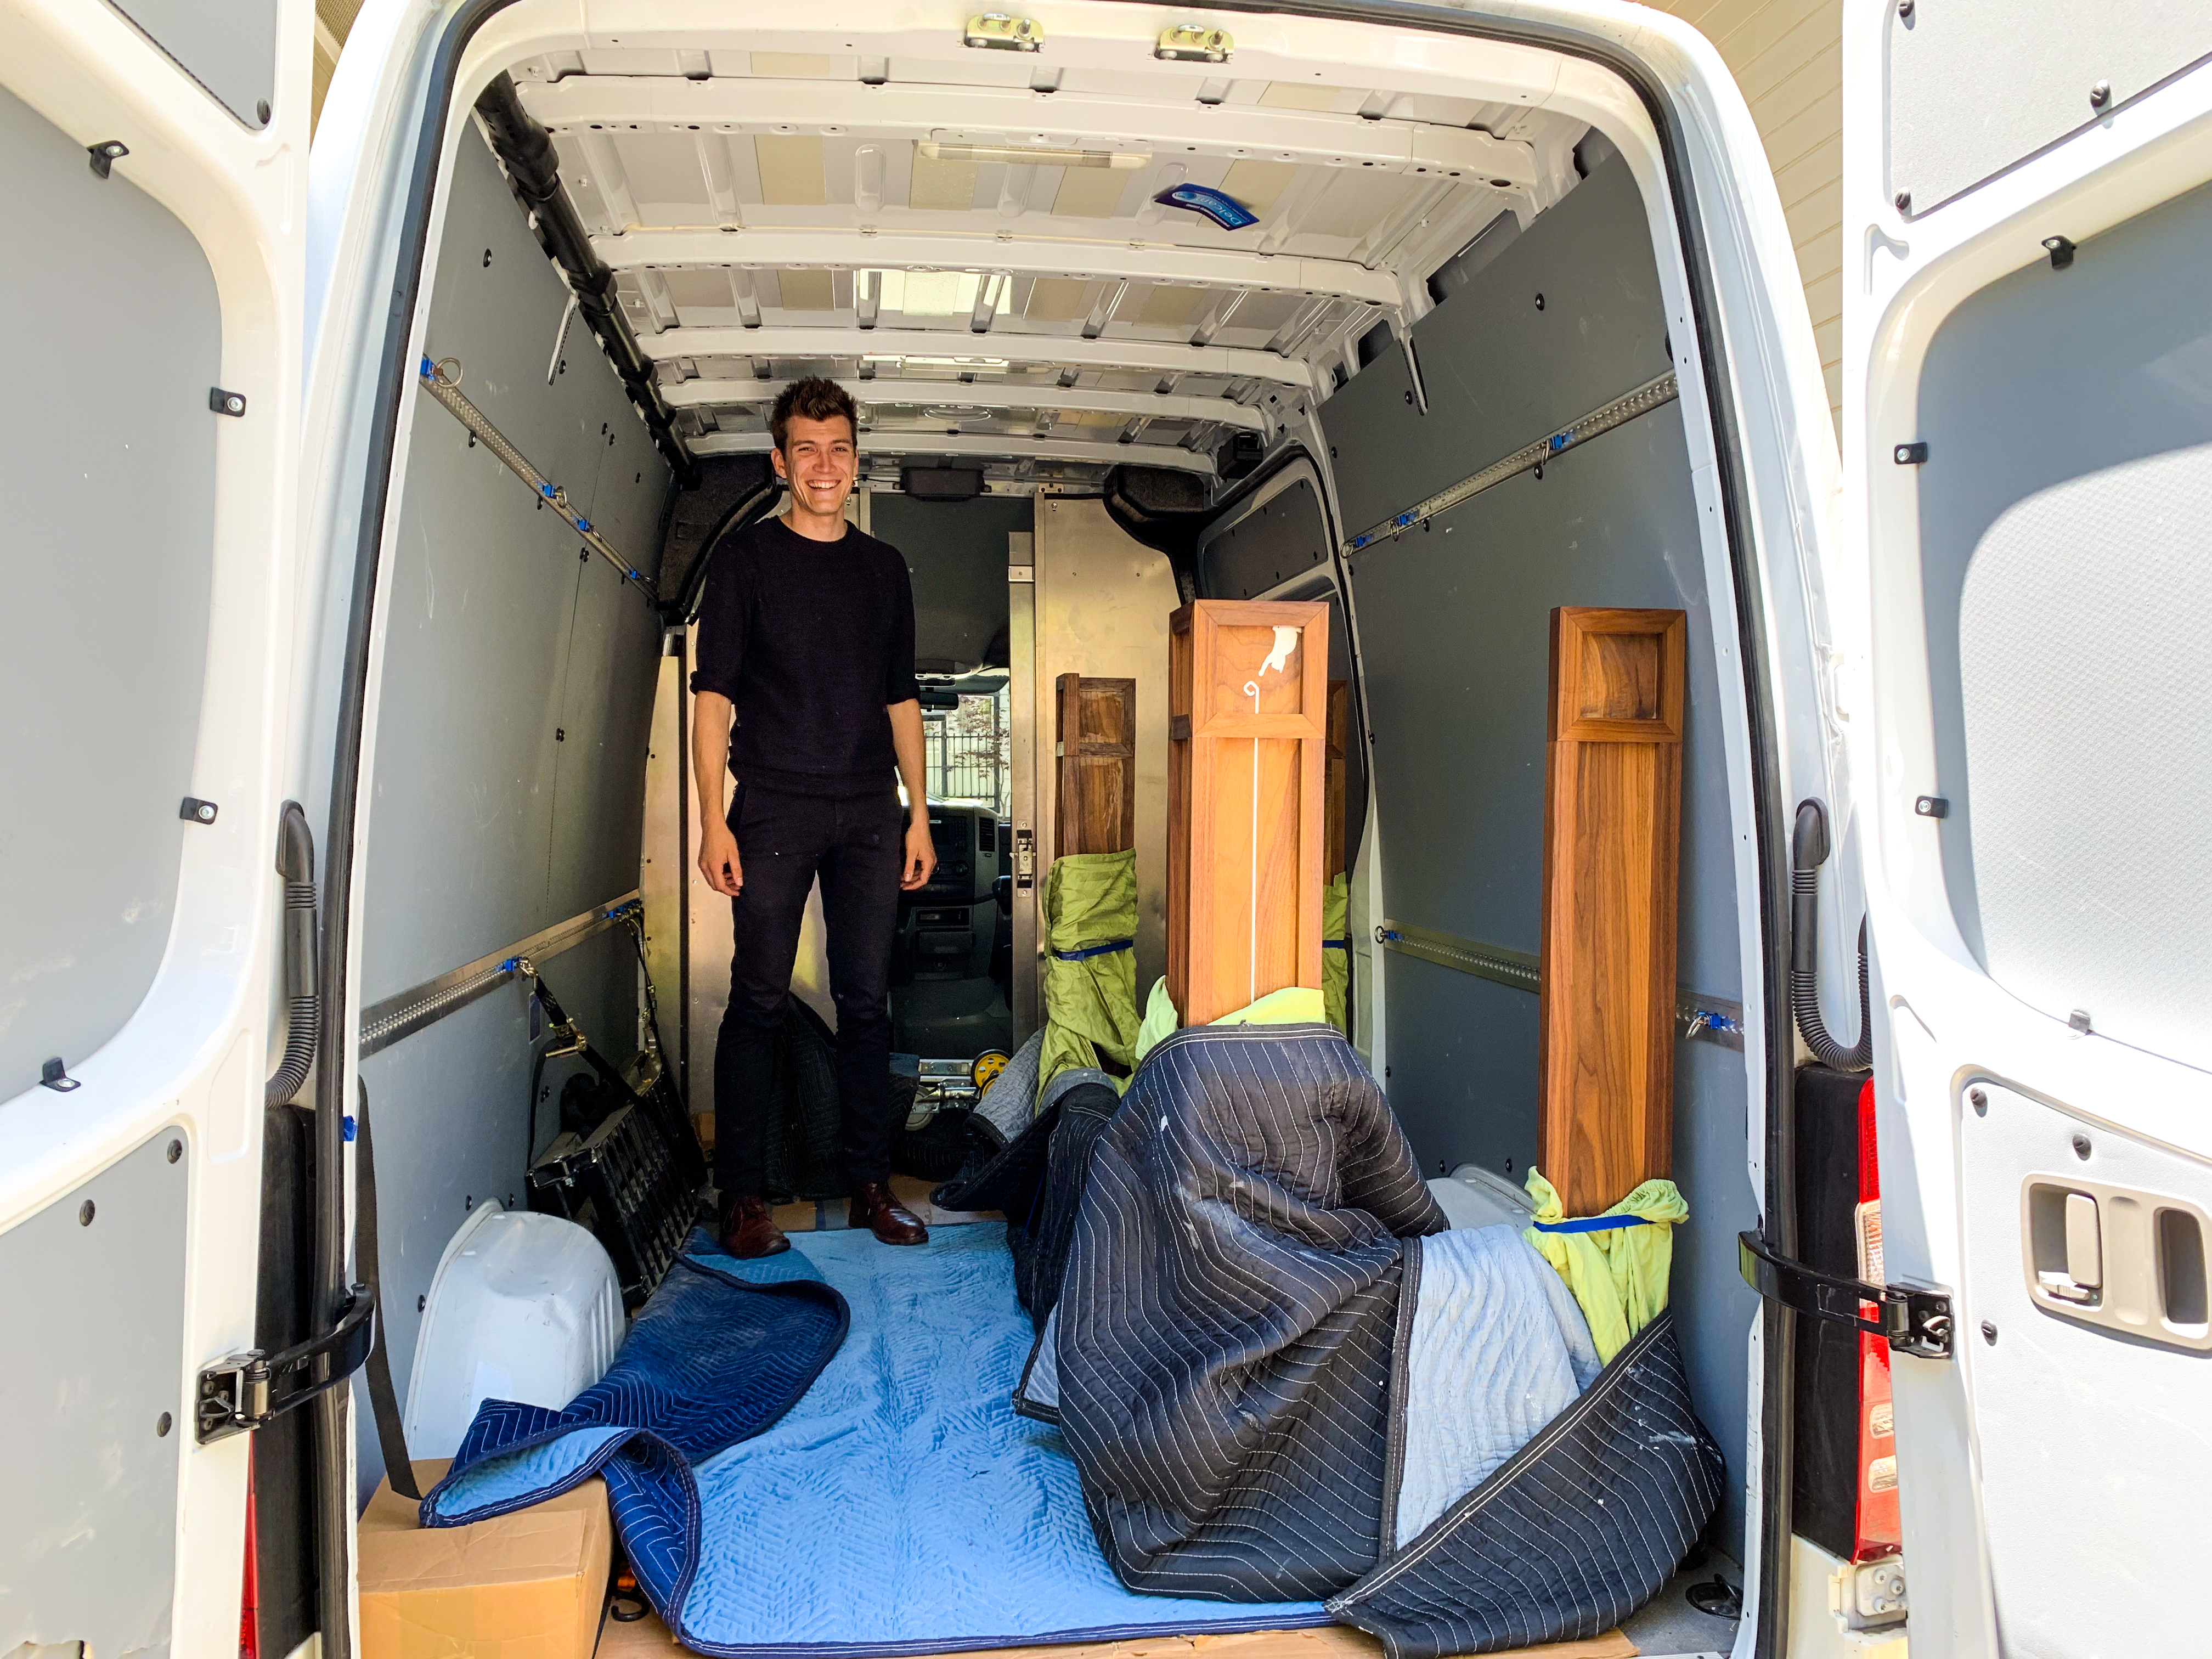
Ready for transport (thanks for the ride, Andreas!)
Here’s where we find out whether it fits…
…and it does!
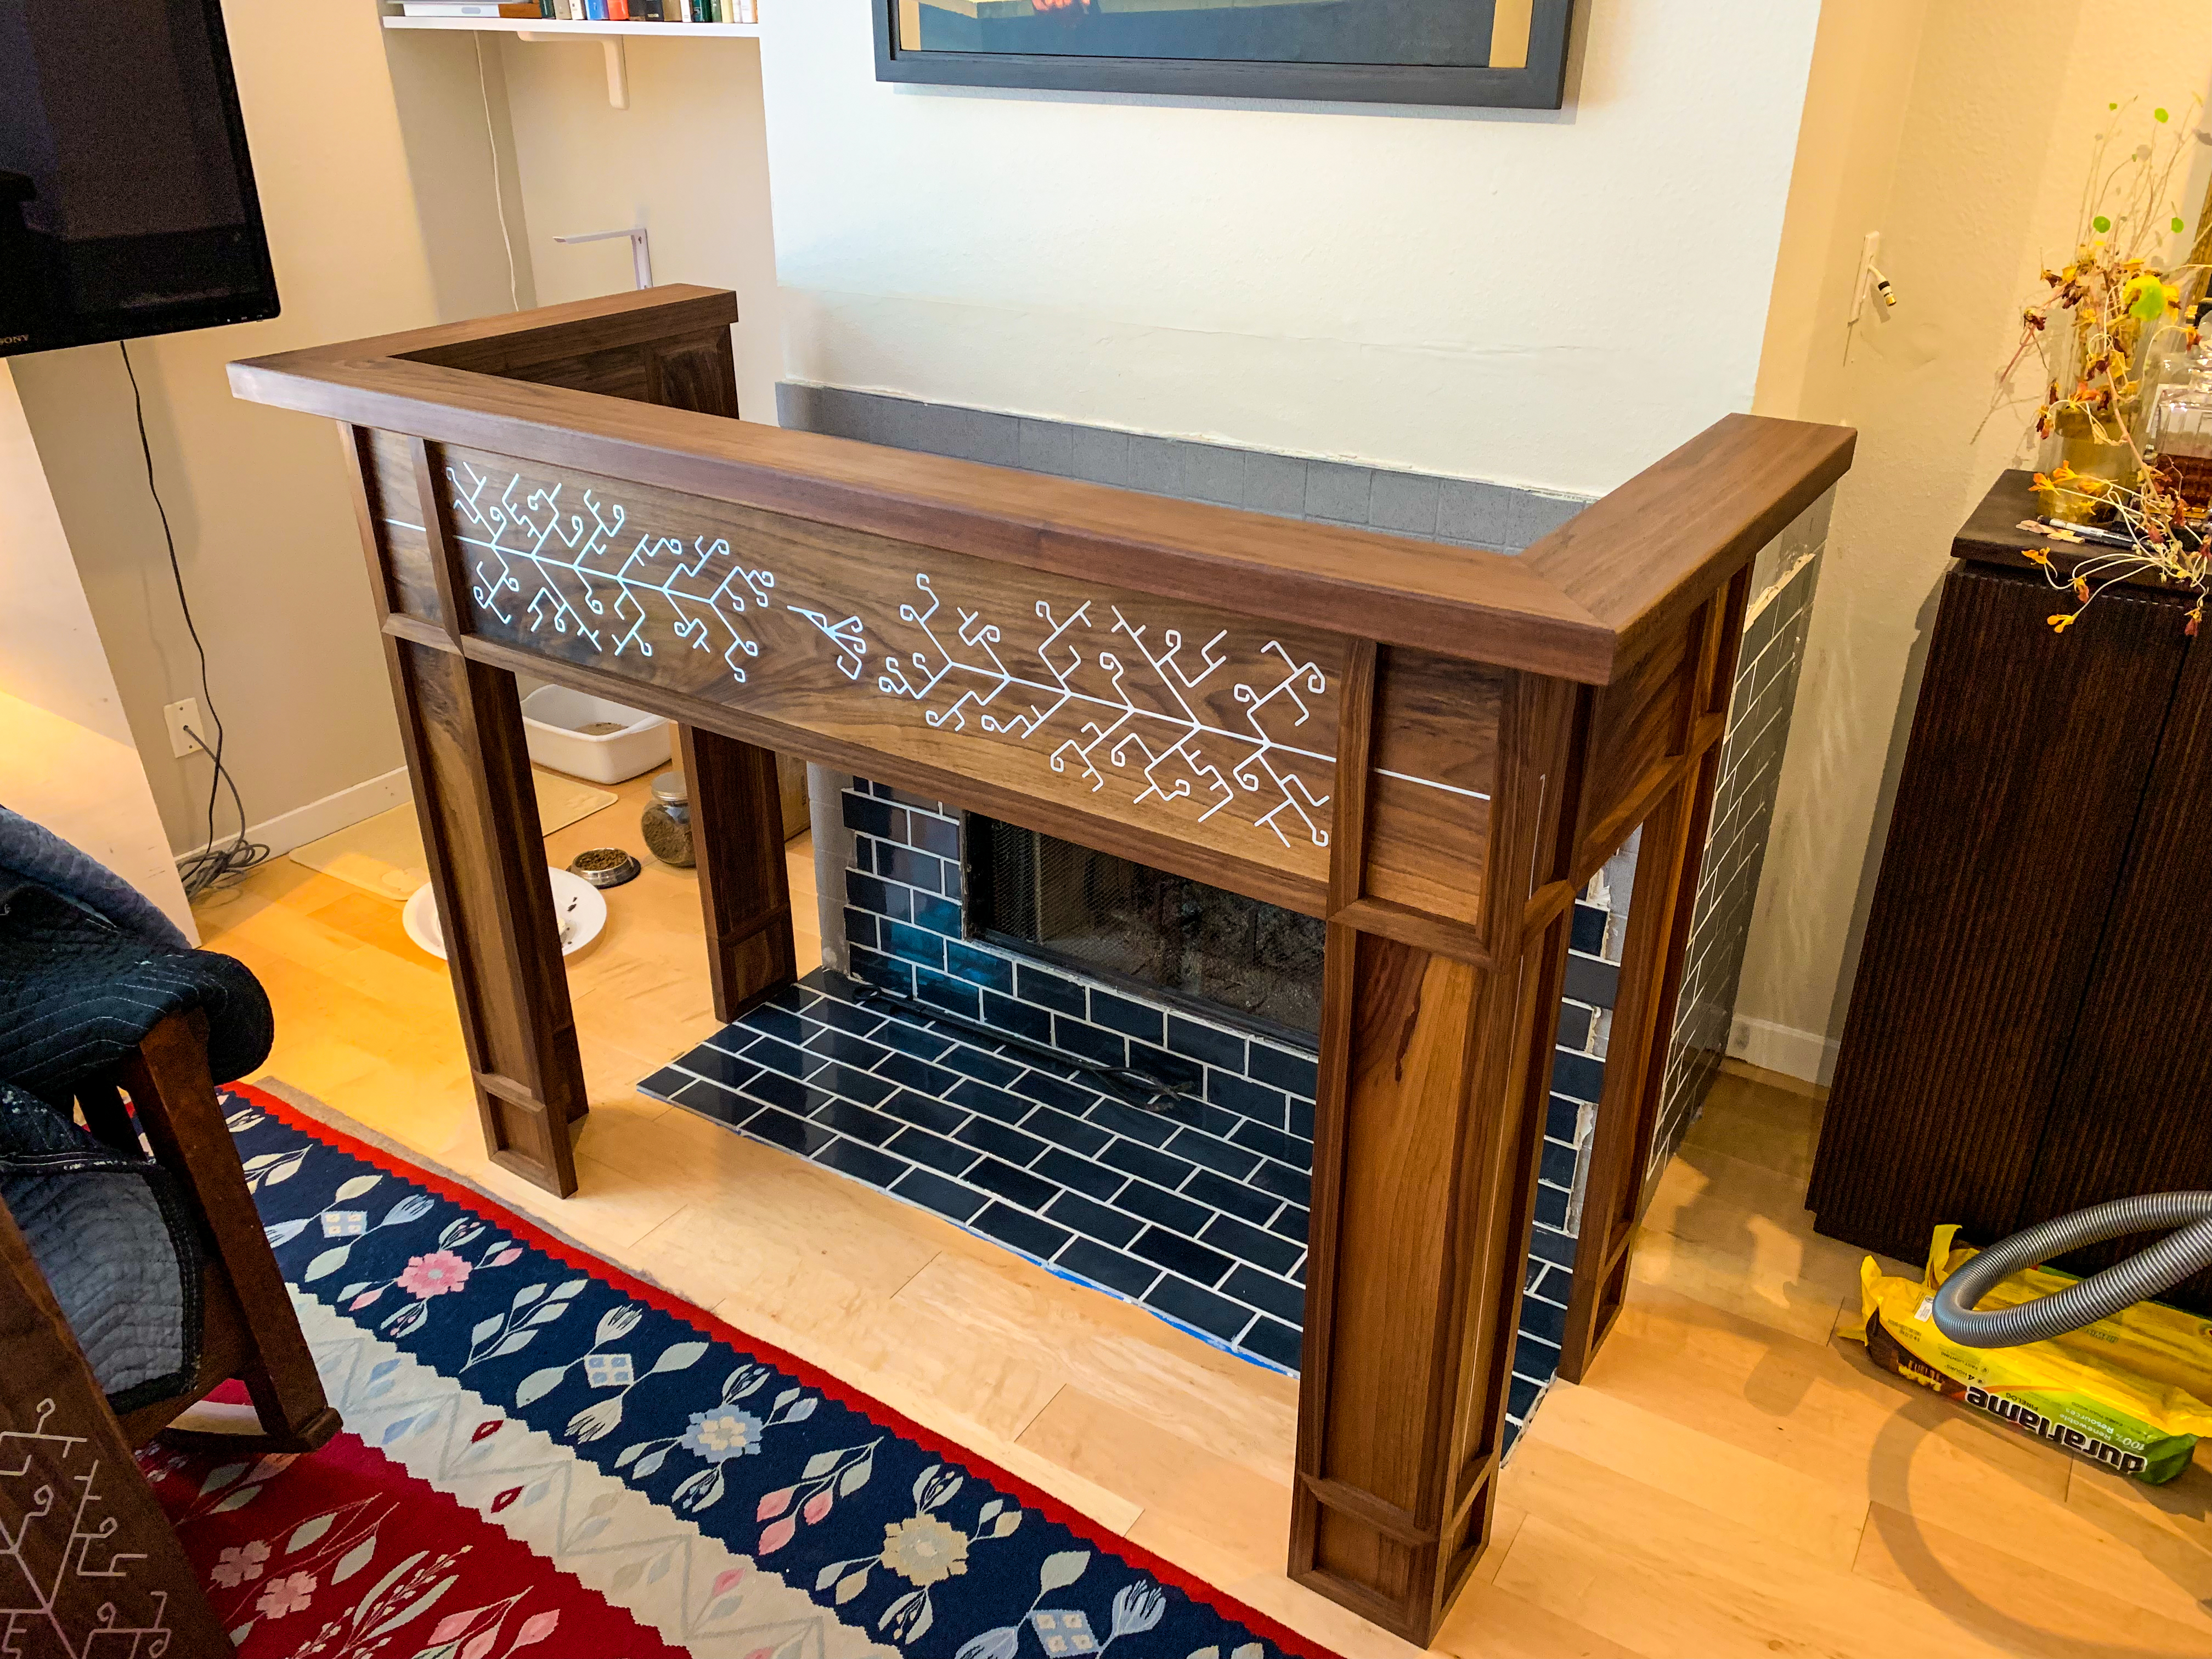
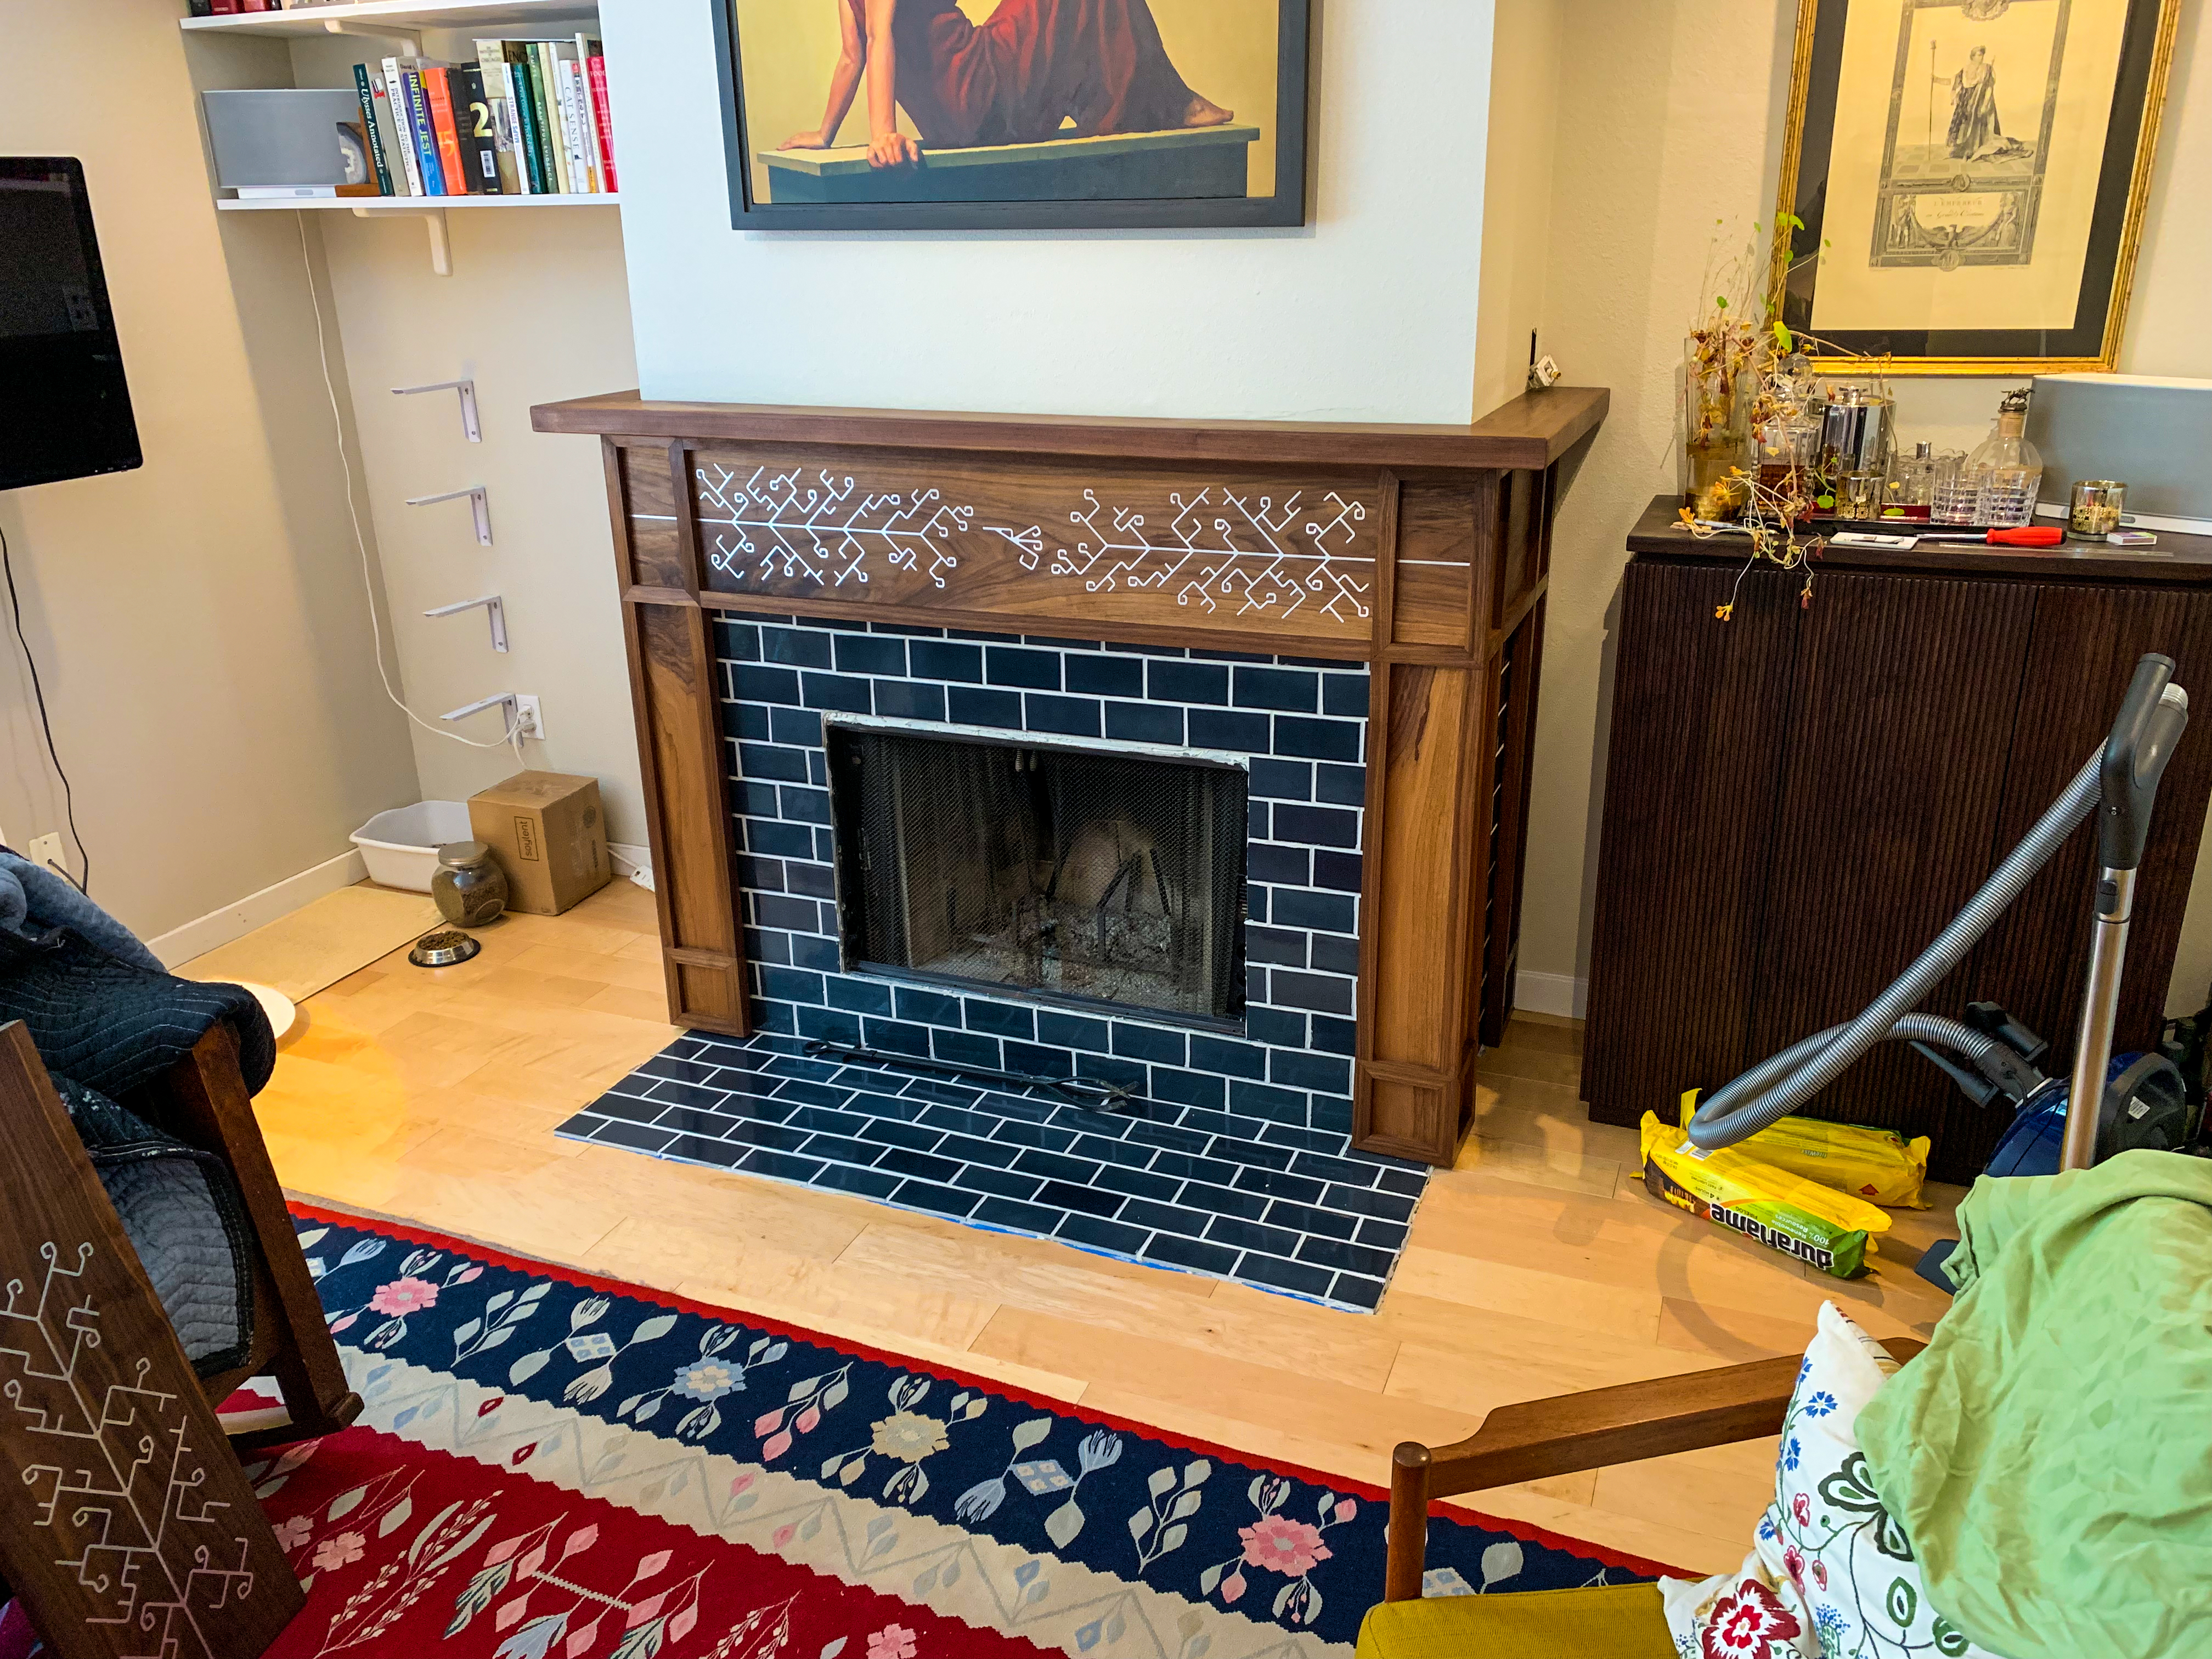
The mantel is in place!
Time to add trim to the hearth. I made the trim from the same lumber by using the table router to cut a notch in one side of a wood strip to accommodate the tile edge and beveling the other side.
Trim in place and tacked down.
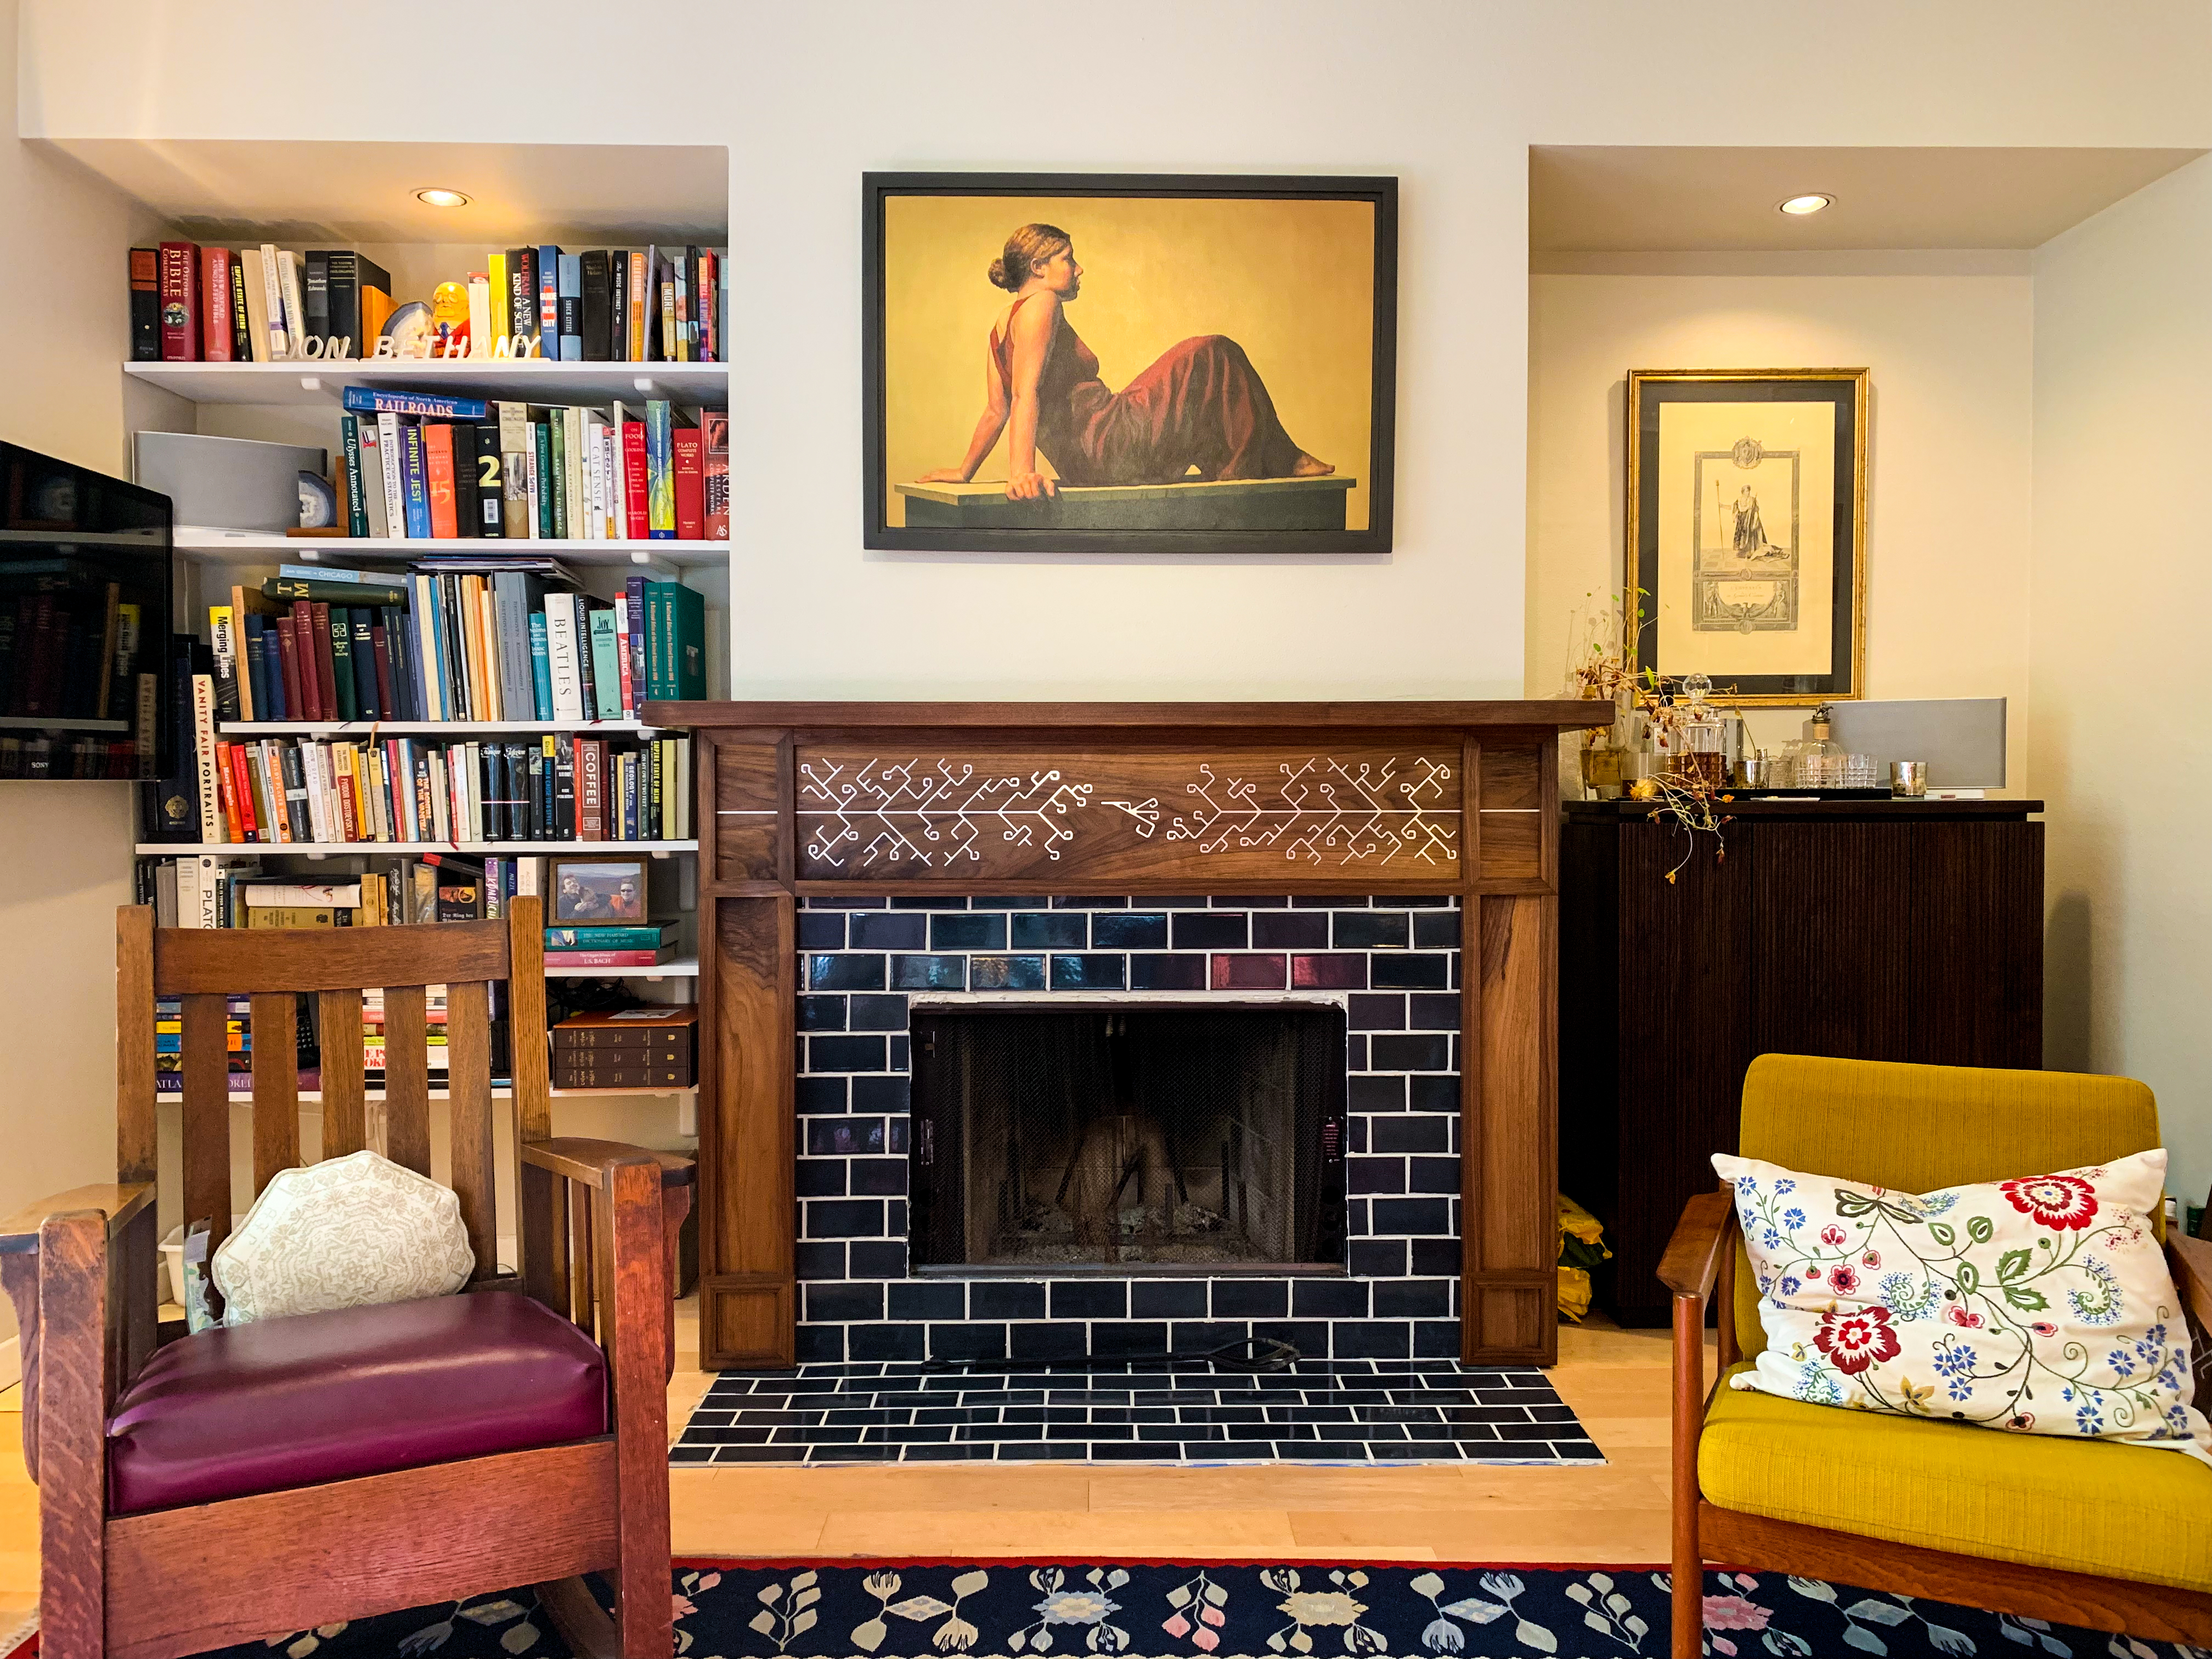
One more shot of the finished work!
Glare from the lights makes the aluminum really pop against the matte Danish Oil finish when you move around the room.
Huge thanks to Joe Jastreboski, Mary Elizabeth Yarbrough, Andreas Bastian, and the Autodesk Residency team for making this possible. And of course, thank you to Bethany for working at the hospital with such dedication that I get to pick up cool hobbies :)
You can download my Fusion 360 model of the mantel on GitHub